Rewillia
-
Content Count
124 -
Joined
-
Last visited
Everything posted by Rewillia
-

Do You Have A Motorcycle With You While RV'ing?
Rewillia replied to redandsilver's topic in General Discussion
Our Set-Up; Special build Hydralift HLA Platform spec. designed for street legal 1,200 lb. Garia 2+2 LSV Prior to purchase of both the Garia and the Hydralift; we consulted with both Newmar and Spartan on capacity and load implications as well as with Hydralift on the design & engineering of the lift which includes strengthen alloy and heavier hydraulics than their conventional MC lifts. In terms of capacity, there are no issues as our coach and its K3 chassis has a 20k lb. towing capacity. As well, following professional installation, the coach was properly weighed and ride height adjustment was made. Width of the Garia is 108" with rear 1-pc. passenger handrail/license plate/3rd brake light removed which we stow in a basement compartment when transporting it. All in, has been and remains trouble free. -
Brett, That's a good observation and yes, we've fallen off topic in terms of my OP and threads following.
-
Looks as if I'll take IH10 >IH65 then 280/80 into Perry.
-
Recently came across the Michelin RV Tire Guide which contains a lot of useful information in the form of recommended practices for the use, care, maintenance and storage of RV tires. If this has been previously shared, please excuse otherwise, I hope it is helpful to others. https://www.michelinrvtires.com/reference-materials/tire-guide-warranties-and-bulletins/
-
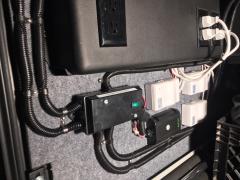
After thought. After completing my recent Thetford Sanicon hard piping project I realized there just wasn't enough light in the wet bay compartment so using a surplus section of LED lighting strip I mounted it and tied it into the existing small 12v dome light Newmar installs on the left wall near the door hinge. What a difference a little light makes! I now think I'll do the same up front in my generator slide compartment (where there is currently no lighting) as well as the engine compartment (only has 12v dome light now) and as well the chassis electrical basement compartment (LF forward of steer tire). My view (or lack of it) being one can never have too much light in these areas when its needed and as well, installing them are easy to do and make a huge difference...
-
Yes. And I suppose as with most large rally's pump out and fresh water re-supply services are/will be available. Again, haven't gotten the Rally Package yet which I am sure will have lots of info in it.
-
Herman, We actually registered for Perry last night and now plan to attend. That being stated, we will plan to try and arrive 1-2 days before the start of the Rally and may have to leave a day earlier, i.e. on the 17th as we have a new baby grand-daughter that is due to arrive on the 21st of March and want to be back home for that event. That lil' gal will be the first girl borne on my side of the family in 3 generations! This will be our 1st attendance to a FMCA rally so any insight you and Carl can give me will be helpful i.e. are early arrivals accepted? and if yes, what do we need to do in order to schedule an early arrival? Our attendee package is being mailed to us so I'm presently unaware of what is possible. I'm now searching out stopovers on the route to Perry and factoring 3-days to get there as we typically don't like to drive more than 250-300 miles per day. Any particular route you planning to take? Advice is always welcomed. Same goes for you Carl (knowing you'll be seeing this post). Will be nice to meet both of you in person. Regards, Rick
-
Carl, Yes, I agree and Newmar did apologize for what was somewhat of a manufacturing/production oversight on my particular coach (as other '17 KA, EX and LAs received changes that incorporate better dump hose management). Newmar did also agree to retro-fit mine but I felt that would be time consuming to undertake such wherein they paid to have a 3" hole drilled through the drip pan & belly pan per my specification and owing to my plan to affix the exterior dump line drain connection. As to your comment on heat, the distance between the two is actually enough that I suspect residual heat from the Oasis exhaust pipe will never become an issue. (It's likely 14-16" just doesn't look that far by the photos besides the Oasis only fires intermittenly and thus does not run continuously). The issue of exhaust heat from the Oasis is far more concerning with potential effect upon the sewer hose itself in than one has to be careful when routing it out and away from the coach. All the more reason my having a 2nd (optional) sanicon 1-1/2" discharge hose that will now quick connect and allow me the additional length if and when needed. Still behooves me how some parks/campgrounds including newer ones still tend to place their ground level sewer dump cap connections on individual pads at the far ends nearer to the corners instead of something midway. Also, the extended reach will be good for rally type parking as well (as i recently had to run out and buy a 3rd section of 3" hose when attending the Newmar Intl. Rally in Sedalia due to the distance. (I already had two lengths and that still wasn't enough). Herman, We're still working our 2018 Spring/Summer travel plans & schedule but at the moment it remains uncertain if we'll make it to Perry in March. If it comes about we will attend, I'll be certain to get in touch beforehand. Regards, Rick
-
Failed to state the obvious; Upon completion I sealed the rubber flange gasket on the bottom of the belly pan with some RVT then applied some 3M Undercoating to the piping (section exiting the belly pan) as additional protection against road debris. Also still need to install a 2" caddy clamp on the flange of the 90° elbow to the small bracket as can be seen for additional stability. At normal ride height the bottom of the female cam lever coupler is approx. 9" off the ground (as can be witnessed by comparison to my Oasis exhaust pipe). The small stainless cable is just to tether the male plug when the system is in use. All in, I figure the project cost was <$150 including the purchase of an additional 21' section of the sanicon discharge hose which I can now add to the existing hose easily by using the M/F cam lever couplings allowing me to extend my sewer dump line hose up to 42 ft. when needed. And, as any wise man would do, I still carry 2 sections of conventional 3" dump line flex hose in my separate hose storage compartment in the event I'll ever need it. Note: the white channel seen running horizontally along the base of the belly pan is part of my recently installed full surround Under Glow LEDs which as you can see are shielded by use of the aluminum extrusion channel and diffuser panels.
-
Project completed.
-
We have the Sleep Number King rounded corner RV mattress which we found to be "somewhat" comfortable in it's original state and considered changing it until we purchased and added Sleep Number's 2" CoolFit Gel Topper pad which made it much more comfortable and such that we have no desire to replace now, i.e. It's a "perfect sleeper" now. Note: we did choose to take the Gel Pad to an upholstery shop and have them round the bottom corners (foot) to align with the RV mattress but that was a small additional price to pay for it fitting properly ($35).
-
Installing Ground Effects Surround Exterior LEDs
Rewillia replied to Rewillia's topic in Type A motorhomes
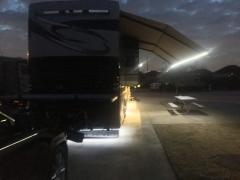
For whatever reason if nothing more than to communicate how I completed this portion of my project using the open 3-sided channel found on the upper inside of the rear wheel well to run my wiring; In completing this project, I returned to the subject area and used some aerosol spray expanding foam insulation to fill the channel and thus encapsulate the 1/2" split loom. By doing this and using the spray foam, the 1/2" loom is now fully secured in place inside the channel and further protected from wheel wash from the drive or tag axle. Once I allowed the foam to harden in place, I went back with a long edged razor knife trimmed off the excess foam (that had seeped out from the channel after drying) and then followed up by covering it all with some 3M spray undercoating. The wire loom is now fully secure and concealed along with being protected. This was the easiest way to secure the loom without having to pull both rear tires (drive & tag) in order to be able to get to the inside of the wheel well area. By attaching a 2 ft. extension of 3/8" plastic tubing to the expanding form aerosol can, I was able to reach inside of the wheel well (from outside of the coach) above the tires and direct the flow of the foam down and along the channel opening providing a uniform and full end to end gap fill. The under coating I applied after which was likely not needed but will serve as additional strengthening and security for the wire loom. It also provided a nice clean finish to the rough edges of the dried spray foam. Hope all of this helps anyone considering a similar LED lighting installation project. -
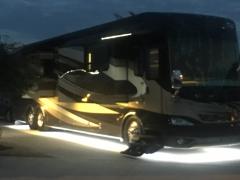
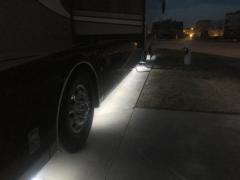
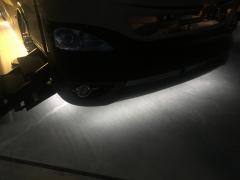
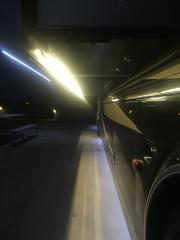
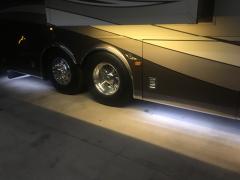
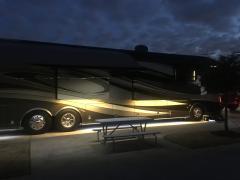
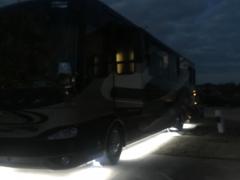
From the album: Boogey Lights
-
My DIY installation of Boogey Lights' Under Glow full surround LEDs.
-
-
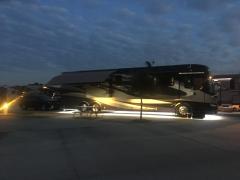
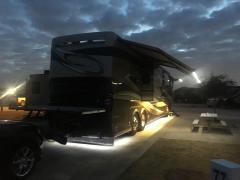
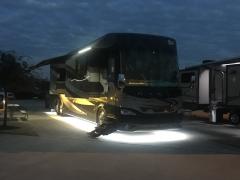
From the album: Boogey Lights
-
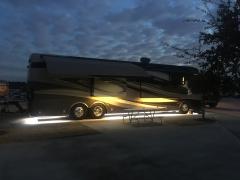
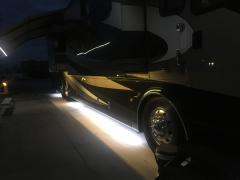
From the album: Boogey Lights
-
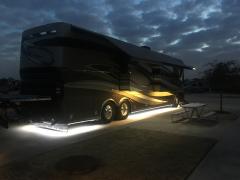
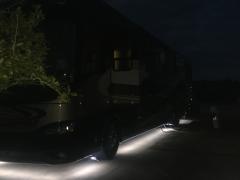
From the album: Boogey Lights
-
From the album: Boogey Lights
-
From the album: Boogey Lights
-
From the album: Boogey Lights
-
From the album: Boogey Lights
-
From the album: Boogey Lights
-
From the album: Boogey Lights
-
From the album: Boogey Lights
-
From the album: Boogey Lights