

Cool Modifications to a Roadtrek: Screens and Cabinets

We RVers love to share modifications we’ve done to our vehicles to make they fit our personal style. So it is with delight that a share a series of photos that show some very unique customizations done by blog reader Alan Shafer from Rockford, Mich., to his Roadtrek 2006 RS Adventurous.
His photos are included. Here is his account:
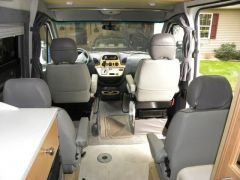
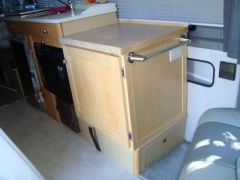
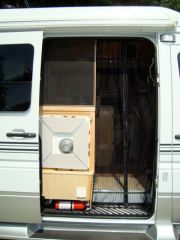
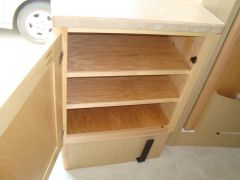
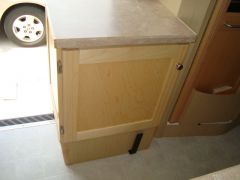
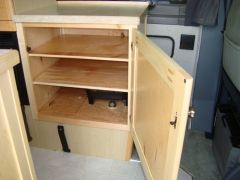
As you can see by the pics, it had four captain’s chairs. I removed the rear chairs and started from there. I have detailed pics of the whole process. The good thing is that I did not drill any new holes in the existing cabinets, etc. when doing the cabinets. I used all existing holes. The cabinets are made of 1×2 and 1×3 solid maple for the rails and stiles. The sides and doors are recessed panels made with maple veneer 1/4″ plywood. There was no stain used. They were finished with satin finish polyurathane. (Minwax)
I was able to get a towel bar and electrical outlet on the side of the cabinet on the driver’s side. (Again, no new holes made in the existing cabinetry.) I also still have access to the storage area under where the seat on the driver’s side was located. The reason for not wanting to not make any new holes was that if we should decide to sell this Roadtrek down the line, I wanted to be able to put everything back to original in case the new buyer would want the van the original way it was. This can be accomplished in less that two hours. . . . maybe less.
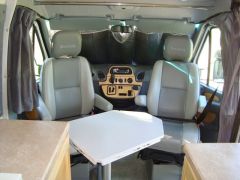
As for the screens, I made a frame for the screen which is mounted above the cabinet on the passenger side to cover that part of the door area. The rest is a magnetic closing screen (Magna Screen) that was purchased at Menards. The sides are held in place with self-adhesive and sew on velcro. The top is held in place by a dowel rod used as a curtain rod. To add some weight to the bottom of the panels, I did use lead weighted rope purchased at local fabric stores. (Field’s Fabrics) (Joann’s Fabrics)
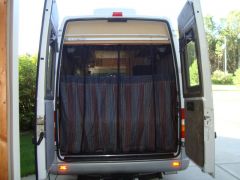
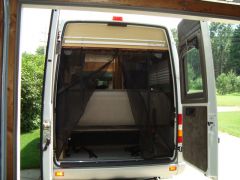
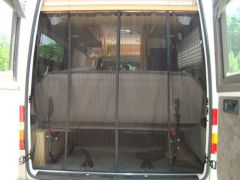
For the rear doors, I purchased two additional Magna Screens. This gave me four panels. I removed the magnets and sewed the panels together where the magnets were originally located. This gave me two panels. Then with self-adhesive and sew on velcro, I finished the project. I did loosen (or remove) some of the interior trim panels so the velcro along the sides would be hidden and also have the panels over the velcro to hold better.
For all of the screens, I did have to sew a pocket at the top to go over the “curtain rods”. I also did have to shorten all of the panels and sew on a hem made from bias tape from the local fabric store.
0 Comments
Recommended Comments
There are no comments to display.
Please sign in to comment
You will be able to leave a comment after signing in
Sign In Now