


Boatman1955
-
Content Count
34 -
Joined
-
Last visited
Posts posted by Boatman1955
-
-
On 1/6/2019 at 9:17 AM, IanBullock said:Boatman, good luck with your repairs. Unless you have access to a heated garage, best you can do right now is try to seal up any leaks and wait until spring to repair. Keep in mind that there could be many other sources of water intrusion other than the roof. Best to check all roof seams, especially where the roof meets the walls or end caps, and seals around any wall mounted items directly above the damaged area such as windows, mirrors, marker lights, awning supports, exhaust fans, etc.
Carl, happy to share. This type of damage was at first a huge mystery to me too. Took me quite a while to figure it out myself.
A heated garage would be ideal and would ensure that everything would be dry before repairs but I might have to settle for a carport and some warm weather. Thanks
On 1/6/2019 at 10:42 AM, WILDEBILL308 said:I would seal them with Dicore sealant. Look at the top of the windows and any penetrations on the roof. The seam at the front and back caps or basically any where you have a screw or penetration of the roof.
When you start to repair,it will be important to make shure the areas are dry inside.
Bill
Thanks Bill!
-
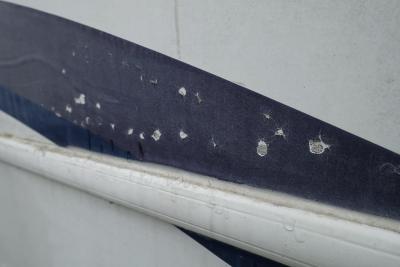
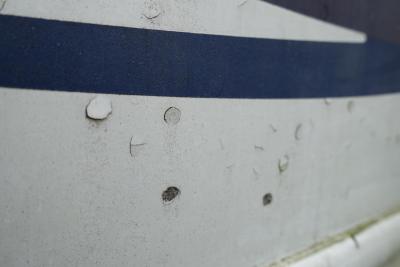
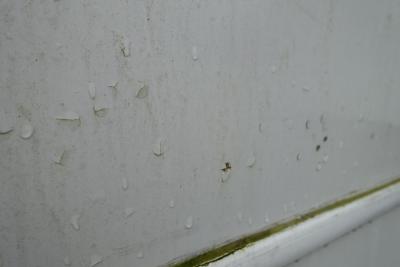
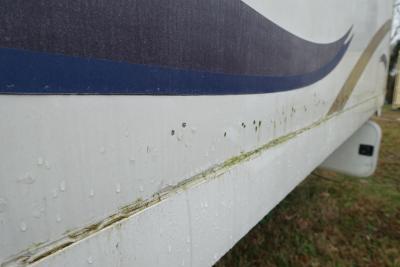
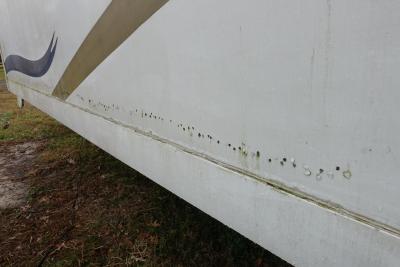
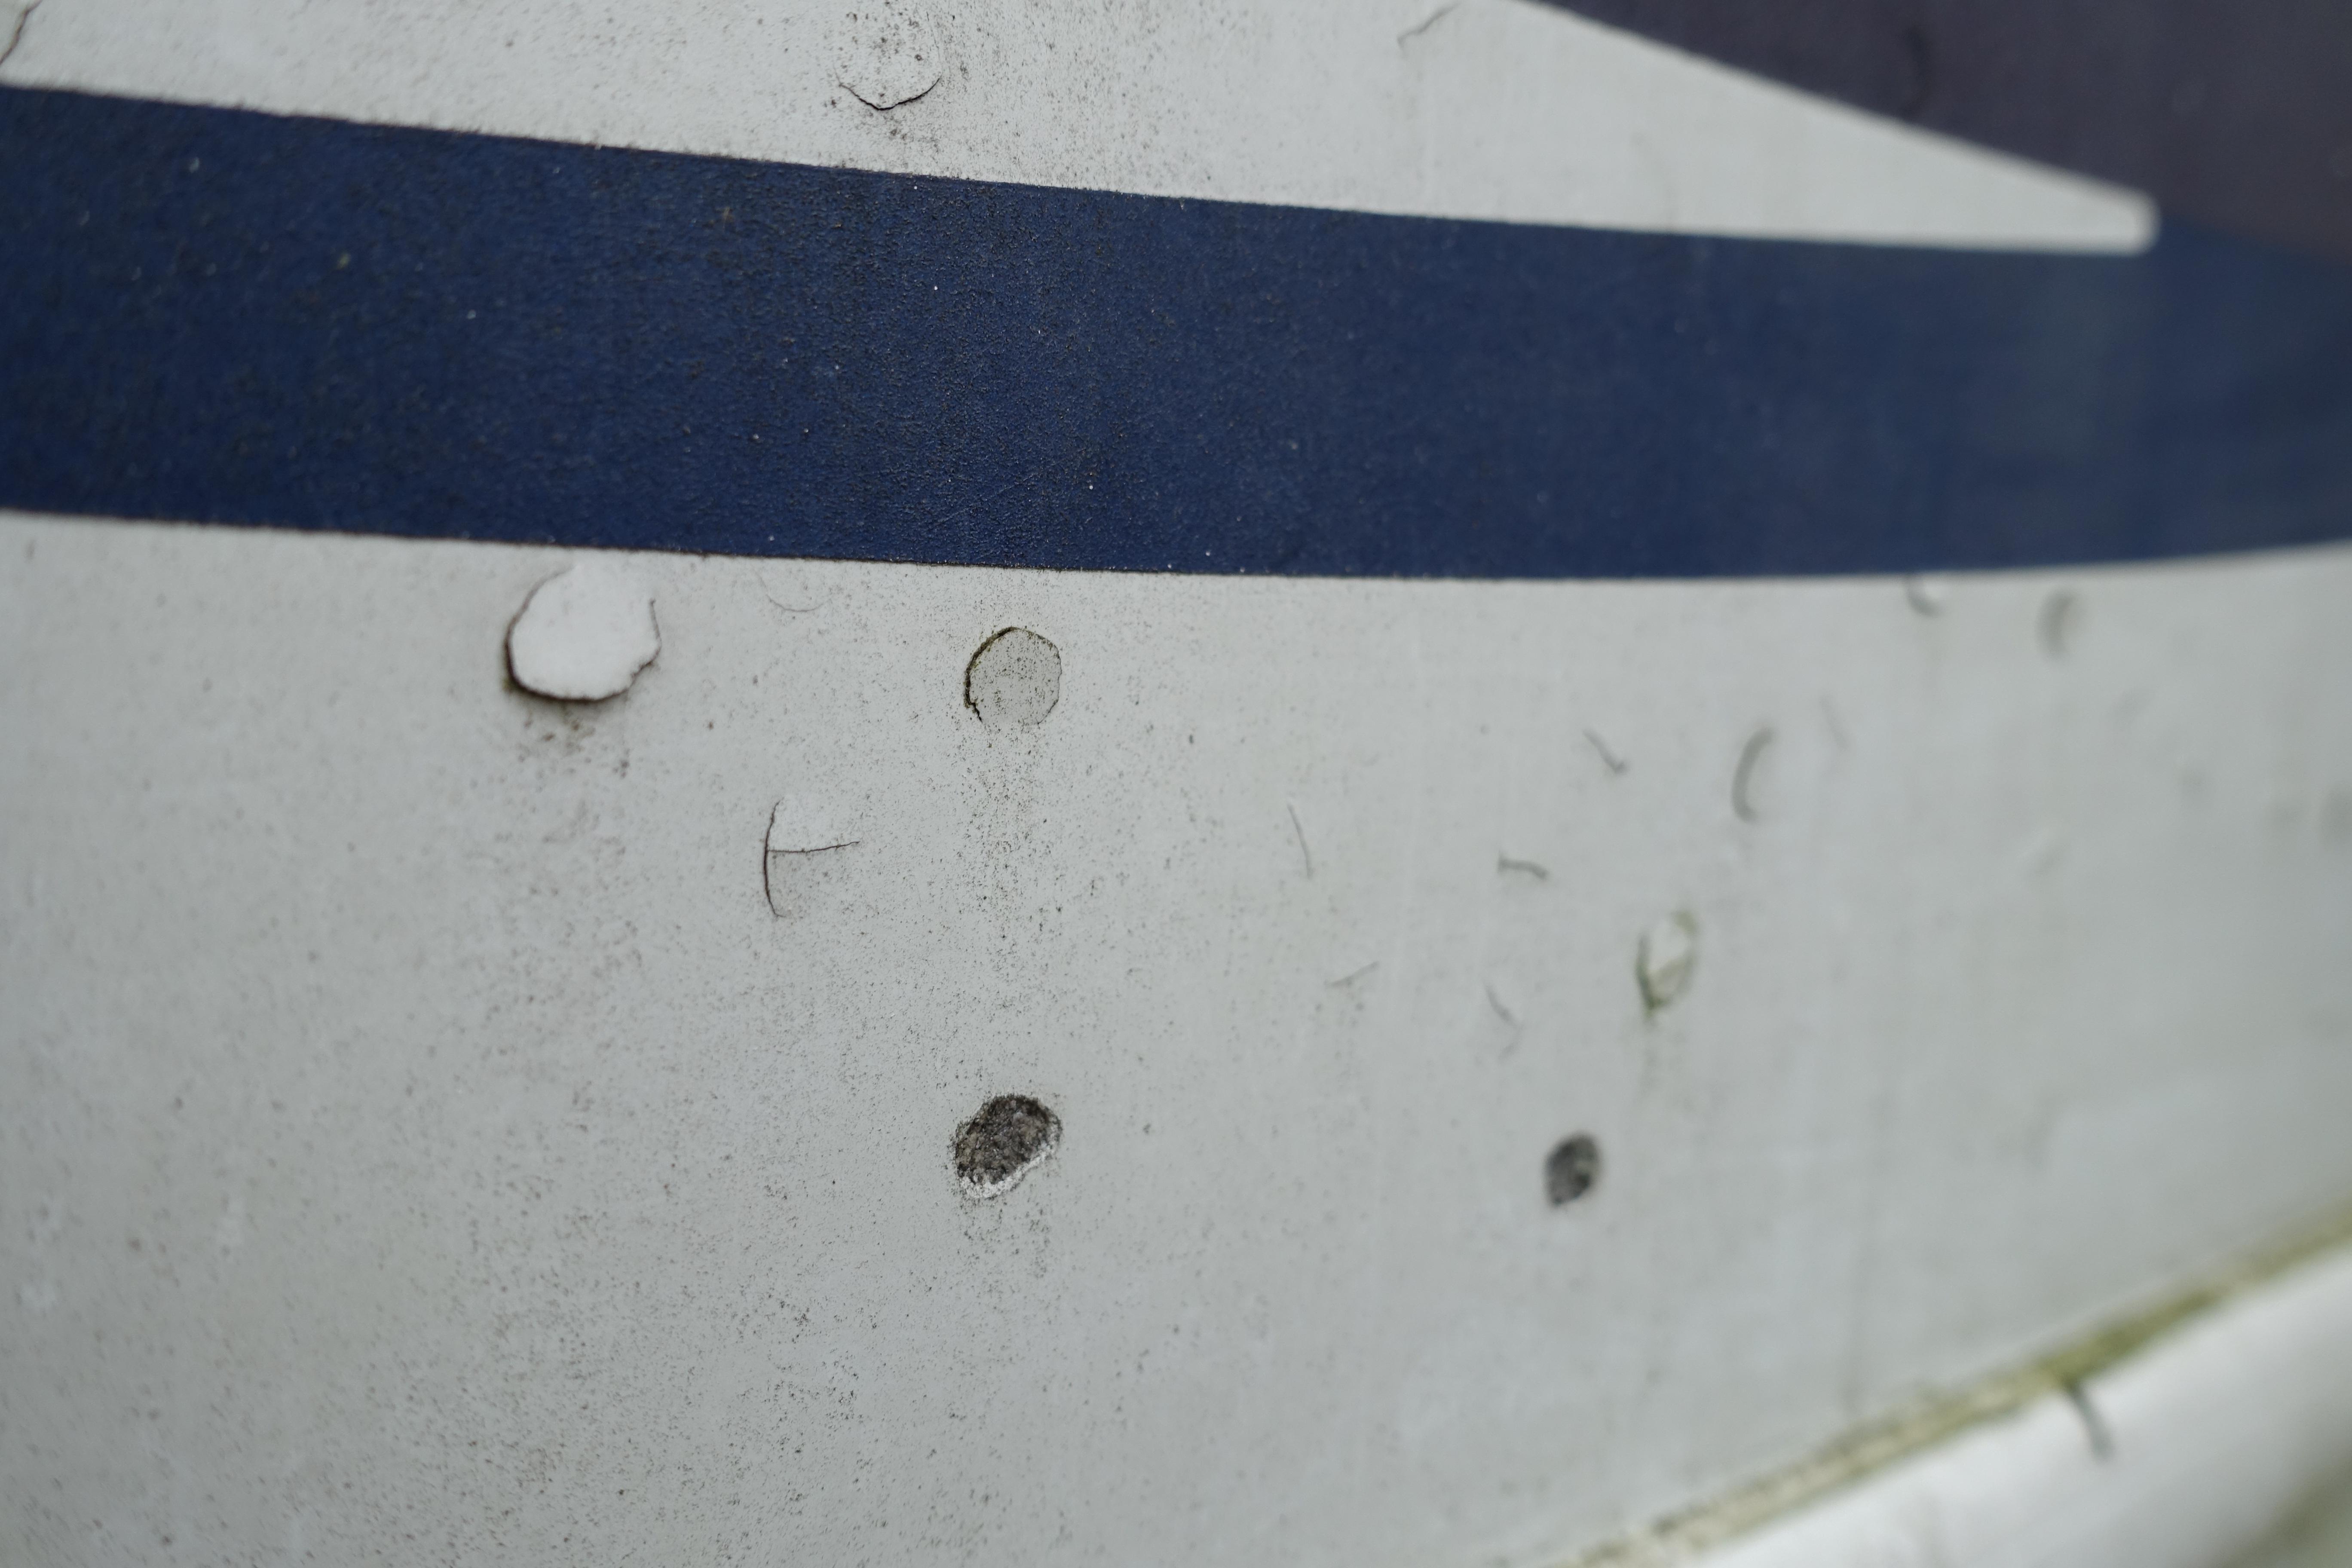
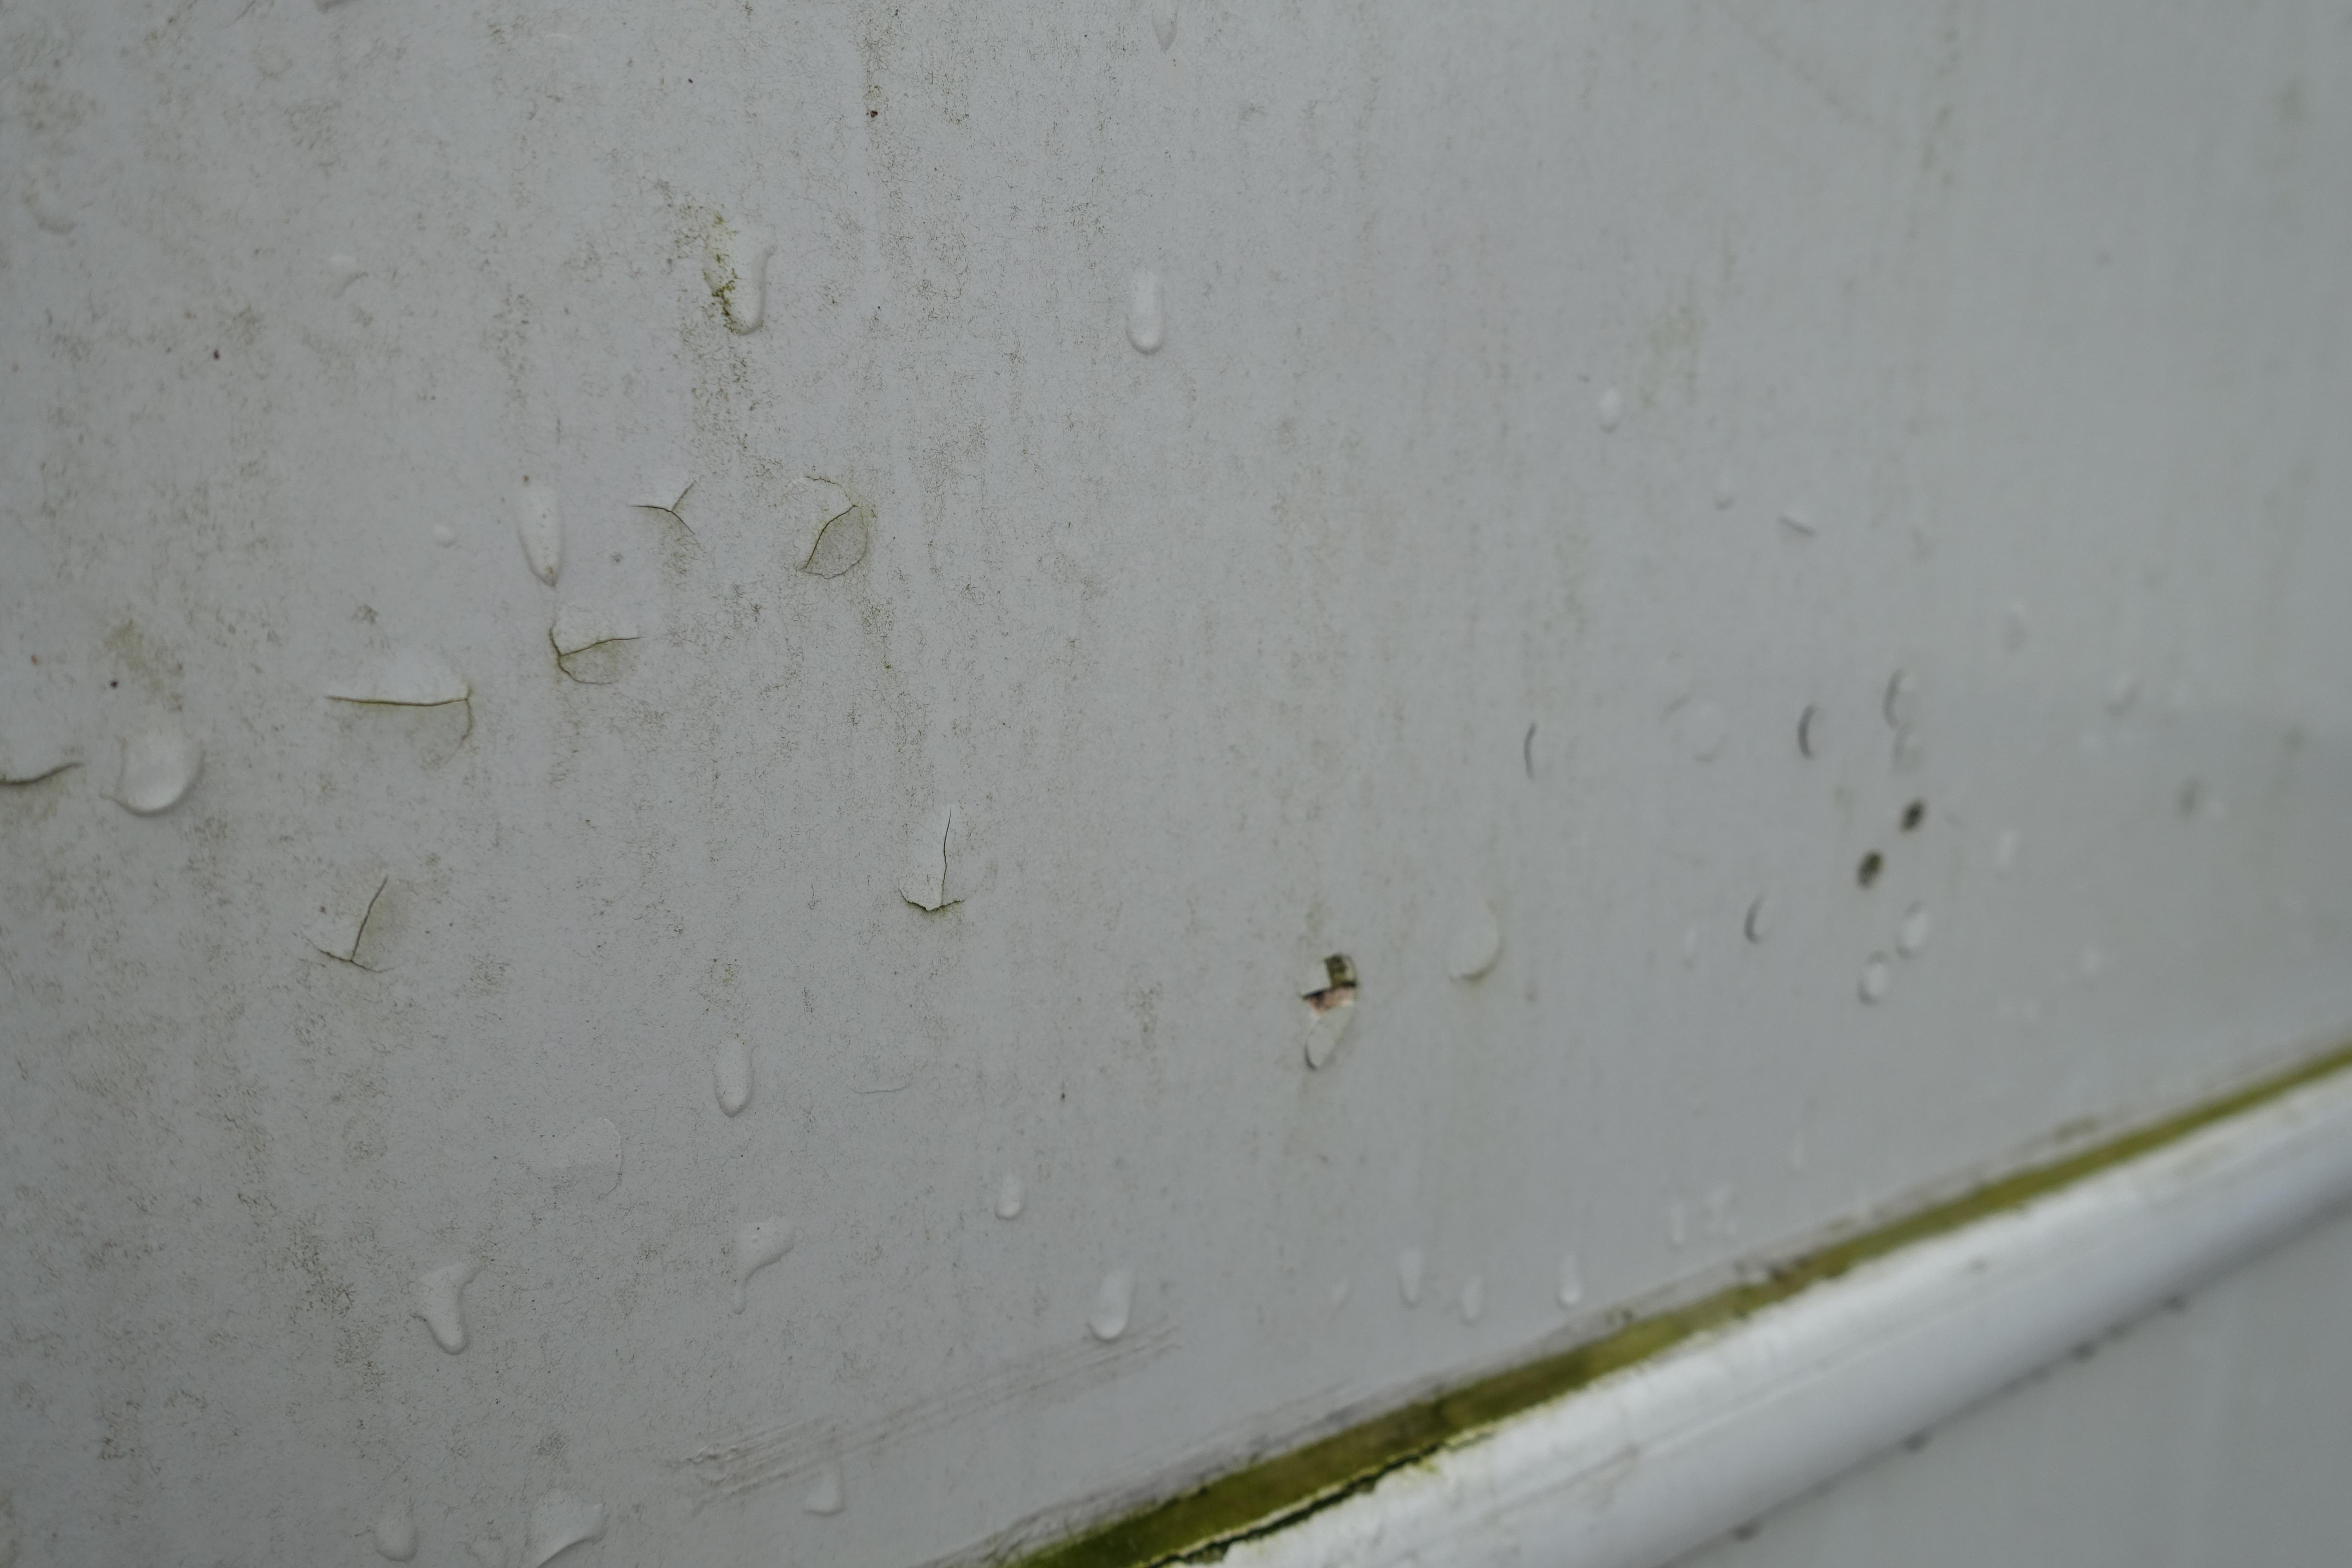
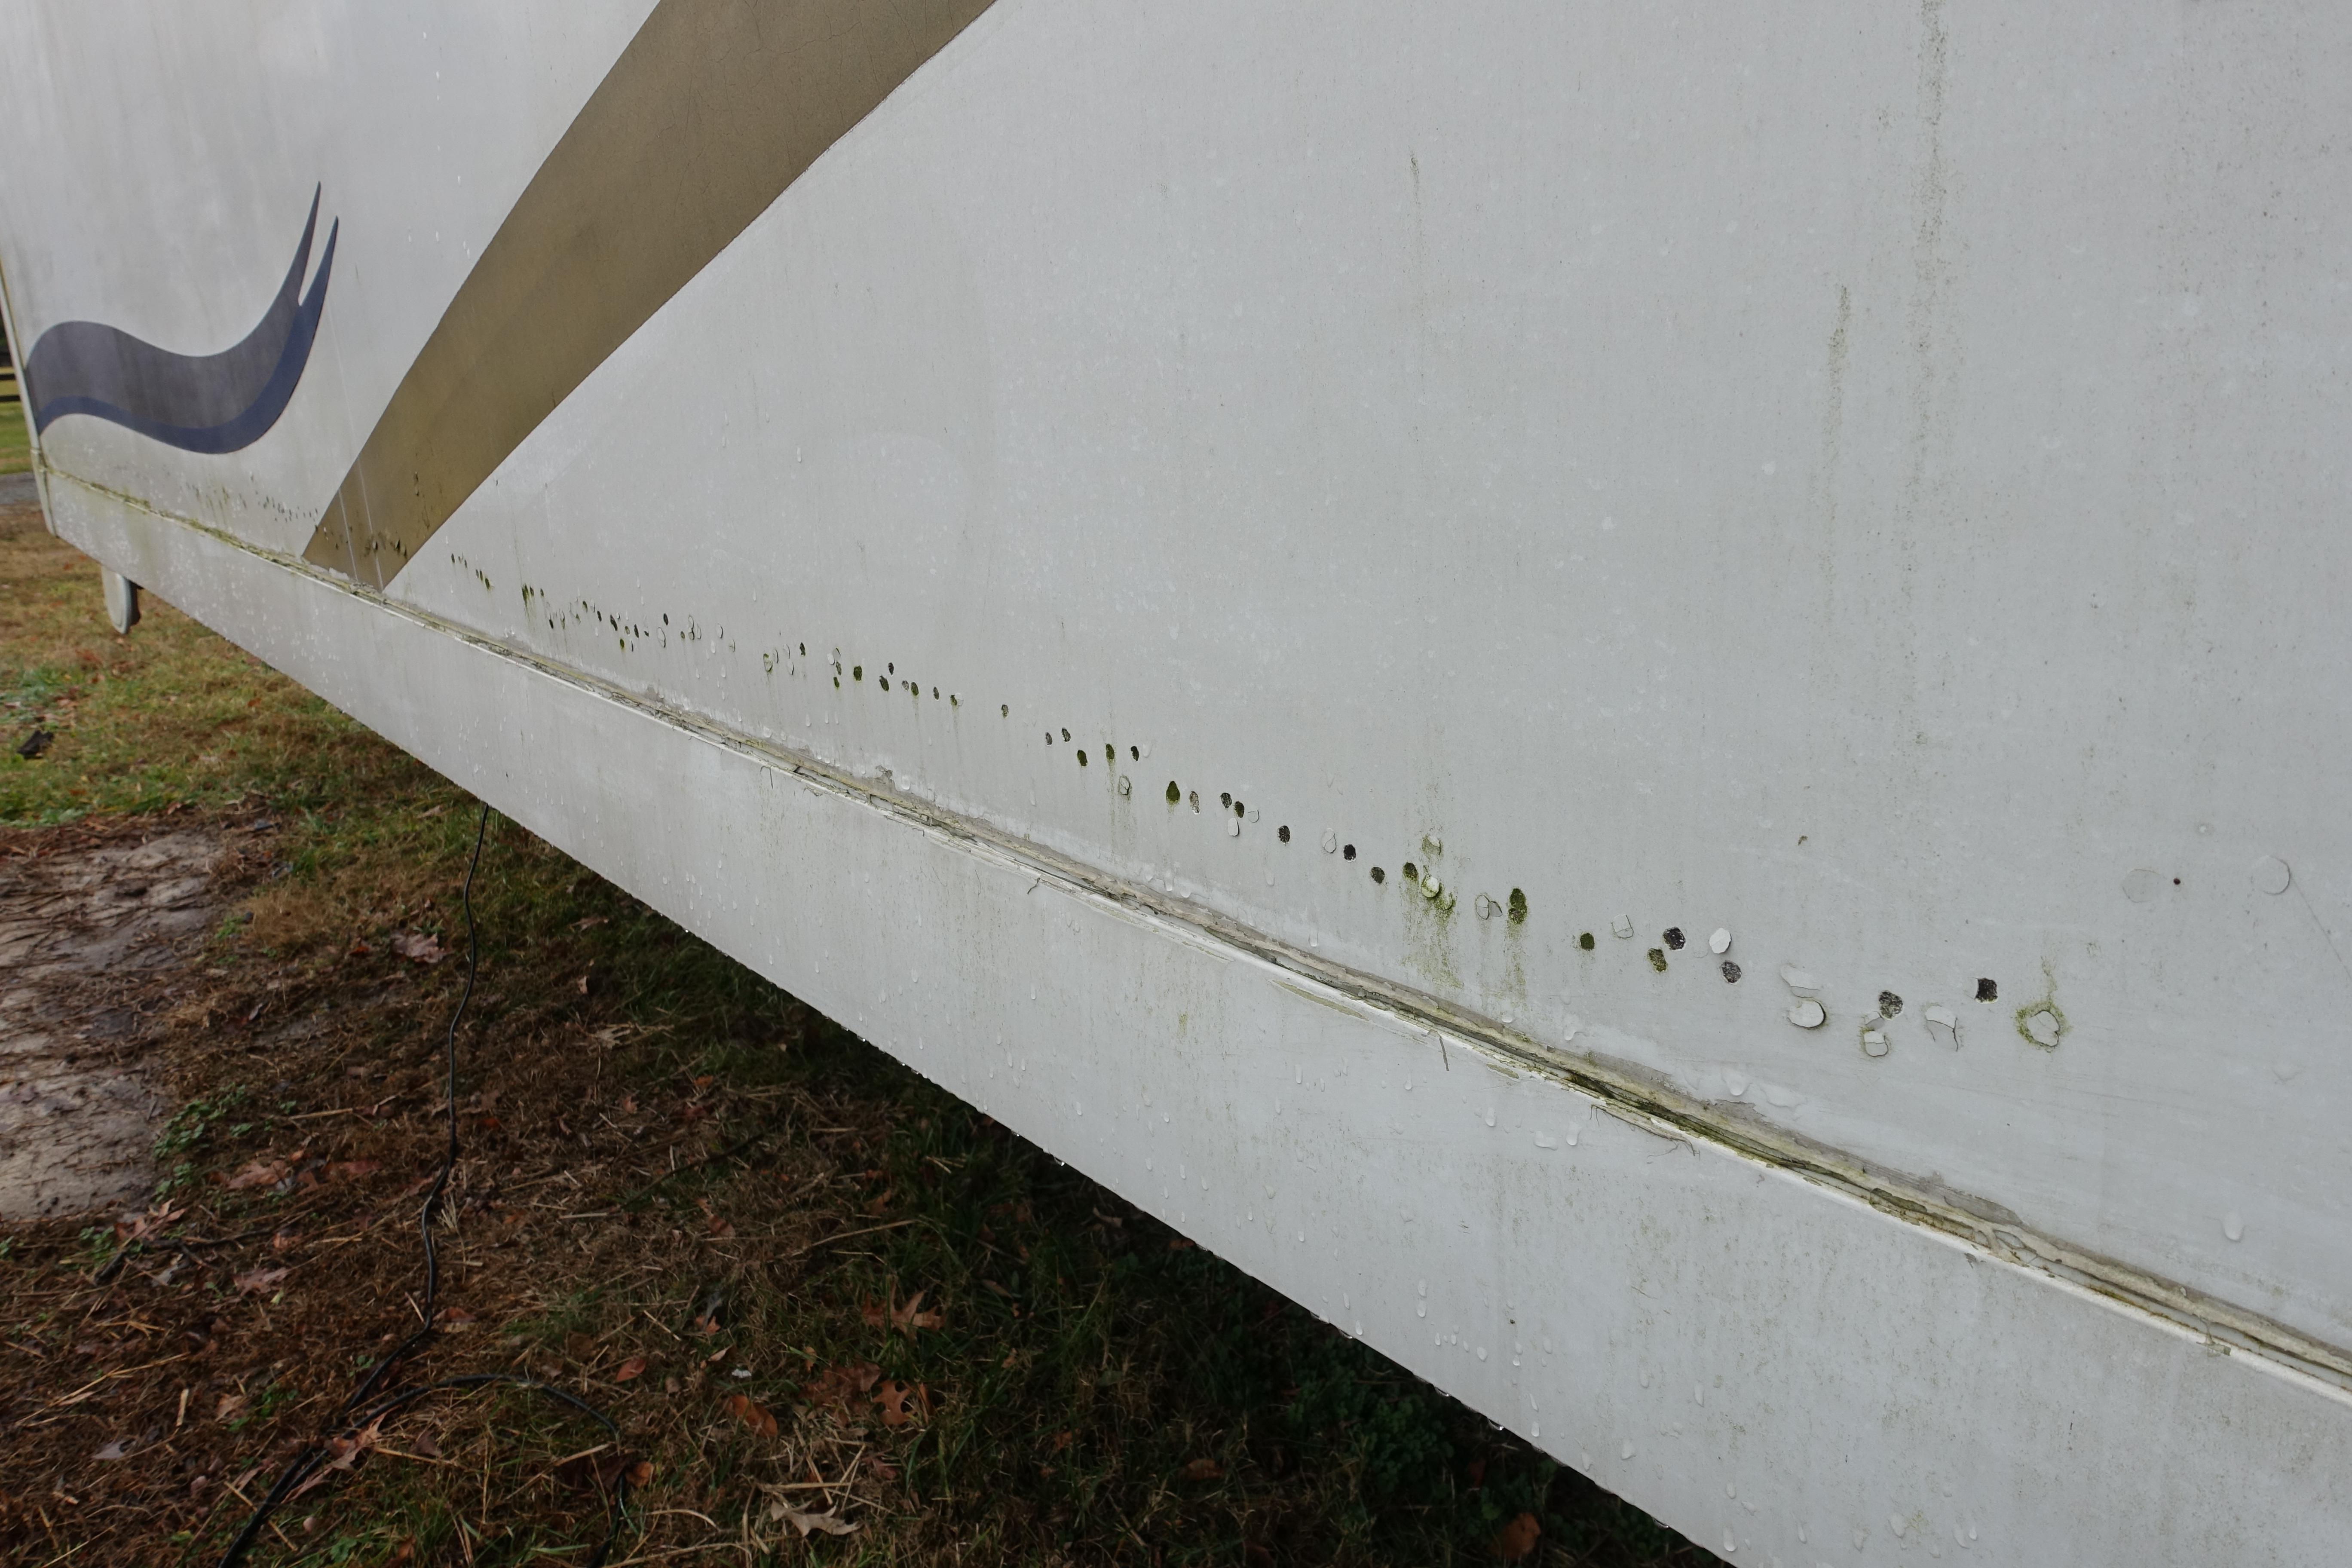
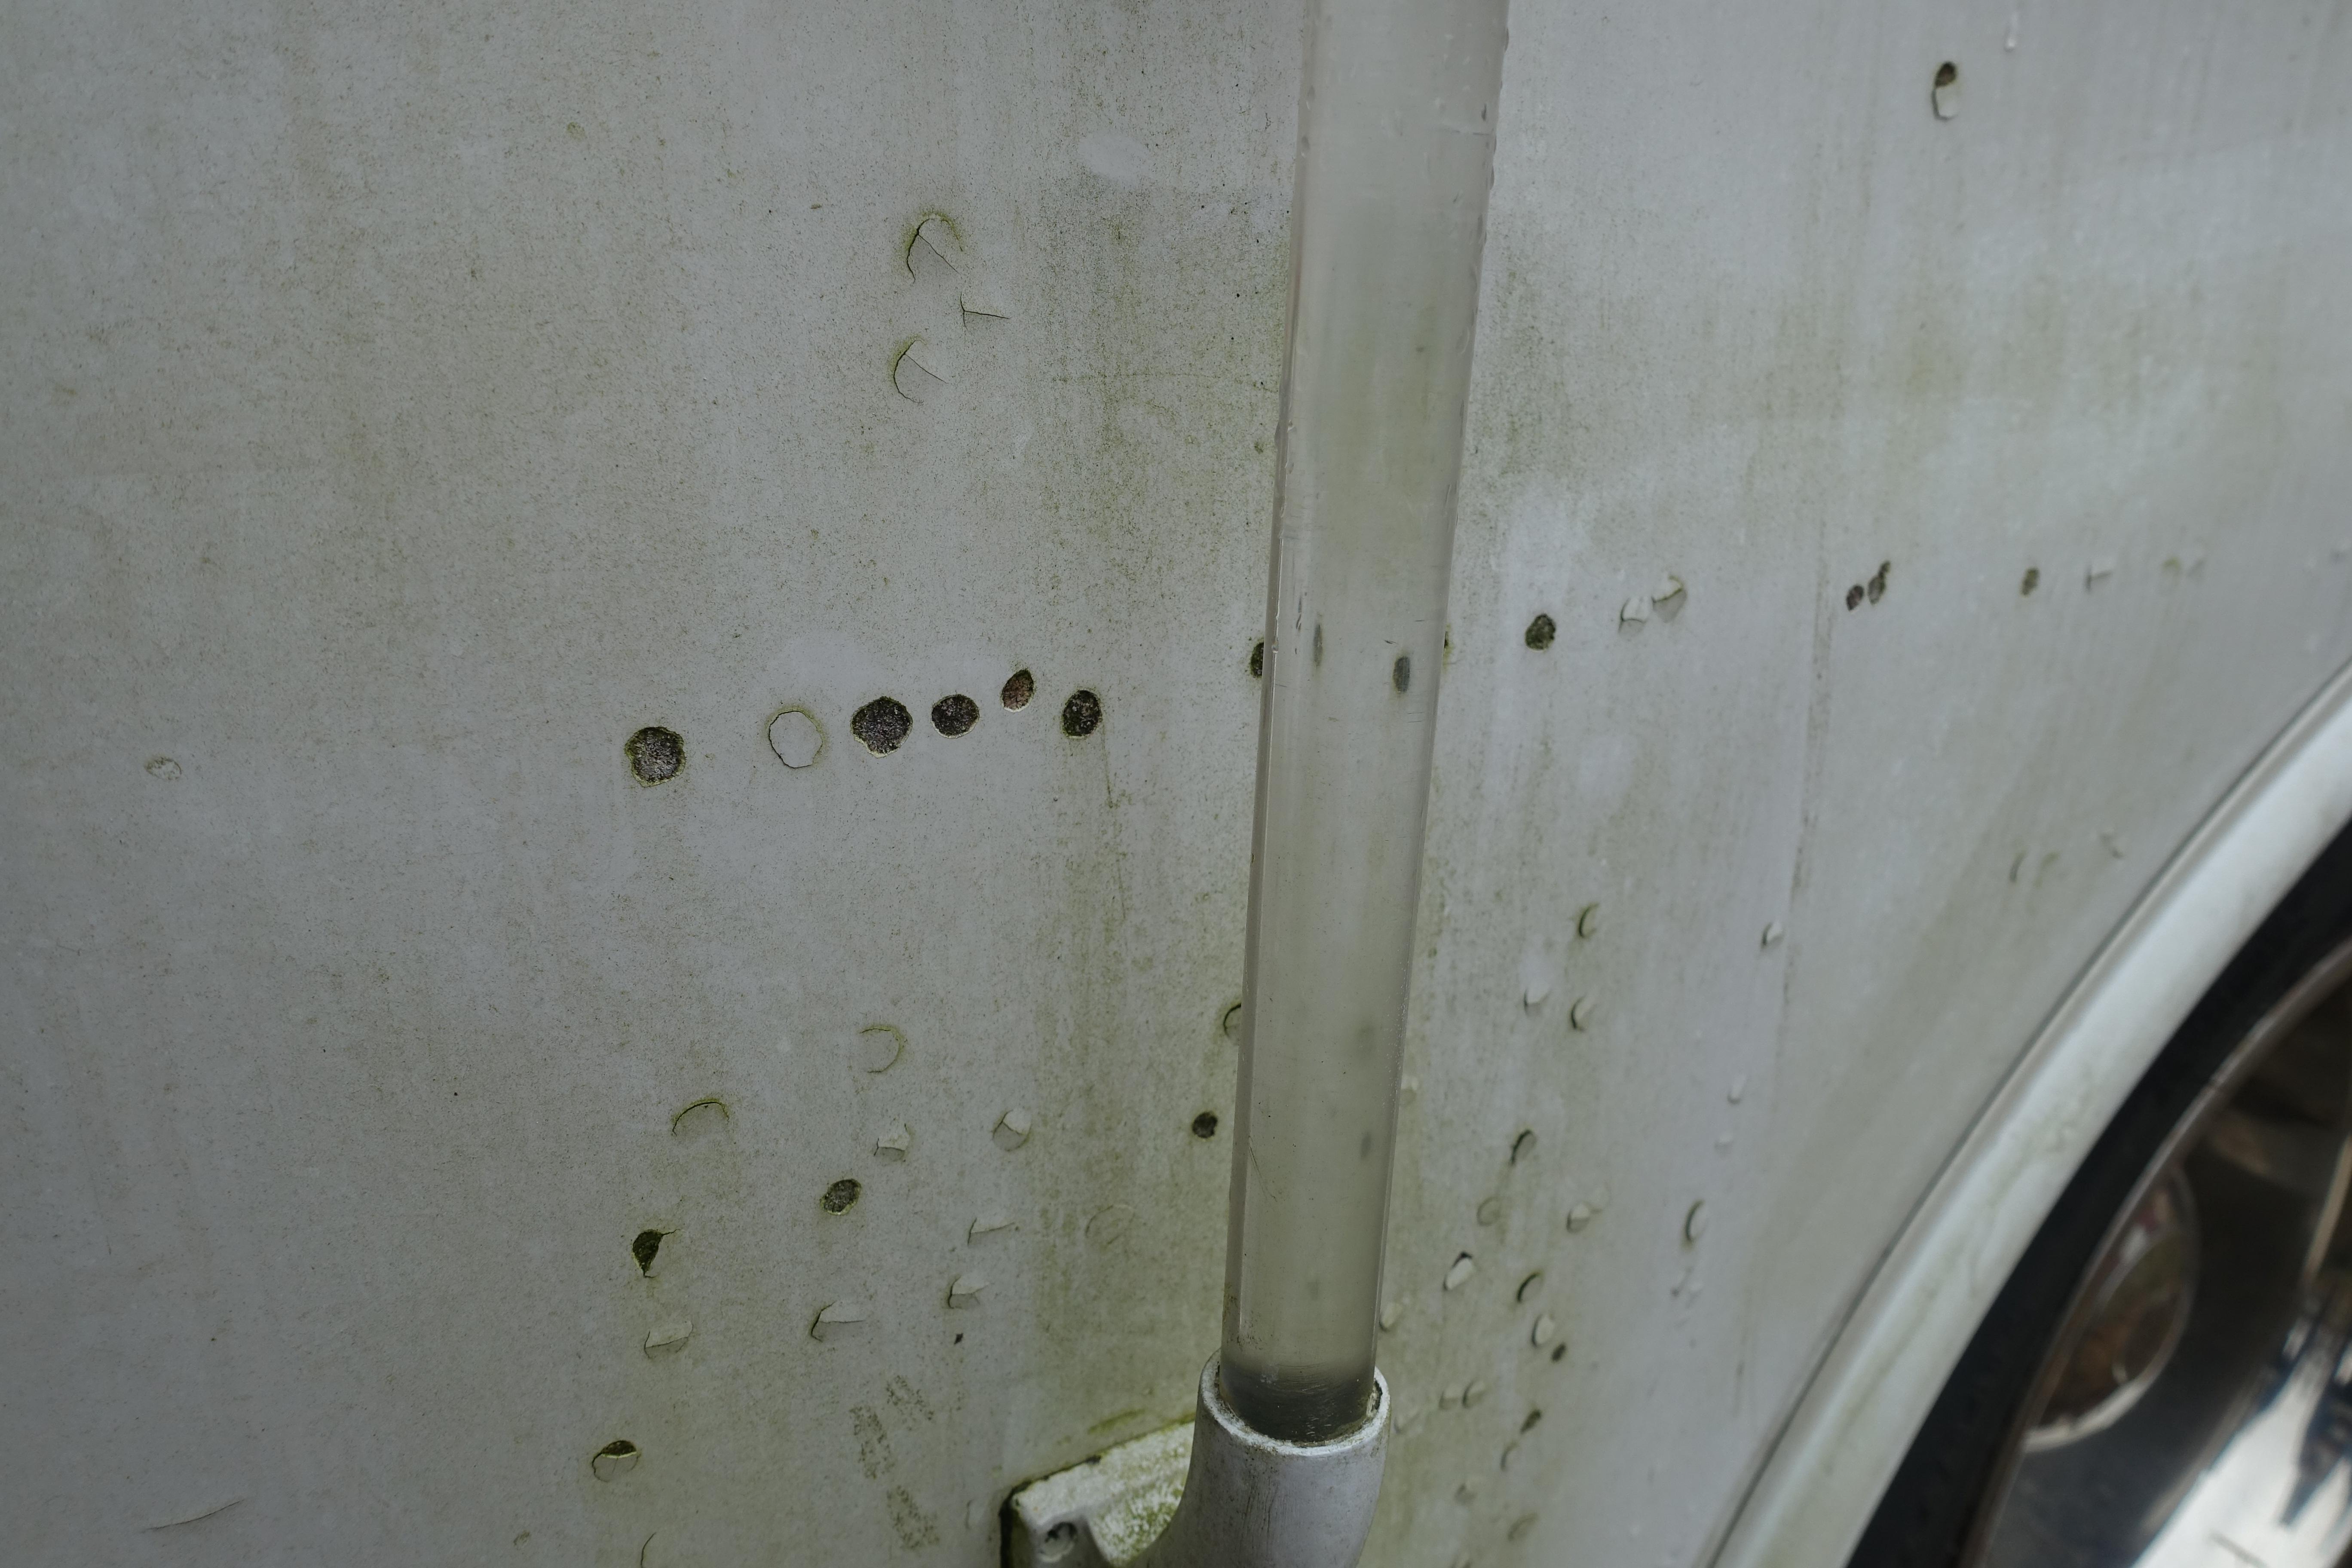
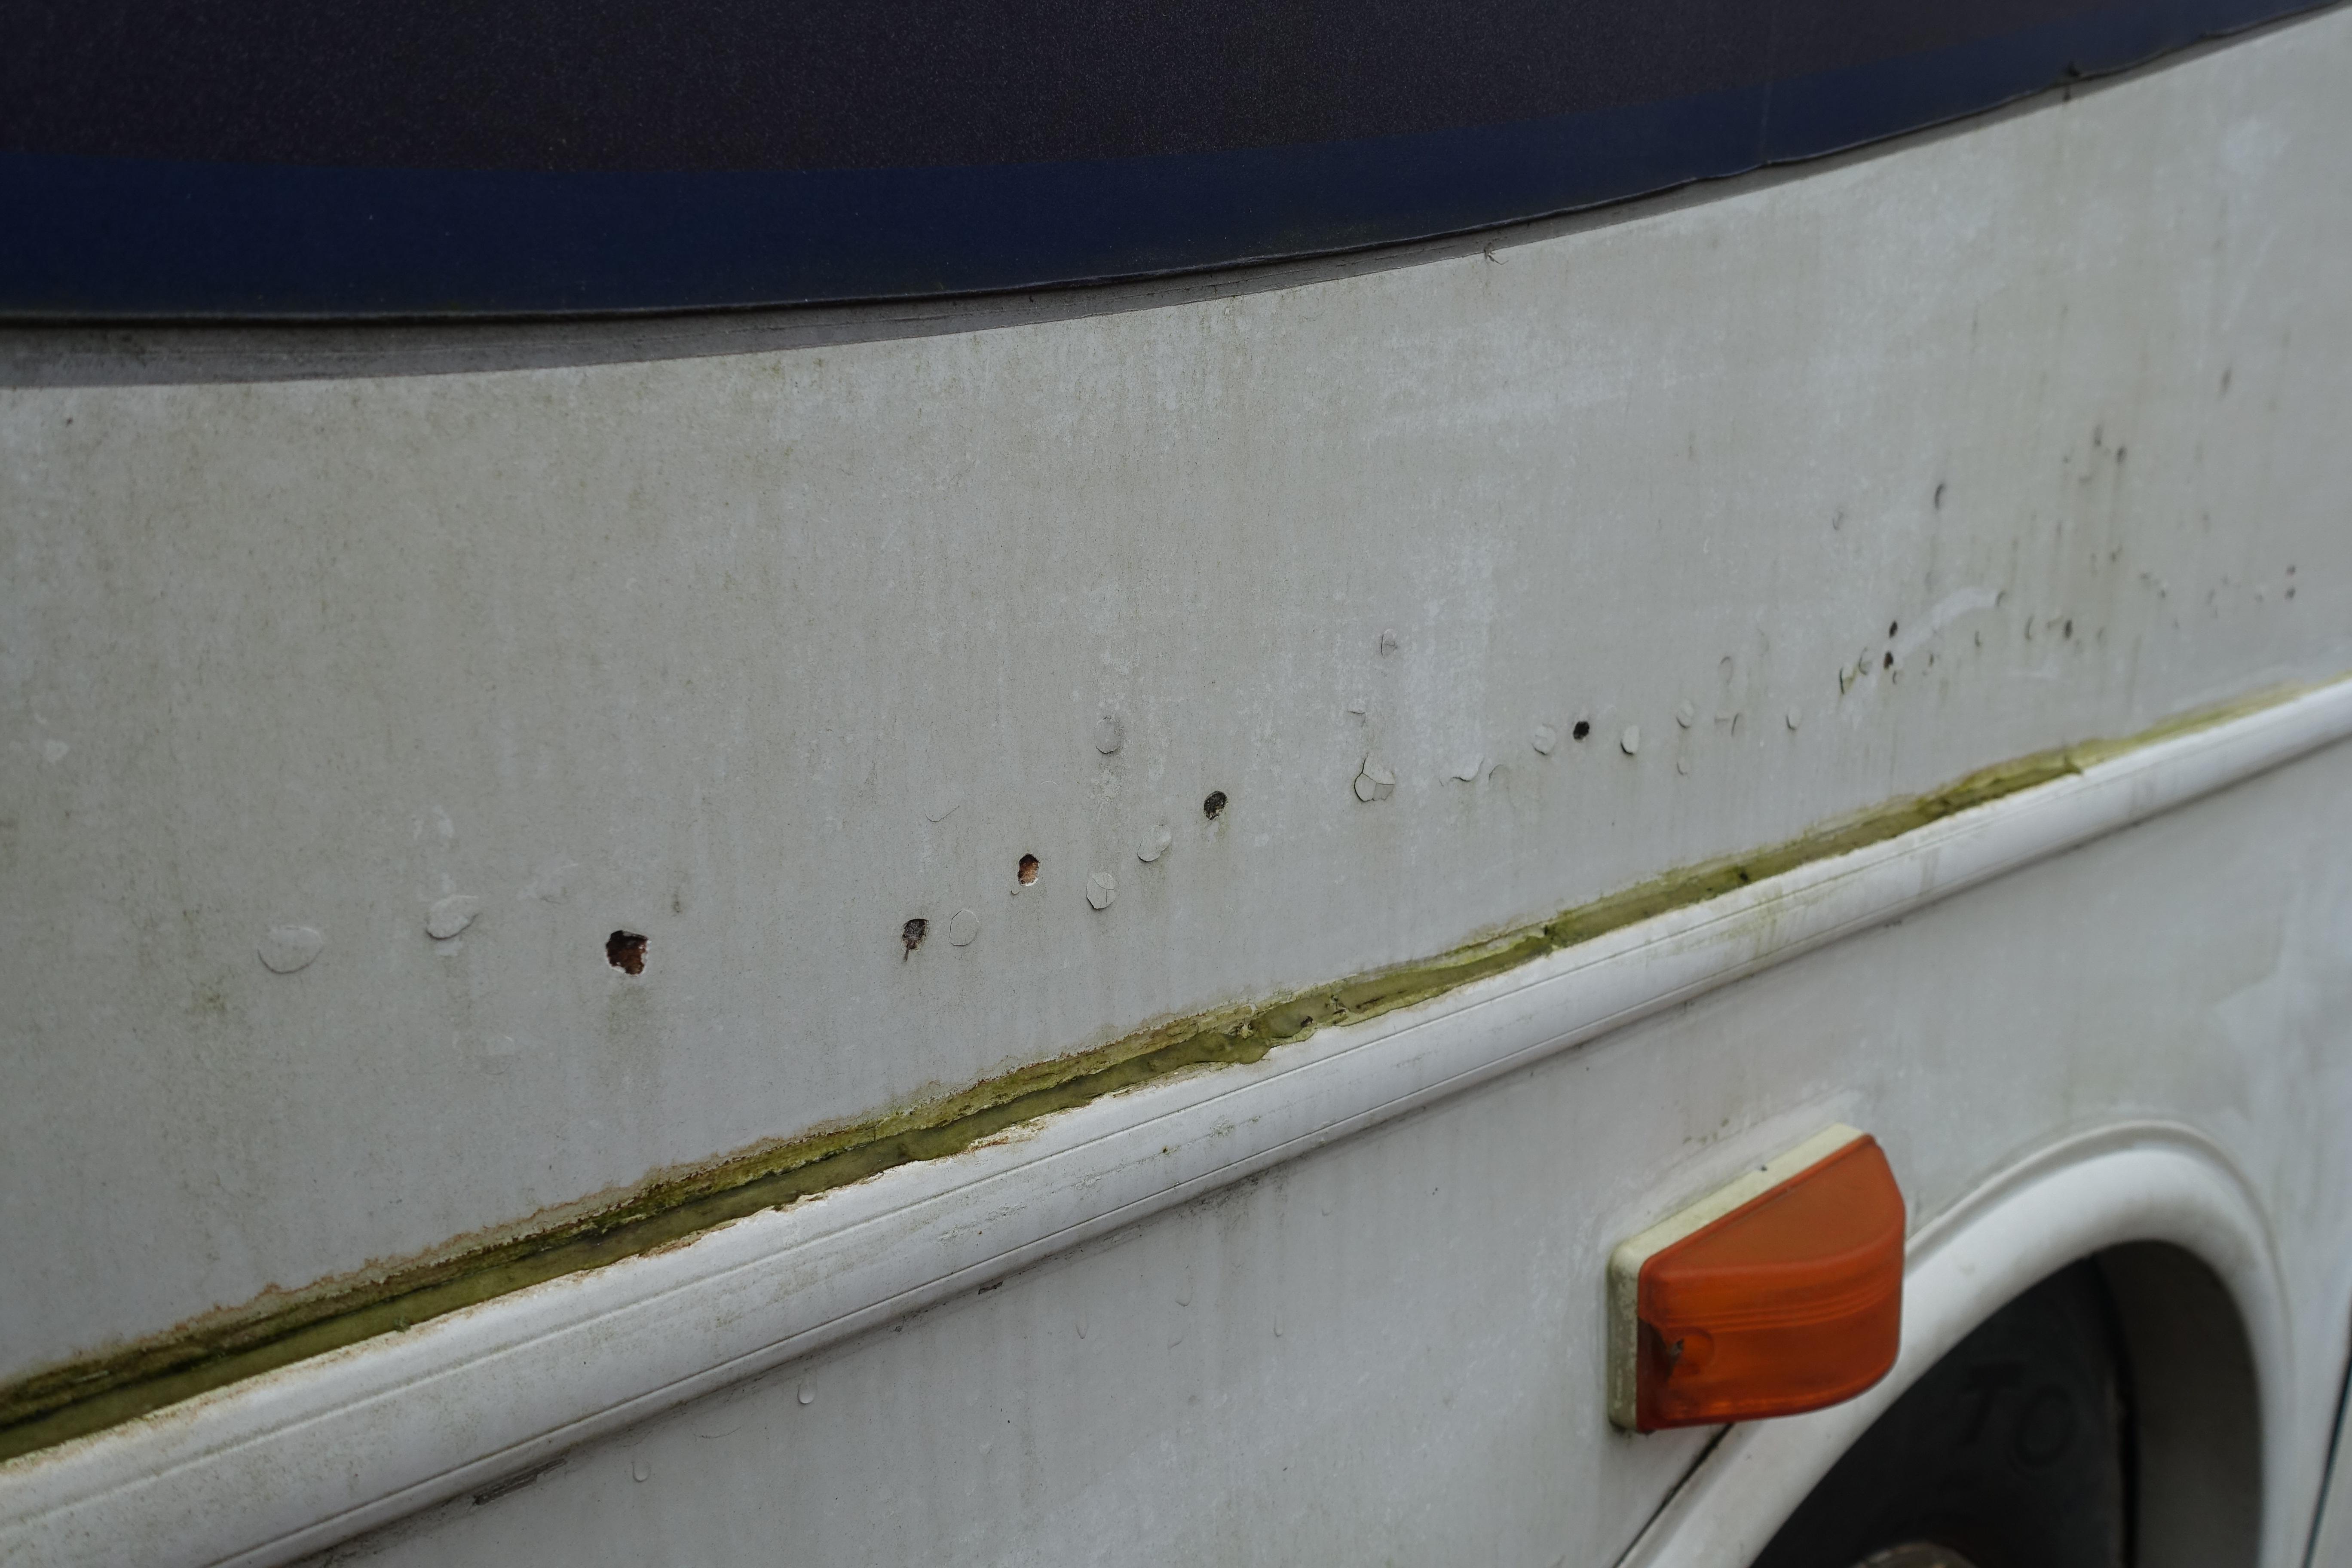
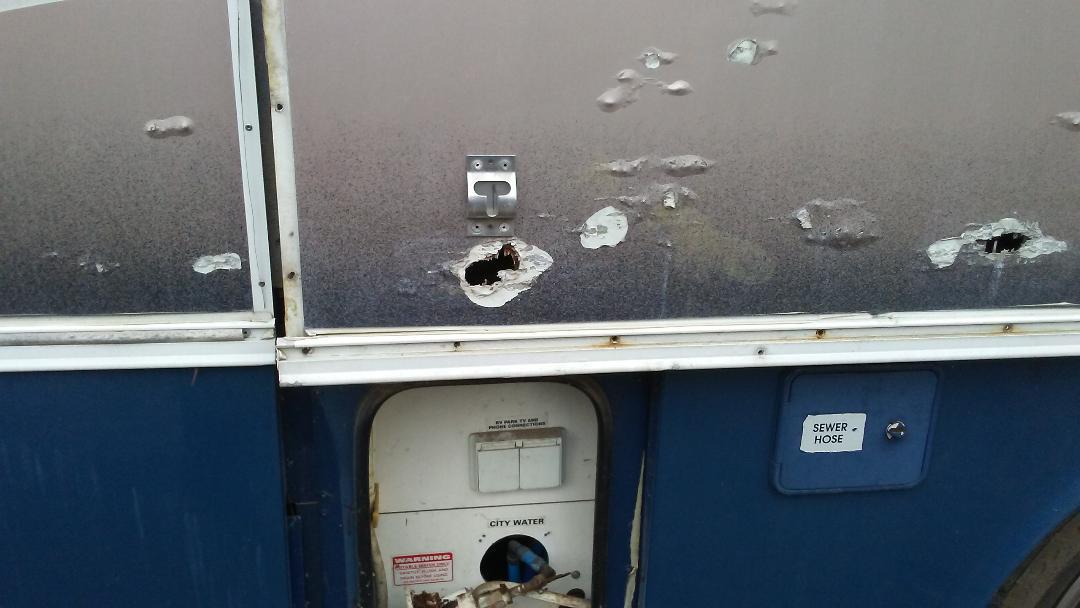
1 hour ago, IanBullock said:The holes are caused by droplets of water in the walls expanding while they freeze causing the exterior surface to pop out. That's why they all look to be about the same size and are round.
Very common issue in okde MH's found in northern states and provinces.
Yes, I agree. I found a few roof leaks today and that might be contributing to the moisture on the walls.
-
1 hour ago, WILDEBILL308 said:Thanks for posting the pictures. That is interesting. Buy any chance are there fastener/screw heads in the places where the material (Gelcoat/fiberglass) has popped out? That is better looking than it could be. This looks like a surface problem not a big structural problem.
Bill
No screw heads Bill, but I was just on the roof (yes it stopped raining long enough) and I found 4 little holes where it looks like something punched through the material. Maybe like some suggested, water getting behind the outside walls could be contributing to the problem. I have a friend who has built fiberglass boats and other fiberglass items and he is going to stop by to look at the issue. I am seeing the same thing as you as far as a surface problem and not a structural. Other than that, the roof material looks good as far as no cracks etc.. I am just wondering if I should paint the roof or apply a special coating to protect it?
-
58 minutes ago, hermanmullins said:Boatman, after seeing the pictures my question is how is the interior? If it is in good shape I say follow Ian's thoughts. He seemed to have made a wise choise. If you have to also have to redo the interior I myself might reconsider how to proceed.
Good luck and I hope all works out best for you.
Herman
The interior is basically good except that it is filthy which I am working on at the moment, but there is some water stains on the ceiling in the bedroom only, and maybe a foot forward of the sliding door for the aft cabin. I just ran my idea past a very good glass man and friend and he says yes, but he recommended epoxy instead of polyester resin if I were going to keep the coach. Yes I am. Even if I were going to sell it I have never been one to skimp on anything.
56 minutes ago, manholt said:Holes look round and uniform in size, like a tool was used to allow water to drain?
They are all natural!
-
37 minutes ago, IanBullock said:I had the same issue on a previous "new to me" 2001 Itasca Suncruiser.
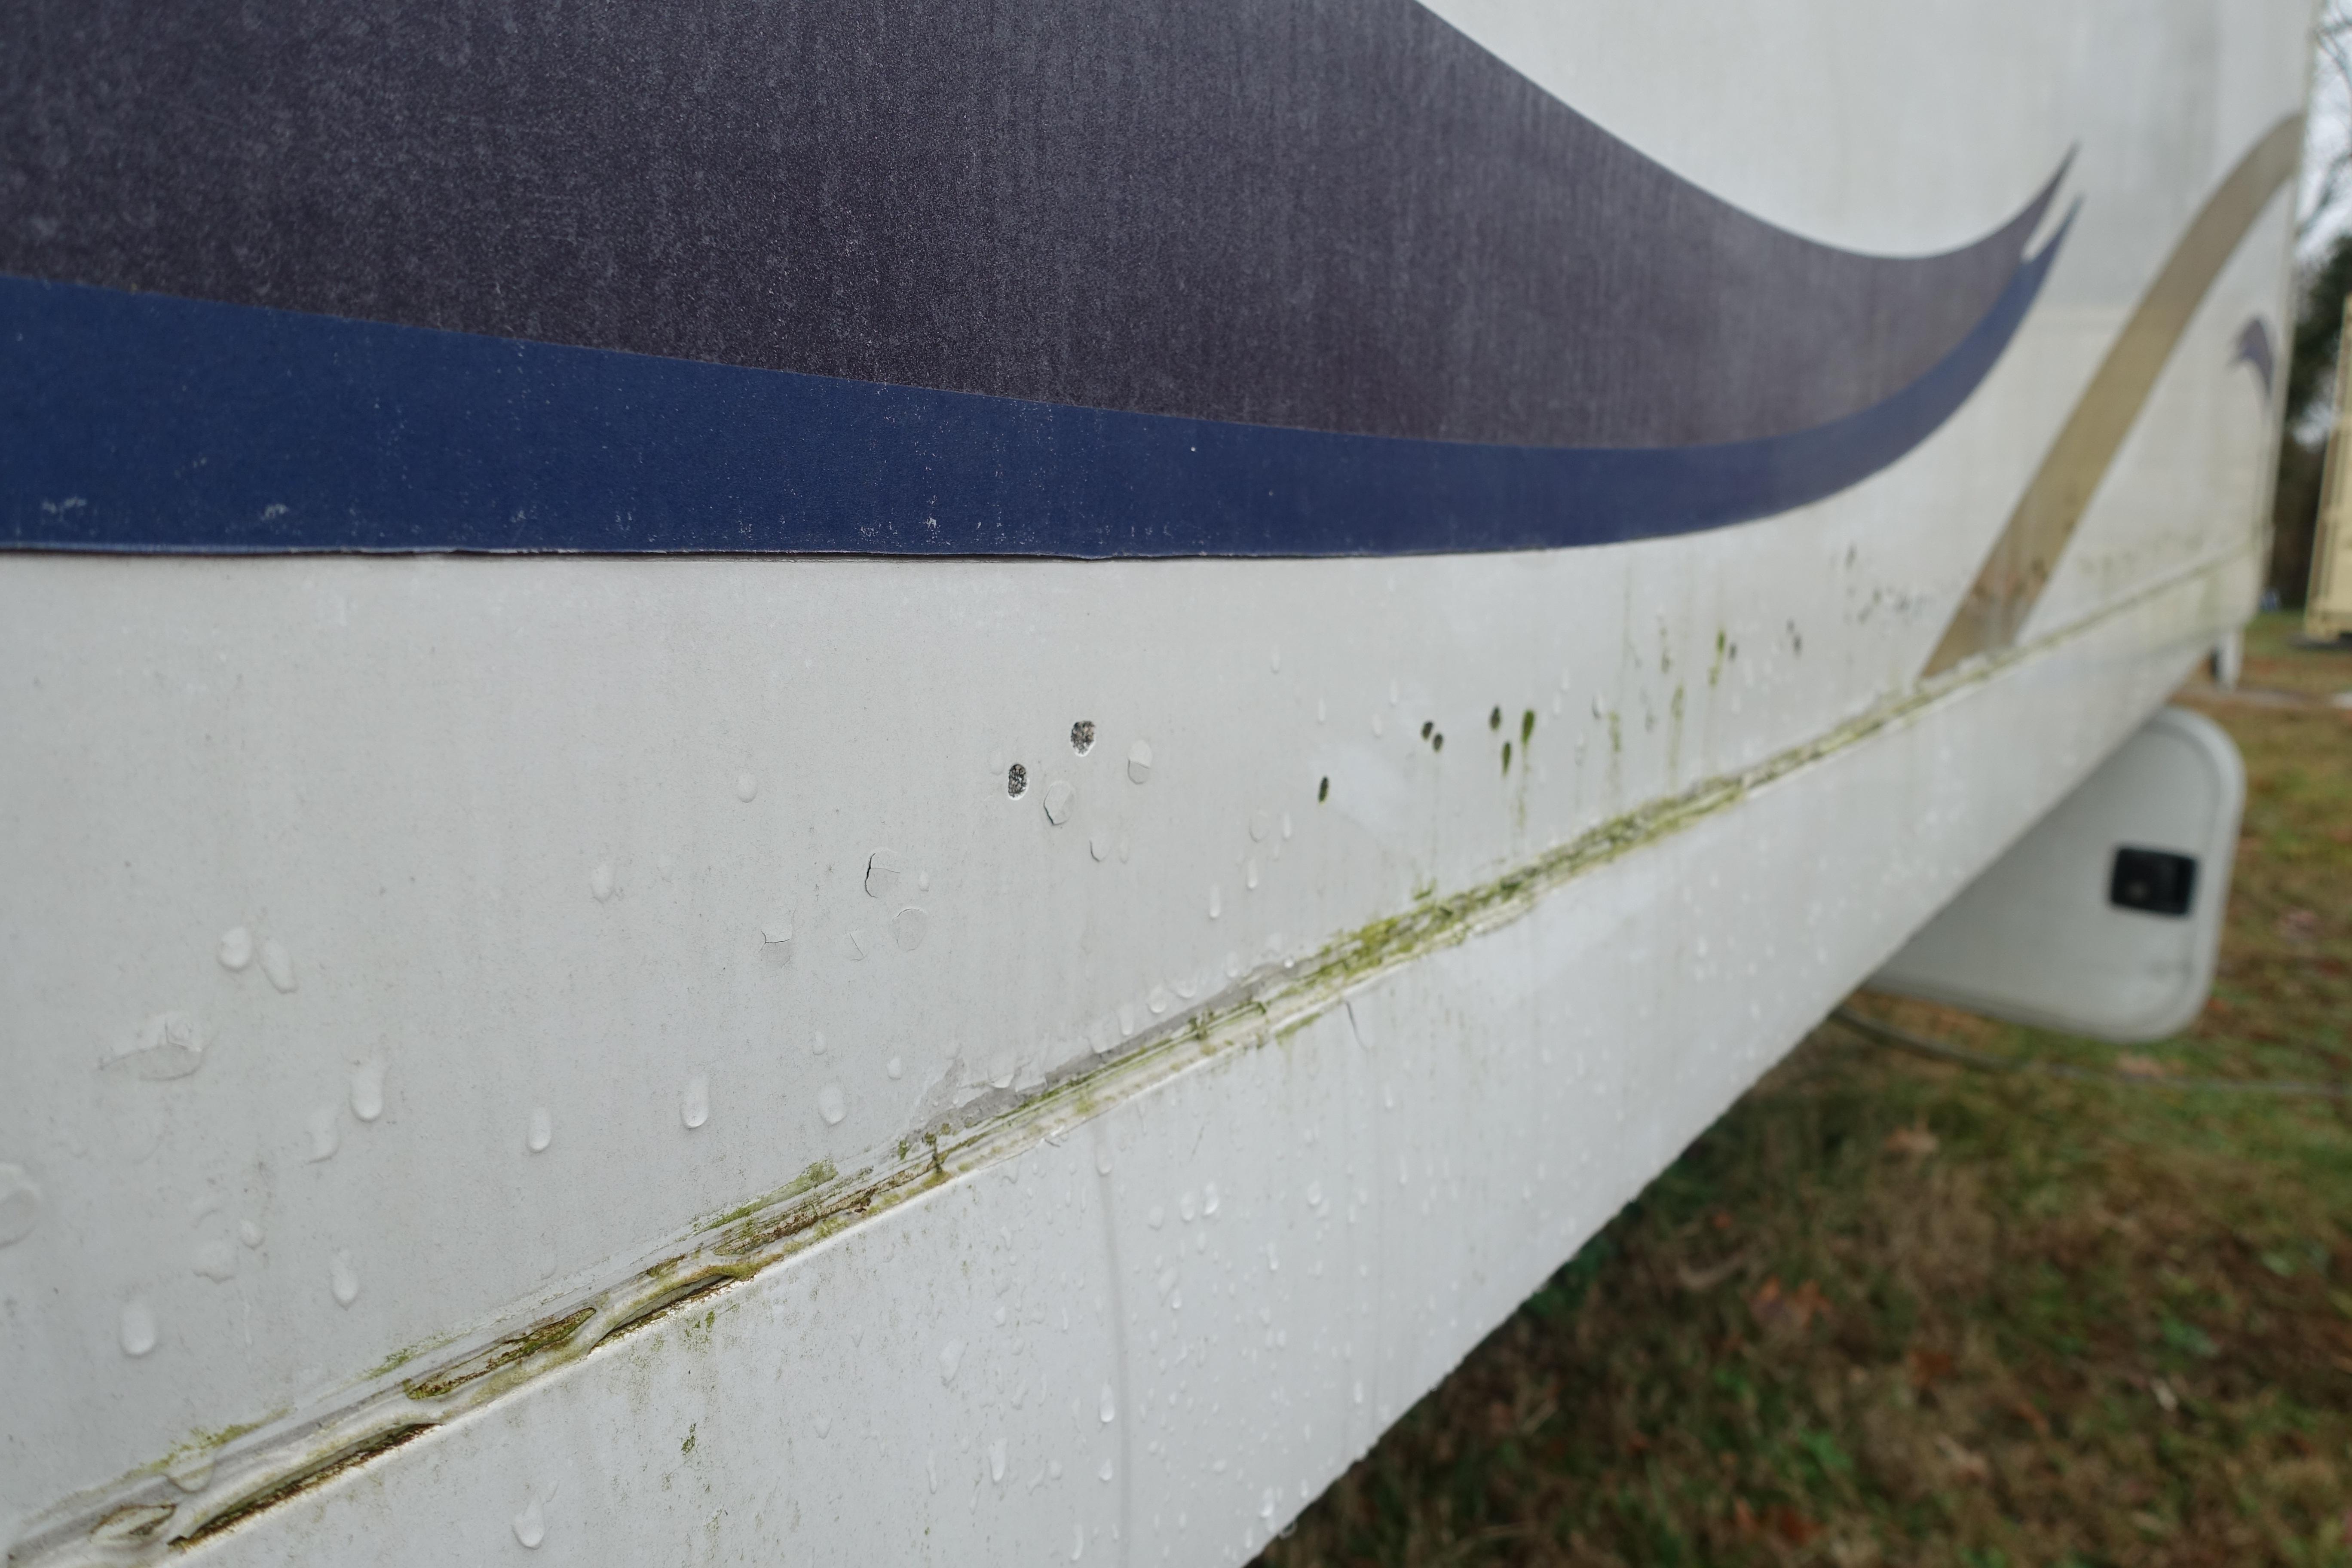
I came to realize the damage to the sidewalls was caused by water infiltration thru several sources. One was a crack in the skylight over the shower (which allowed water into the roof and then into the wall panels, another was thru leaky top window seals in the bedroom wall, another thru compromised mirror mount seals, another thru compromised awning arm mount seals.
Once I had all the leaks fixed, I then sanded the damaged wall areas, used fiberglass auto body filler to fill all holes, sanded as needed, and finally repainted (sprayed) all repaired areas blending the paint to match.
Came out really nice, MH looked like new and we never had a repeat of the issue again.
Thanks, Makes perfect sense to me. I will be checking for leaks today!
-
On 12/29/2018 at 8:35 PM, WILDEBILL308 said:Do you have any pictures of the delaminated area on the Alpha?
Bill
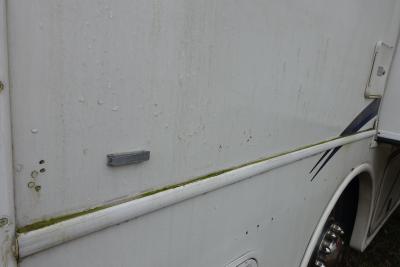
Ok Bill, here are the photos. The left side is much worse than the right. As someone who has done fiberglass work on boats and truck front ends I am thinking of repair instead of replace, at least on most of it. Even though there are numerous holes, the fiberglass still appears to be bonded to the wood, which of course is a wonderful thing. My repair would be to first grind the bad area, then lightly sandblast the area, which cleans and provides incredible porous places for fiberglass resin to infiltrate and bond into. Then I would mix resin and fiberglass to make a paste and force it into the holes with a putty knife. That should work better than gorilla hair or equivalent imho, as an integral repair than just something like gorilla hair wiped on the surface.
I know she is FILTHY but this thing is new to me and I'm not going to wash in this freezing weather...☺️


-
On 12/27/2018 at 4:27 PM, RayIN said:Go HERE, then click on his links-W/pictures showing exactly how he removed, repaired, replaced his Coleman-Mach basement air conditioner. He is the ultimate authority IMO for these basement units. He's helped many owners with their units, and has a long list of where and how to obtain replacement and upgraded parts. The only thing different, as I said, is this unit has 2 120VAC compressors inside, where standard household units have 1 large 240VAC compressor.
I have several links to parts from Bill's website,and even new OEM units are available, if you need my links. Duner's information should be all you need though.
FWIW, I have a basement unit, it keeps our MH(see sig) very comfortable in winter and summer, regardless of our location. (hope that doesn't jink me)
I downloaded all of this good stuff today, love it!! Thanks!
-
On 12/29/2018 at 8:35 PM, WILDEBILL308 said:Do you have any pictures of the delaminated area on the Alpha?
Bill
Bill, I will get some pictures this weekend when I'm back at my coach. Thanks!
-
23 hours ago, elkhartjim said:HardiPlank is a fiber cement material siding. Great stuff for home building.
Ok, Gotcha!🙂
-
11 hours ago, manholt said:So I found out in Galveston! Salt air and Vinyl Siding don't do well either, Hardy board & Trek is your friend.
") Don't know what Hardy board is but it must be good stuff!
Don't know what Hardy board is but it must be good stuff!
-
20 hours ago, kaypsmith said:I sometimes wonder if salt wont corrode fiberglass!
 Well maybe not fiberglass but my brother owned homes right on the beach near PC Florida, and the salt air down there did a number on almost every kind of metal except high grade stainless, aluminum was one of the worst to sustain damage from the salt.
Salt won't hurt fiberglass from what I have seen but it can certainly accelerate fading of the gelcoat. And yes there are many types of stainless and aluminum, and both have certain types that are recommended for marine use.
-
15 hours ago, RayIN said:The normal cause of aluminum corrosion is water intrusion, which results in galvanic corrosion. Galvanic corrosion occurs when dissimilar metals are in contact and get wet. https://www.engineersedge.com/galvanic_capatability.htm
Yes and of course a major problem on boats. In this case I was surprised in that the aluminum was glued to wood.
-
41 minutes ago, RayIN said:Go HERE, then click on his links-W/pictures showing exactly how he removed, repaired, replaced his Coleman-Mach basement air conditioner. He is the ultimate authority IMO for these basement units. He's helped many owners with their units, and has a long list of where and how to obtain replacement and upgraded parts. The only thing different, as I said, is this unit has 2 120VAC compressors inside, where standard household units have 1 large 240VAC compressor.
I have several links to parts from Bill's website,and even new OEM units are available, if you need my links. Duner's information should be all you need though.
FWIW, I have a basement unit, it keeps our MH(see sig) very comfortable in winter and summer, regardless of our location. (hope that doesn't jink me)
Thank You for this Ray! I will print this out and add it to me ever growing alfa library.
Thanks so much and Happy New Year!
-
On 12/26/2018 at 10:34 AM, rsbilledwards said:Boatman1955 welcome to the forum and your new hobby,
I will throw my two bit in here as well. Repairing the leaks up top. The simplest way to assure no more leaks assuming the vent covers are sound... Pull all the existing sealant up from the base and reinstall. Once you get it started it will come up pretty easily. Two school of thoughts on this include using Eternabond tape and overlaying the seamed area, body of the vent onto the roof. I like the Dicor self-leveling sealant. It is available online for as little as 8 bucks a tube thru Amazon buying multiple tubes at once. At the same time I would pull all the screws which most likely will have been zinc plated and now rusty from ambient moisture and replace with stainless steel ones. It may be necessary to go one size larger as the wool/Luan may be compromised. Reseal liberally with the Dicore. Allow a minimum of a month before painting as it takes that long for the stuff to dry sufficiently, just ask how I know. Sealing the cap to roof is best done with the Eternabond tape. This tape thru RV supply houses is very expensive. Buying it thru the roofing industry or the construction industry it is very reasonable . However there are Johnny come lately tapes that claim the same performance, not! Buy the Eternabond branded tape, white one side and sticky the other side.
The fan vents and height, Yes you can use the sit up in the air and add additional height with the suggested MAXXAIR covers about 12 inches tall. A better solution are the premium fan assemblies MAXXAIR and Fantastic make that are even better with dark colored lids and that when folded down closed are only 5 inches tall. The are automatic, variable speed, push air out and or pull air in and are very quiet. They retrofit to the standard 14 X 14 inch hole. One of the best sources for parts is PPL Motorhomes.com parts superstore. When on sale everything is cheaper than all the other places particularly big ticket items and post is very reasonable. Shop for what you need at Camping World so you know what not to pay and buy online it will save you a wheelbarrow full of money. Please keep us apprised as to the progress we all enjoy it
A wheel barrow full of good useful information here! Thank You so much and Happy New Year!
-
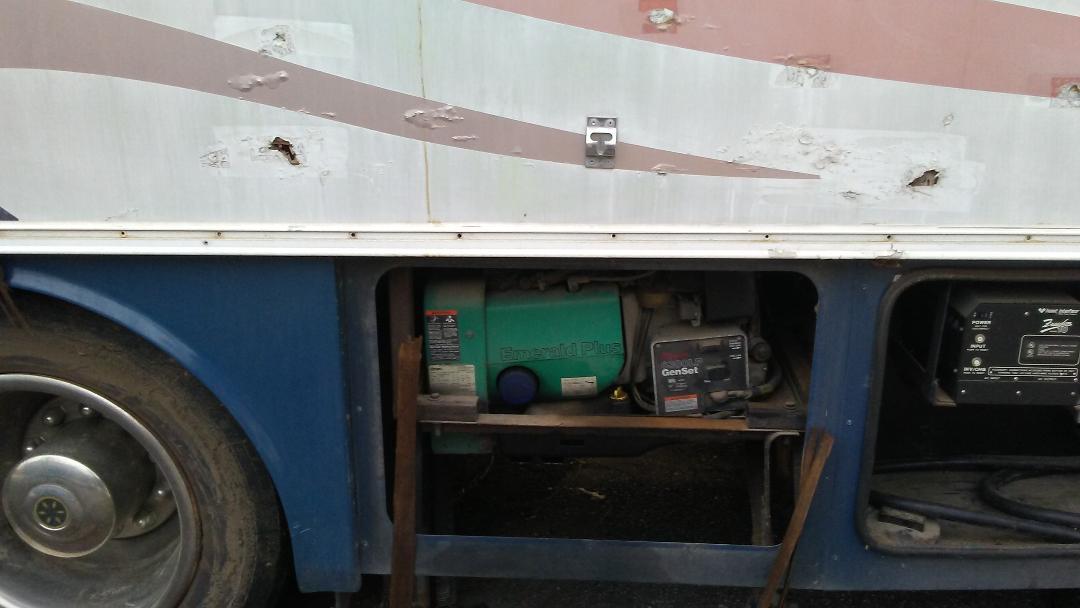
On 12/26/2018 at 8:15 AM, jleamont said:Since this coach was inherited, id look it over for structural damaged from water and if all good make a decision to either fix it or run it as it is, since it sounds like you don't have any money invested into it. I actually considered aluminum skinning our last coach and removing the fiberglass.
Hi,
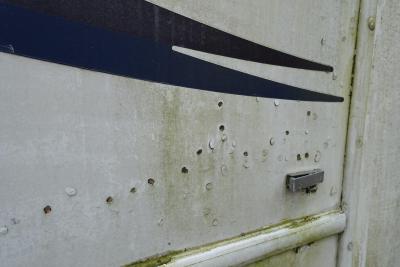
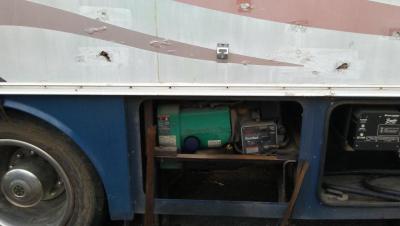
I'm not sure what caused the corrosion on my friends Renegade with aluminum skin but check out the photos of that before shot I posted on this thread. That thing was nasty!
Thanks and Happy New Year!
-
On 12/26/2018 at 4:27 AM, manholt said:If you go to rv. USA, you'll find the complete specs! Your overall height is 13 foot 1 inch + the added roof AC. Don't know what make/model was added, but IMHO, your above 13 foot 6 inches in overall height, probably 13' 8"!
Your sidewalls, end caps are Luan Plywood, 3-4 mm.
I was hoping to be within my magic number of 13-6" but will do an actual measurement to be sure.
Thanks and Happy New Year!
-
On 12/26/2018 at 4:27 AM, manholt said:If you go to rv. USA, you'll find the complete specs! Your overall height is 13 foot 1 inch + the added roof AC. Don't know what make/model was added, but IMHO, your above 13 foot 6 inches in overall height, probably 13' 8"!
Your sidewalls, end caps are Luan Plywood, 3-4 mm.
Ouch... 13-6" was my feel good cut-off point. But actually I could still be within that number as there are other things sticking up above the roof, just not quite as high as the Coleman Ac unit.
Thanks and Happy New Year!
-
On 12/25/2018 at 10:29 PM, Moonwink said:Boatman1955, To measure the height, lay a board on top of the air conditioner and make sure it's level - then measure the distance to ground from underneath it.
Use a vent cover meant for the Fantastic fan or you'll lose a lot of its ability to move air. The smaller covers are great for the small fan in most bathrooms and non-powered vents.
Ok sounds good Moonwink! As long as I am 13-6" or less I am good to go. And I want all the flow I can get with the fans so will order the right ones.
Thanks and Happy New Year!
-
On 12/25/2018 at 10:04 PM, manholt said:That project is way above my pay scale!
Good Luck & hope to see some photos of before/after!
Thank You and Happy New Year!
-
On 12/25/2018 at 9:33 PM, wolfe10 said:Sounds like you are extremely handy.
Yes full wall replacement is certainly possible, but well past 99% of RV owners.
Good luck with your project-- look forward to pictures/write-ups of the project!
Thanks for that Wolfe! Happy New Year!
-
On 12/25/2018 at 8:45 PM, kaypsmith said:On one coach, we cut through both fiberglass skin and luan plywood, replaced the plywood with just the right thickness plywood so that it was flush with the outer skin, did a rough sand job on the entire sidewall that was pretty badly affected, then applied new skin over the entire side. The results were very good with a new coat of paint over the entire coach (white) then added some vinyl graphics. Thanks for responding to all of us, looking forward to seeing a great looking coach from you in the future. May the coming year be the best for all!
Hi Kaypsmith,
I posted some photos on this thread today of my buddies Renegade that I helped him skin almost 2 years ago. I am hoping that I don't have to do the entire thing but maybe that would be best. Thank You for responding!
Happy New Year!
-
On 12/26/2018 at 2:33 PM, RayIN said:The basement air conditioner is also a heat pump! If you wish, PM me and I'll send you links to removing, repairing, and re-installing your Coleman unit. It is basically built like a household unit with 2 compressors inside instead of 1, to make it a 24,000btu unit. Any Air conditioner repairman can service it once you have the links to the instructions for removal and re-installation. Some are saying the Coleman unit is no longer available -not true.
Hi RayIN,
I did not know the basement AC unit was also a heat pump, Thanks for that! My e-mail address is < boatsferu@aol.com > and I would love to receive any information that you'd care to send me! I would think between both units working correctly it should cool nicely in any weather.
Happy New Year!
-
2 hours ago, hermanmullins said:Second picture looks smoooooth. Quite an undertaking. Keep us up to date on your coach.
Herman
Thanks for your support and interest!
Happy New Year!
-
On 12/25/2018 at 8:45 PM, kaypsmith said:On one coach, we cut through both fiberglass skin and luan plywood, replaced the plywood with just the right thickness plywood so that it was flush with the outer skin, did a rough sand job on the entire sidewall that was pretty badly affected, then applied new skin over the entire side. The results were very good with a new coat of paint over the entire coach (white) then added some vinyl graphics. Thanks for responding to all of us, looking forward to seeing a great looking coach from you in the future. May the coming year be the best for all!
Hi Kaypsmith,
I have a few photos of my friends Renegade that I helped him re skin almost 2 years ago. As you can see the aluminum was badly oxidized with many holes. I don't think I will need to do all of my Alfa but will take a closer look and make a decision. In any event that will not be a priority as the other issues are more important.
Happy New Year!!

.thumb.jpeg.d198b5e4b89c7cd68a4fa65f04d4ee23.jpeg)


.jpeg.a6c3219256cb8f5436bbdde2d9c2f4ba.jpeg)

Inherited an Alpha, see ya 40', 2004
in Type A motorhomes
Posted · Report reply
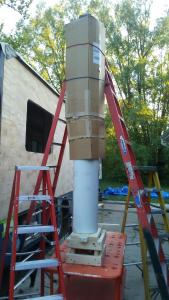
Yes, I know you're right, but not much I can do at the moment unless I pretend this is one of my boats and shrink wrap the upper section..😖