-
Content Count
88 -
Joined
-
Last visited
Posts posted by bikeryder
-
-
Thanks for the additional info, wildebill308. That's something else for me to see and learn.
Any additional knowledge I can gather and can help others is greatly appreciated.
Eddie
-
SUCCESS!
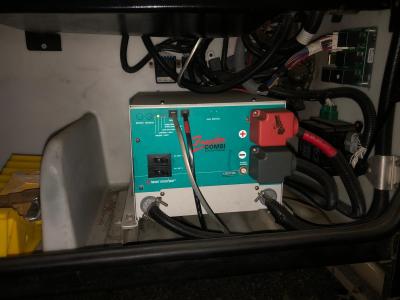
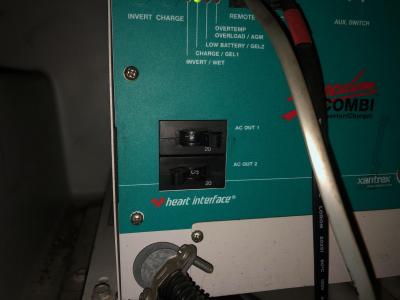
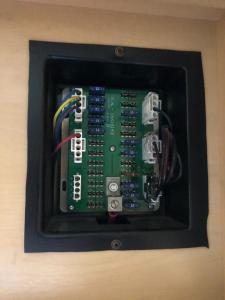
Thank you all who replied. The solution was a breaker at the inverter! I didn't know of these but, now I do. You guys are amazing.
For those who like me may not be familiar with these breakers, I've enclosed pics of my inverter and the breakers.
You can see the tripped circuit breaker on AC 2 OUT
-
Yesterday I inadvertently plugged my single burner hot plate into receptacle on my 2003 Monaco Cayman while 2 space heaters were plugged in [dumb I know].
Immediately the circuit popped, living room TV shut off as well as hot plate and both space heaters. One space heater was plugged into bathroom receptacle which is GFCI, another space heater was plugged into wall receptacle just outside the dinette booth. In all four wall receptacles inside coach are dead, with another receptacle down in cargo bay also dead. Both the living room and bedroom TVs Do not have power.
The first thing I tried was toggling all the circuit breakers in bedroom, this did not remedy the problem.
Also the existing GFCI outlet [which is located at bathroom sink], the test and reset buttons seemed to not have the feel of a solid click. The test button when pressed did not give off an audible sound. So I thought why not replace the 20 amp GFCI outlet which [after turning power off] I did. After taking my time to ensure everything was wired correctly, I turned power back on, same problem exists. Although the newly installed GFCI outlet has reset and test buttons which feel like they have a definite click when depressed, the small LED lights located on the outlet do not illuminate [no power].
I’m stumped, I’ve tripped all the circuit breakers I can find, and nothing seems to return power.
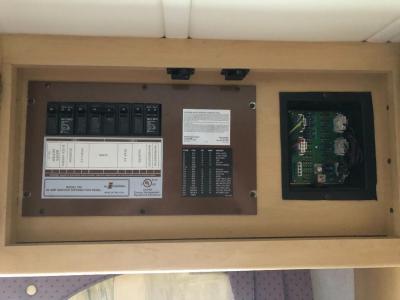
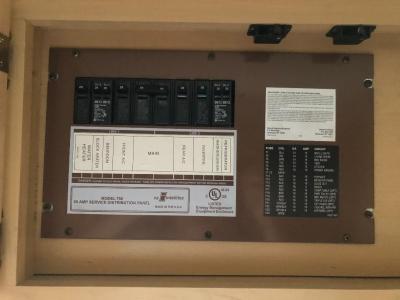
The 120V circuit breakers are labeled as follows left to right;
Water Heater, Block Heater, Bedroom, Front A/C, Main, Rear A/C, Inverter, Washer/Dryer, Refrigerator.
The only circuit breaker that I can clearly see what is being protected is the bedroom.
I have 3 wall outlets in bedroom and all are working fine.
Both roof A/C units work, water heater works, microwave convection oven works, refrigerator all work on 120VAC.
I’ve searched for a possible circuit breaker but cannot find anything that remotely resembles 120V circuit breaker.
In summary I now have 4 Wall outlets inside coach and another wall outlet in cargo bay which have no power. In addition both Front and Rear TVs also have no power.
Can anyone offer advice on something I might not have already tried?
I’ll post a picture of my main 120VAC breaker panel and 12VDC fuse panel.
Thanks in advance.
Eddie
-
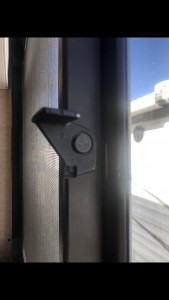
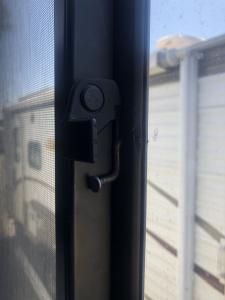
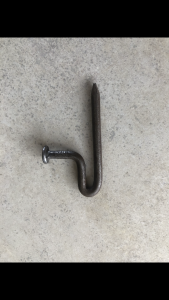
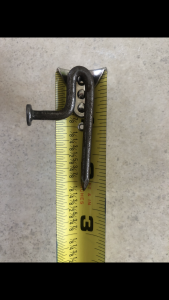
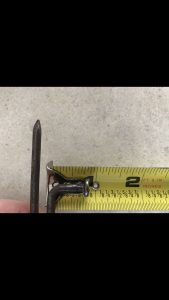
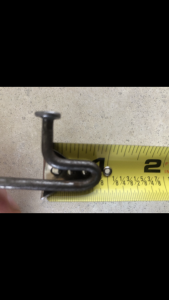
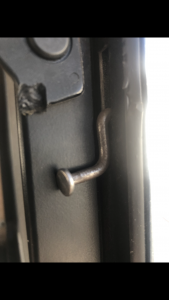
For the most part all of my plastic window latches / locks have broken due to age. Drilling out the pop rivet is a pain, as there is the possibility of cracking a window pane. What I’ve come up with is an add-on window locking device. I cannot take credit, as I saw something very similar on something unrelated. It’s nothing more than an 8 penny nail, bent on a vice with assistance from a small hammer. It works great, at least it does for my needs. Pictures attached.
Eddie
-
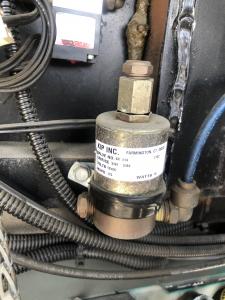
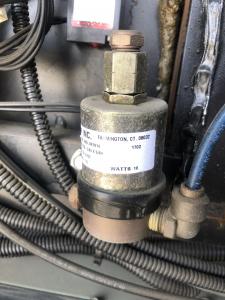
File uploading feature reestablished... Added additional pics showing solenoid air valve removed from firewall. Adjustment air flow screws now visible, air flow adjustments finely tuned, lastly reinstalled air valve onto firewall. Amazingly the air valve is mounted in such a position on firewall the air adjusting screws are not at all apparent. I also discovered my solenoid air valve is manufactured by Humprey. These Humprey Pneumatic D1052 valves complete with solenoid are readily available at Northwest RV Supply, cost is about $30.
-
With the temporary shutdown of FMCA forums I was delayed in reporting I was able to finally solve the violent opening of my entry stairwell cover. After further inspection, it turned out my 3 port solenoid air valve did indeed have the two air flow adjusting screws. Now stairwell cover opens and closes gently. I had to remove the air valve from firewall to discover and access the adjustment screws. After properly adjusting the air flow I reattached valve to firewall. I was going to attach a picture of air valve showing previously hidden air adjustment port , but it appears the feature of posting news pics has been disabled. Thanks to all who offered suggestions.
-
-
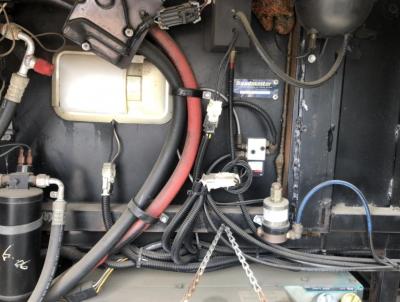
Hi all... I’m reaching out for much needed advice on how to solve my ongoing problem with opening my stairwell cover in my 2003 Monaco Cayman. Every time I activate my stairwell cover, it opens with such tremendous force the sound shockwave startles all onboard.The first problem I encountered was trying to locate the air control valve, as it is not located in the roadside compartment under drivers seat as stated in Monaco Cayman owners manual. Ugh! After searching for a bit, I believe I located that rascal on the firewall just above the generator.
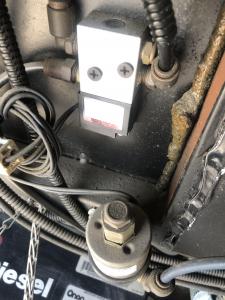
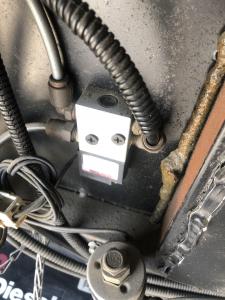
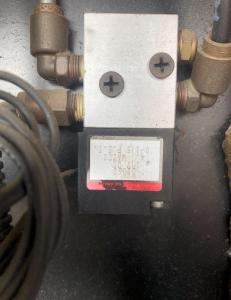
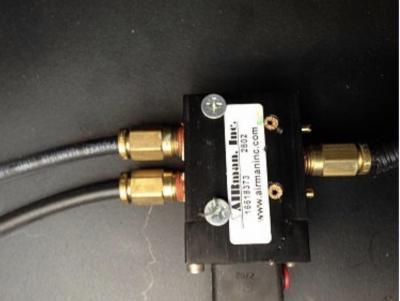
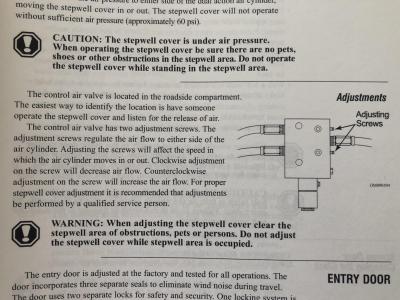
Unfortunately I do not believe my air control valve has the adjusting screws to regulate the air pressure through the air control valve [I uploaded pics of mine without adjusting screws, and another I found online Airman Inc with adjusting screws, another image from my owners manual showing adjusting screws, and lastly, an overall image of firewall with air control valve located mid picture slightly to right].
First off are these control air valves with adjusting screws readily available for purchase? I’m having one heck of a time, simply trying to locate and obtain a proper control air valve with needed adjusting screws.
I will say that when stairwell cover retracts to its closed position, it does so slowly and quietly [no issues when closing]. I’d like it to open as slowly as it does when it retracts.
Any advise is warmly welcomed.
Eddie -
Great idea, it’s an 03’. Thank you.😊
-
I’ve been wondering if it’s possible to install fully automatic / adjustable gas and brake pedals [like those in Camelots] on a Monaco Cayman Diesel Pusher? If that’s not a viable option, are there any kits available to extend the brake and gas pedals [non adjustable]? Thanks in advance for any suggestions. Eddie
-
Yes, I re-water tested after applying the silicone, and as far as I can determine the leak has been rectified. One thing I know for certain is water no longer migrates down behind lower facia trim. After the next hard rain ☔ I’ll know. Fingers crossed . . .
Eddie
-
Good evening all,
Sorry I’ve been away for so long, unfortunately work tends to get in the way of the things I truly enjoy in life.
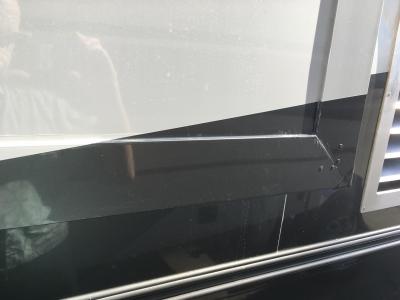
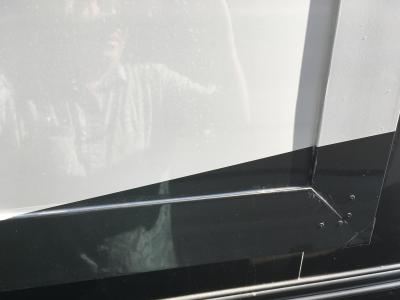
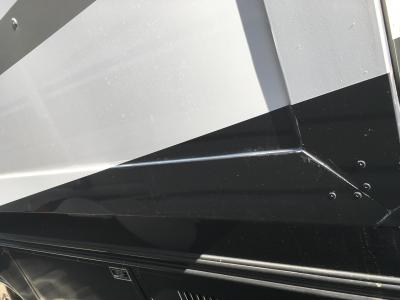
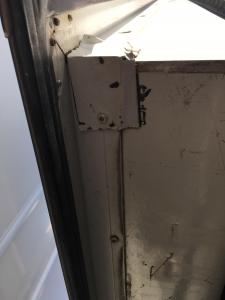
The really good news for me is I discovered the mystery of my bedroom slide water leak. After much research it turned out to be another Monaco factory defect. Simply stated silicone was missing on the lower right hand corner of slide out facia trim piece. All this time I wrongly assumed the factory applied silicone under the trim, as not to mess up the paint job. This was not the case. After applying much water (with slides in) water continued to find its way onto my bedroom carpet. Long story short... water made its way down behind lower right hand corner of slideout facia trim. Then as the volume of water built up behind the trim it traveled on top of angle iron [about 1 1/2” wide], which allowed water to travel over and beyond rubber seals, then dripping [as if it were a waterfall] onto bedroom carpet. {You can see where I’ve applied silicone at bottom slideout trim piece} Pictures attached...
Leak problem solved. Now, when I can afford I will replace interior bedroom flooring.
Eddie
-
Thanks everyone for your many contributions. Now I have a better understanding on how slide seals should appear [flipped outward] and how to properly maintain the seals [lubricated] to provide a longer life. I just recently had my seams on the roof resealed, so I'm quite sure nothing is leaking from those [Believe it or not the end cap is sealed, I know the photo appears to indicate the seal to be bad]. As far as under my slide awning, what exactly should I be paying close attention to?
Eddie
-
-
jleamont, that is a good question.
From my memory the seal which wraps around the opening is firmly against the opening on the outside of opening.
I will need to drop by my coach, open the slide and I'll take some photos.
Eddie
-
Corkey thanks for your reply...
I definitely need a professional to diagnose and ultimately make the proper repair as I am at a loss at the moment.
Eddie
-
I am in need of replacing the rubber seals on the rear bedroom slide out on my 2003 Monaco Cayman. I've noticed it pools water on floor at rear corner of bedroom slide out. For the life of me I cannot detect any water entering the coach while a garden hose is applying significant amounts of water to the slide out. However, after a heavy rain I always notice saturated floor carpeting at read corner of bedroom slide out. With Monaco going bankrupt and purchased by Navistar are there any dealers I can take my Cayman for professional slide out seal replacement. Another thought I had are mobile RV technicians capable of performing such a service? Any advice or suggestions is greatly appreciated.
Eddie
-
I always use my Sams Club, Sams Plus MasterCard for all of my diesel and gasoline purchases. I receive 5% discount on first $6,000 annually, after $6,000 discount is reduced to 1% for remainder of year. The 5% is paid out annually [via mailed check] on your sign up anniversary date.
-
-
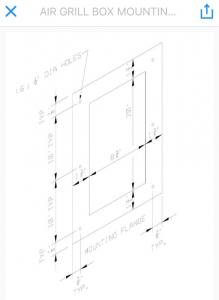
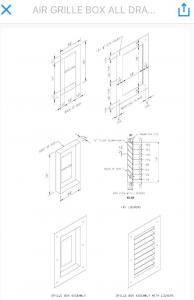
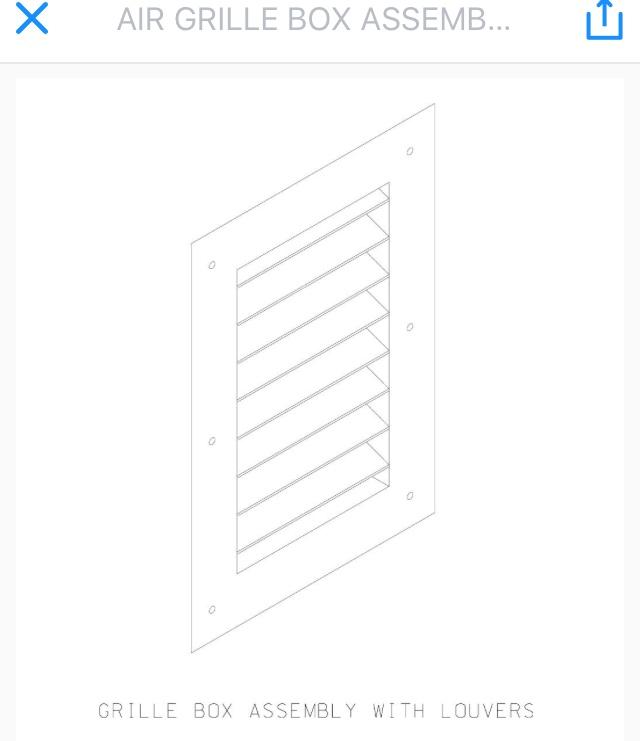
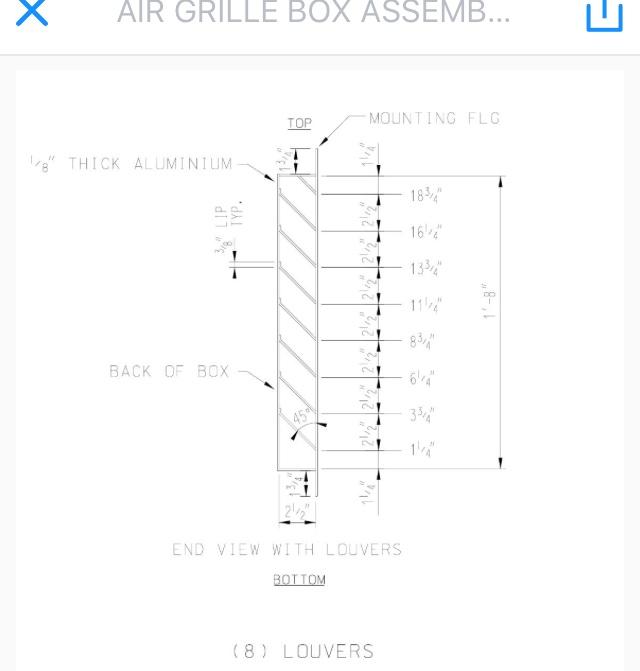
Hi all, it has taken me the better part of six months to find a reasonably priced CNC machinist to fabricate and weld my custom aluminum engine air intake grille. I was discussing my air intake situation with my auto mechanic, and he mentioned he might know someone who could fabricate and weld the air intake grille. As it happened I had a set of drawing prints in my shoulder bag so I gave those to him. Two days later my mechanic calls with his CNC contact guy which he handed his phone. Long story short, my custom 1/8" thick aluminum air intake grille was CNC fabricated, formed and welded for $650. Sounds like a lot, but considering it was a one off, not so bad in my opinion. I found my CNC contact only 4 weeks ago. Saturday late morning I received the final product. I was more than satisfied, as the quality is superb. The factory installed air intake box water drain hose which was pinched was removed. A new hole drilled up through the floor directly under drain tank fitting. Then, reusing the drain hose, I switched ends of hose, installing the formerly outside bottom up through the newly drilled floor hole, snugly attaching it to air intake box drain fitting. I then used a 1/8" thick 4"x8" aluminum plate with 5/8" diameter hole to allow drain hose to pass through. Applying a liberal amount of silicone sealant before securing with 4 wood screws. I have a few smudges which you can clearly see in the uploaded pics. I will rub those out this coming weekend with a red Brillo pad. I will upload some photos tonight with more to come later in the week. I'm very happy with the overall installation. It is now time to get my Cayman back out on the road again. Eddie
-
Good evening Manholt,
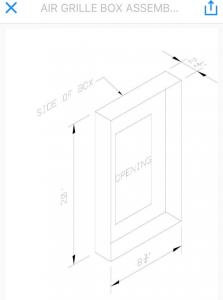
Yes, this plastic Air Intake box is awful. What a mess it has created. Once the stainless steel replacement air intake box and grille is fabricated and installed, I’ll most certainly post updated photos. After that, I’ll begin the drudgery of having to pull ruined carpet and flooring. Not to mention disassembling my entire rear closet with drawers, wardrobe and sliding mirrored doors. I’m not looking forward to this at all, but it must be done.
Thanks very much for your encouragement.
Eddie
-
Kaypsmith,
The fact that you work with someone you trust, as well as having a familiar understanding of how the various components on a motorhome function, I’m feeling pretty confident your suggestion of using the metalshop close to you just might work out. I’ll PM you later today. As always, thank you kindly...
Eddie
-
Good morning kaypsmith,
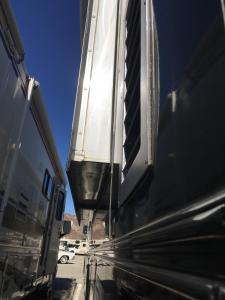
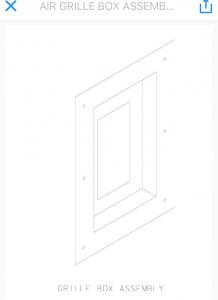
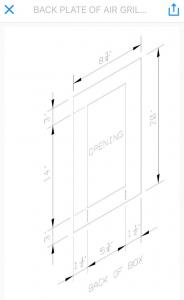
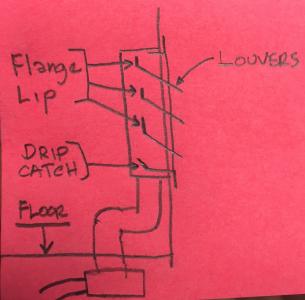
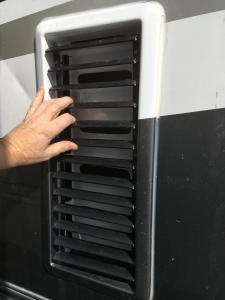
The brown grille is made of aluminum, and it’s housing receptacle is made of plastic. I’ll need a complete redesign. If you’ll notice the grille itself, does not have much of a slope to allow water run off. Additionally the grille louvres are much too short to do any good keeping water out. I’ve attached a very simplified sketch of something that might work better in preventing water migrating into interior of my bedroom area.
So, bottom line is an exact replacement will not resolve my issue.
Thanks so much for you input...
-
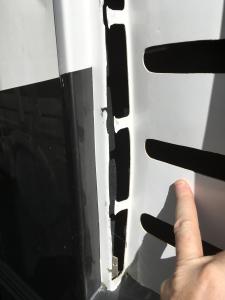
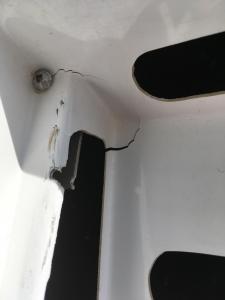
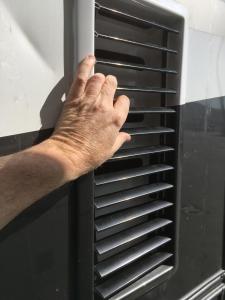
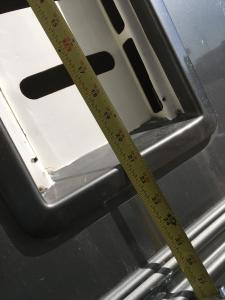
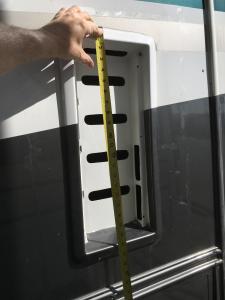
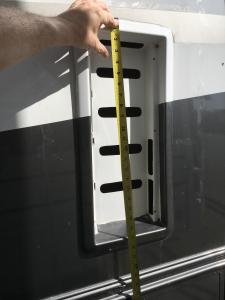
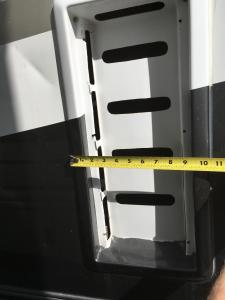
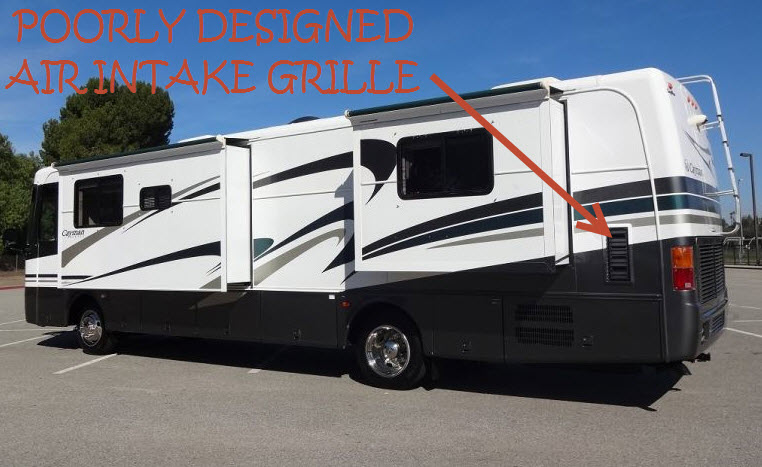
I’ve recently discovered a major design flaw with my 2003 Monaco Cayman’s diesel engine air intake grille. What has been happening is water migrates through this poorly designed grille and it has warped my bedroom floor behind the closet. I’ll pull up the wooden floor and replace it with marine grade plywood, but first I’ll need to address replacing this worthless factory installed air intake grille [see pics]. BTW, the cracks you’ll notice in the pics were recently created when I took off this grille to inspect behind it [grille is old and brittle]. These cracks have nothing whatsoever to do with water migrating into the interior of my Cayman.
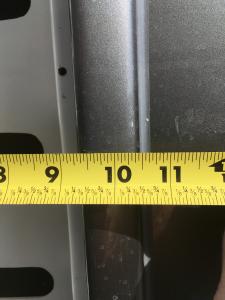
I’m thinking about having a custom made 1/16” [0.0625] thick aluminum grill fabricated and welded. The overall dimensions “horizontal outside of flange lip” to “vertical outside of flange lip” are: 10 ½” H x 22” V.
Has anyone had a similar experience? Additionally, anyone out there know of someone with experience that actually custom manufactures such grilles?
Any and all suggestions are greatly appreciated.
Thanks in advance...
Eddie




FMCA plate is crap
in Membership/Benefits
Posted · Report reply
I just stumbled onto this topic, and I must agree, the FMCA member number egg with vinyl sticker [whether or not it peels off] appears to be cheaply made, which it is. When I originally joined FMCA the first thing I did after receiving my membership package, with the less than stellar looking FMCA member number eggs, was to order the injection molded raised number oval egg set. I am so glad I did, as these injection molded plates do not look as though they were purchased at a dollar store bargain bin. It is sad FMCA membership department does not listen carefully to its membership base, especially the newest members amongst us. The only sure way to grow your member base is by listening. If it is a matter of money, then simply charge accordingly the first year of membership, and include FMCA injection molded raised member number egg, doing away the bargain basement vinyl sticker version. Those are my two cents...
Eddie