-
Content Count
255 -
Joined
-
Last visited
Posts posted by eric@babin.com
-
-
2014 Itasca Ellipse 42QD
50amp coach
Over a year ago I had some sort of surge that ended up knocking out my ATS. Had the ATS replaced and everything is fine.....
However, shortly after I noticed the plug (that plugs into the pedestal) would get hot.... not something you really check for, but when I'd go to unplug is was pretty darn hot.... I began to wonder.... "Was it hot before????"
I began using a Progressive EMS-PT50x thinking it was a pedestal problem.... well, the EMS plug never got hot, but my coach plug was still getting hot when plugged into the EMS.
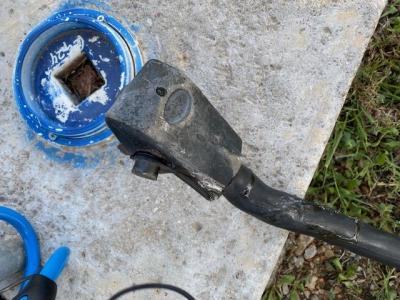
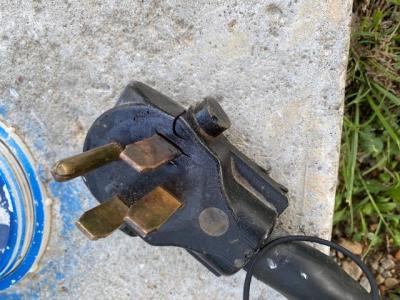
A couple days ago unplugging I noticed my plug was cracked and had some melting damage. I ran another test at the next stop... plugged a 50 amp extension into the pedestal and them my plug into the extension.... only my plug was hot.... the extension plug was NOT hot....
My thought, when there was the surge a year ago it damaged one line at the plug causing resistance, thus heating up, causing more damage over time.
How to fix? Replace the plug!
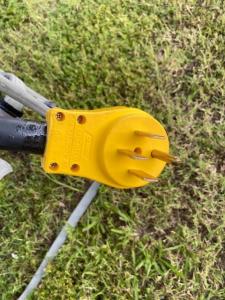
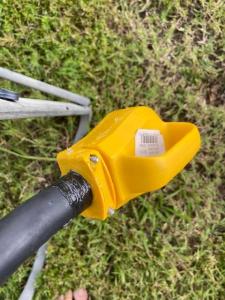
Here is the replacement... I found a Camco 50 amp plug at a nearby KOA. Home Depot, Lowes, nor Walmart had them in stock. I did order one from Amazon but decided not to wait for that.
I'll keep that one as a spare.
I found a good Youtube video
Here are my instructions, pretty much the same as he shows in the video.
Unplug coach.
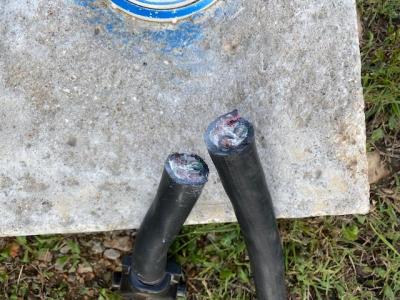
Cut off plug several inches down (to be sure to be past any heat damage) with a hacksaw.
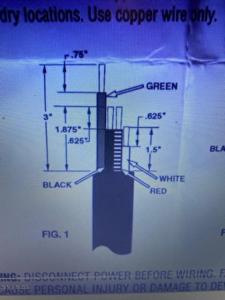
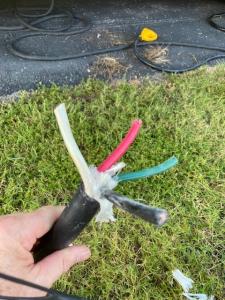
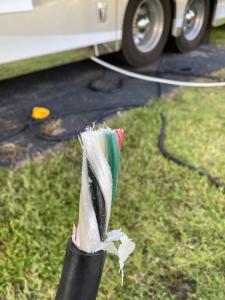
Remove black insulation around all wires 3" down.
Cut cloth stuff back to same as black insulation.
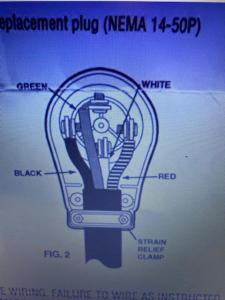
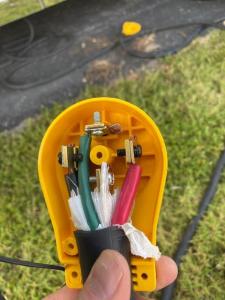
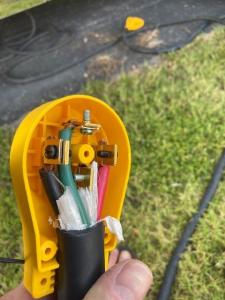
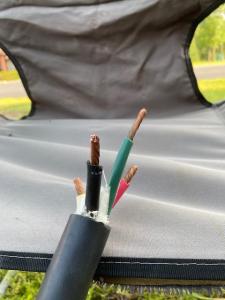
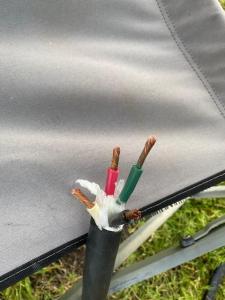
Cut wires to length shown in picture. Green will be the longest, white the shorest. Black and red are the same length between the two.
Strip all wires to have 3/4" showing
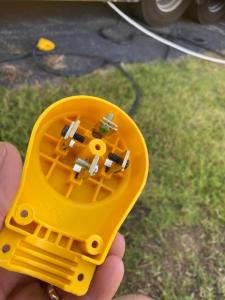
take each plug prong out, one at a time and attached to the appropriate colored wire.
wait to replace prong into casing until all prongs are attached.
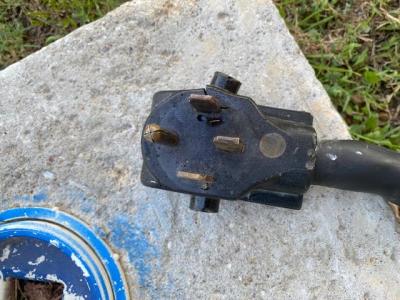
once all prongs are placed in the proper place (use picture)
once all are in place, place cover on and put the 3 short screws in and tighten.
once cover is on with it's 3 short screws put some sealant at location where you are about to place the holding clamp on.
once sealant is there, (be careful not to get sealant up into the plug housing), then place holding clamp and secure with the 2 long screws.
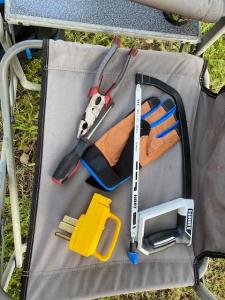
Pictures included have tools used. The only thing not in a razor knife used to get wire insulation off and measuring tape.
Tools: Hacksaw, wire cutters (lineman plyers), phillips screwdriver, gloves, measuring tape, sealant.
^^Do not use the video on Amazon for reference. That video is for a 30 amp plug.
I got it from KOA for $24. Less on Amazon but couldn't way 2 days.
Once I had the old plug off I check resistance... the line that was slowly melting over time had a much higher resistance than the other.
*****NOTE: Pictures are NOT in order... Yellow plug is the new one, black plug is the old.*****
-
I've been "full time" traveling going on 5 years now... I've been meaning to put together a binder in case of roadside problems but never got around to it...
I've been broken down a few times and it's always very stressful finding the info I need....
FINALLY I am putting one together.
So far in the binder I've got my FMCA Roadside Assistance number and contract, Freightliner help number, Cummins help number, Lippert, and Winnebago (I own an Itasca).
I've also got engine ESN#,
filters and belt part numbers,
my tire info,
coach dimensions including weight
generator info (model #, S/N, oil type, filter info etc)
and I've even got the build sheet for all the "RV" related part and serial numbers....
What else may be important... especially in the event of a roadside breakdown (I'm now even going as far as having spare serpintine belt, fuel filter, and separator...... leaning toward carrying a spare tire even!)
-
Coleman Mach 8 A/C units
So I got some foaming no rinse coil cleaner to clean my coils on the units.... I've not cleaned them before, and one unit is about years old, and the other about 6 years old.
Took the unit covers off and noticed the coils didn't really look dirty. I use these A/C units daily. Is that normal for them not to be dirty?
I cleaned them using the spray cleaner anyway.... I guess maybe there was some dirt in there somewhere?
-
Last update: They've updated the software and it still doesn't work.
Requesting a refund today!
-
I had some body work that needed to be done to our 2014 Itasca Ellipse 42QD. I had used Texas Custom Coach located in Pipe Creek Texas in the past for things such as Aqua Hot, A/C, scheduled maintenance etc and they have always done a great job so why not let them do the body/fiberglass and paint work. They began working on my coach the day it arrived, not like some others that have your RV sit for a week or more until they have time to get to it. When I picked up the RV it looked like new. Even knowing exactly where the damage was, I couldn't tell it had ever been wrecked. Best of all, they worked very well with my insurance company so it was a very very easy process. I highly encourage you that if you are within a few days drive of Texas Custom Coach (just NW of San Antonio TX) you set up an appointment to have them complete any work you may need done, and want done right!
Also a very positive recommendation for Progressive Insurance. They were perfect throughout this process.
-
On 5/15/2021 at 8:16 PM, manholt said:Automatic Generator Start. You should have it, when the batteries get to low from inverter when traveling the AGS kicks in and re charges the batteries, when they are full it kicks off. Same if your in a RV Park on 50/30 amp and there is a loss of power, the Generator starts up, until power comes on....just like a generator system for a house!
Look in your owners manual.
ah... yes... we have that but never use it. So, not sure it'd be a big deal if the Micro-air didn't work with it.
-
AGS? Not sure what that is..... ????
-
Coach: 2014 Itasca Ellipse 42QD w/ 3 rooftop Colemans and AquaHot 450D
**Will update once they either fix the issue, don't fix the issue, or I get tired of waiting**
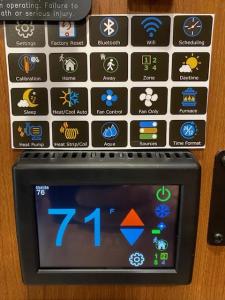
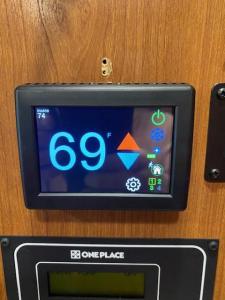
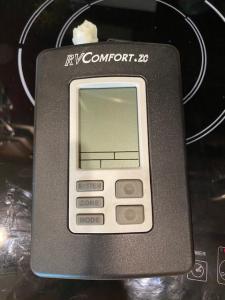
We were having an issue where our thermostat RVComfort.zc would just stop working... push any button and nothing would happen... not even the background light. We'd have to completely power down everything including batteries to reset it.
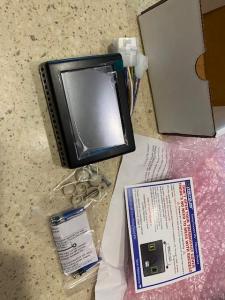
So, I decided the Micro-Air Easy Touch RV Thermostat might be good for us.
I liked it because it allows you to monitor your inside temperature, and adjust from anywhere via your phone using their app. (some models also include outdoor temp via matching up with local weather app but ours did not) This is great if you have pets and leave them in there when you run errands etc)
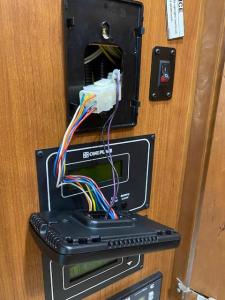
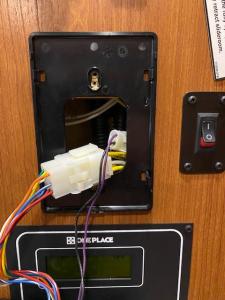
The good: Works via bluetooth if you are in your coach, or wifi if elsewhere. Looks great. VERY easy to install. "Plug and play".
The bad: To change zones via the thermostat is difficult. The zone selection numbers are very very tiny, and my fingers are not. I found it easier to grab my phone use change zones that way. HERE IS THE REALLY BAD: The current model does NOT WORK with AquaHot. It is a known problem and they say they are testing a fix right now and we should receive an updated working version soon. We'll see.
If I don't have a working replacement by June 1 I guess I'll be asking for a refund and return the unit.
Summary: If you don't have AquaHot it's a pretty neat thermostat allowing you to monitor and change your RV thermostat settings from anywhere, as long as you have good wifi at your coach. If you have AquaHot I'd hold off until they figure this thing out.
Link to product: https://www.microair.net/products/easytouch-rv-thermostat?variant=32199143555156
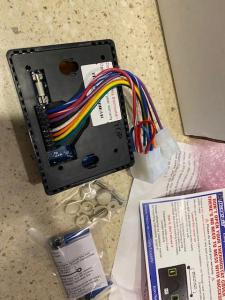
Below are pictures of old and new.
-
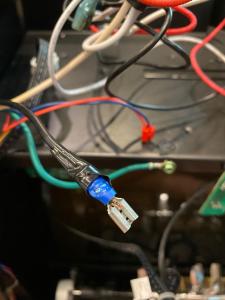
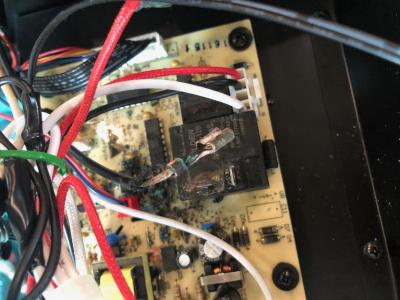
6 hours ago, manholt said:Eric, on picture #3, the copper wire is sticking out from the blue shield...you'll have a short again!
I actually added the extension (about 3" because this was the wire I had to cut the damage off of) to that and taped it up. Should be good.
Nice eye though!
-
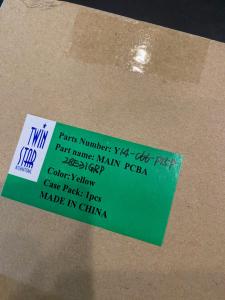
Update: FIXED!
Yes.... I am worried about why the wire burned.... I made sure to test it before putting all the panels back on so I could inspect it when with it on.
Replaced the main board and it works perfect.
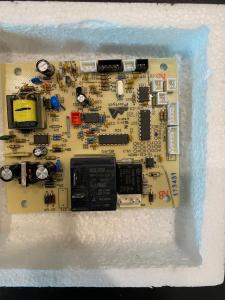
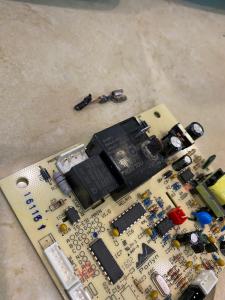
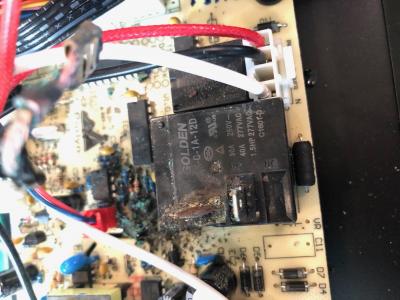
This set of pictures show a better shot of the damaged board and wire.
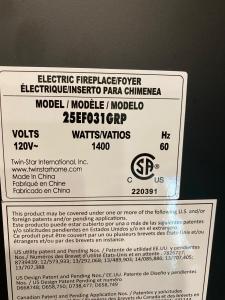
Also pic of new board, new board box showing part number, bad wire fix, and the back panel of the fireplace showing model number.
I did have to cut a couple inches off the damaged wire which meant I had to add a couple inches back with a new wire so it would reach the circuit board.
I have to say Twin Star had great customer service. They actually called me to tell me they don't have a replacement for the wire but could send a new circuit board. I agreed explaining fixing a wire is easy.... Although the warranty was up, they sent a new blower assembly (first trouble ticket explained in earlier post) and circuit board (this trouble ticket) with only charging me shipping on the blower motor.
Total cost of repair: $27.50.
Total time: 2 hours.
-
Update:
They replied to my new trouble ticket.
They are sending a new circuit board at no cost. Even with no shipping this time!
I'll update when I get it and replace.
-
"It's always something"
2014 Itasca Ellipse 4QD
Fireplace:: ClassicFlame 25EF031 GRP https://www.amazon.com/gp/product/B00K75P80A/ref=ppx_yo_dt_b_search_asin_title?ie=UTF8&psc=1
Purchased on Amazon to replace the original insert. This is the nearest I could find to the original.
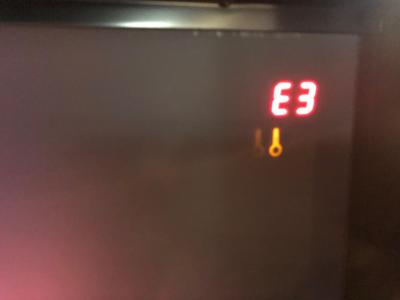
I started getting an E3 code which means overheat protection has engaged. "Unplug for 30 minutes, plug back in, and test, if it continues, contact customer service".
Yes, it continued, so I submitted a trouble ticket to Twin-Star Customer Service: https://www.tsicustomerservice.com/
They got back to me via the trouble ticket pretty quick. They sent a new blower assembly for shipping cost only ($27.50). Not bad since it was out of warranty.
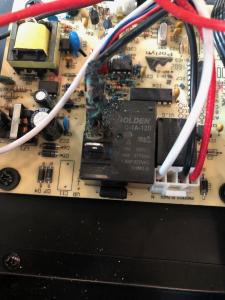
Replaced the part.... it did the same thing.... E3 error code.... well, upon closer inspection, I noticed there was a burnt wire connected to what I believe to be a relay. (see pictures). The burnt wire was the hot wire (black) coming in from the plug.
Just submitted another trouble ticket.... I guess I need a new circuit board for the insert.
I'll update when I can.
-
updated / edited to show install and final product.
-
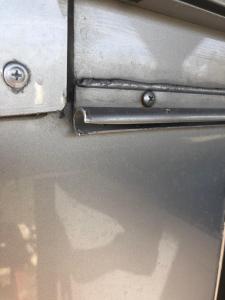
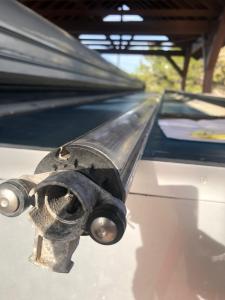
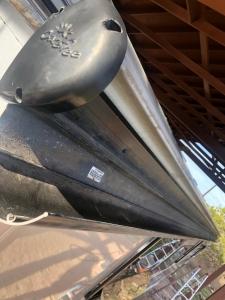
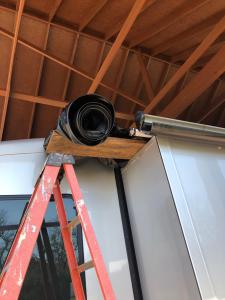
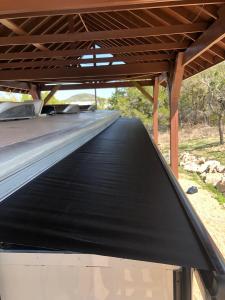
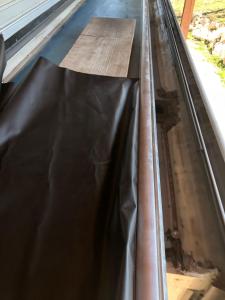
I'm replacing the slide out canopy (awning) cover. Documenting the replacement for reference for the next person that needs to do this.
Me: 2014 Itasca Ellipse 42QD (same as Winnebago Tour)
This is specifically for the super slide / full wall slide.... you know the one... 29' give or take.
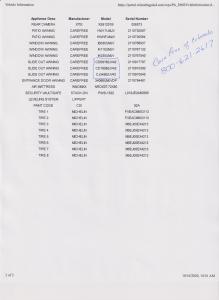
I contacted Winnebago with my VIN and they replied back with part numbers for all my appliances.
Winnebago contact:Terry 800-933-7742 / info@winnebagoparts.com
Providing Winnebago parts for over 25 years
Parts for your Winnebago is our only business!
Call 800-933-7742 or 641-896-2222 M-F, 8-5 Central
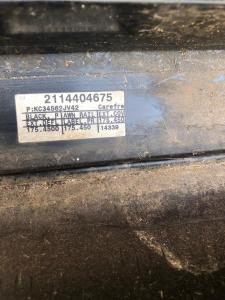
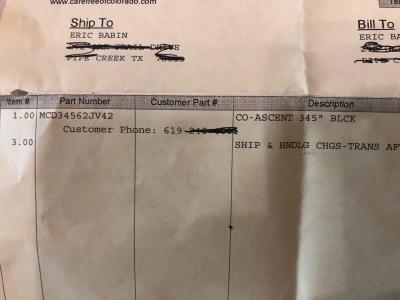
www.winnebagoparts.comHe told me Carefree makes the product and I should contact them with the part number he gave me. (see picture below for my coach's part number listing)
Carefree contact: 303-469-3324
Cost of part: $320.50 including shipping to TX
I used this video to review what I was in store for:
https://www.youtube.com/watch?v=3-LEyBqycMY
I messed up on putting the holding pin to keep it from spinning out.... yep... this one has it on both sides and I screwed it up on each....
I used this link to figure out how many spins I needed to get the tension back on the springs:
https://www.carefreeofcolorado.com/documents/Slideout-Cover-Service-Manual.pdf
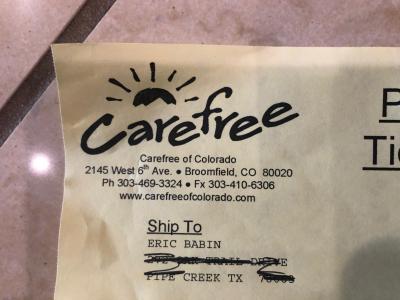
Below are some pictures for reference to include the list of part numbers Winnebago sent me, the sticker on the awning roller bracket with P/N, invoice from Carefree etc.
I'll be putting it on in a day or two and will share any additional info that may be helpful.
OK.... now for the install of the new cover...
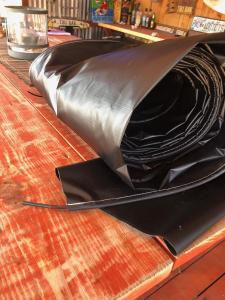
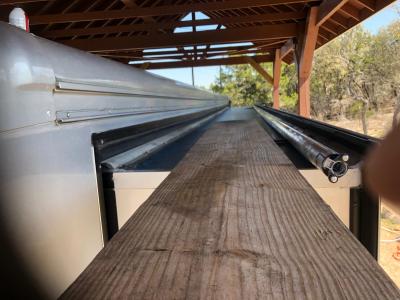
I rolled it out flat, then folded it in such a way the two leads that will go into the channels were about the same width apart as the channels (the channel on side of RV, and channel in the roller assembly which was laying on top of the slide).
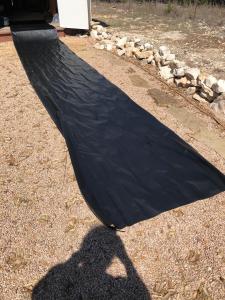
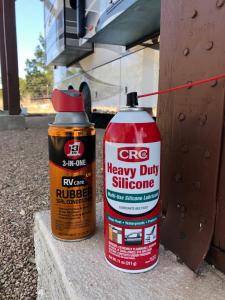
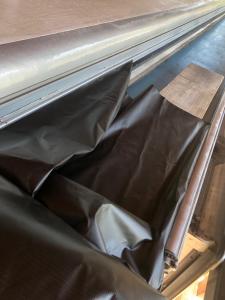
I then rolled the cover so I could place it on a 2x12 sticking off the slide and have my wife simply roll the cover fabric out as I pulled it through the channels. I used a silicone lubricant (see pic) to prep each channel. I can tell you this 29' of channel sliding went much easier than I anticipated.... took maybe 10 minutes if that.
Once the fabric was on the in both channels we rolled the excess fabric onto the roller assembly, put it over the edge of the slide and I placed my end into the end cap that was still in place. I secured with the fastening bolt, then went to the other side to place the end cap on, and secure with the bolt. I can tell you I had to make another quarter turn on the spring to get the end to align correctly with the end cap. (used locking pliers to do this.... pull out the pin that prevents the spring from unwinding, turn 1/4 turn, place pin back in... be sure the pin is facing outward or you'll not get the rolling assembly back into the channel)
Now the fun part.... we tried to knock out the pins (the pins that are keeping roller / spring from unwinding) at the same time with pliers and a hammer... well, I knocked mine out, but my wife missed hers..... strange.... no big deal.... I went down to her end, knocked it out and wham a lamb a ding dong it tighted up just fine.
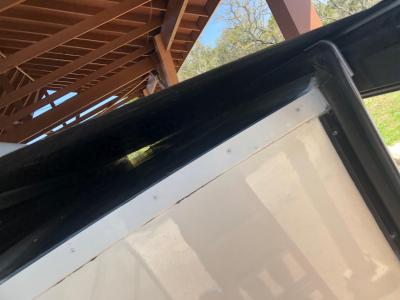
rotated the cover back up to cover the awning roller assembly, put in the top screw on each side and we're done.
Ran a test.... works perfect.... oh, don't forget to put the set screws into the coach side channel... one in front, one in back.
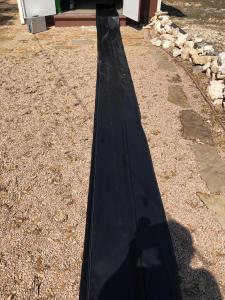
Here are the installation pictures.... I also treated the rubber gaskets on coach side and slide side as long as I had the cover off.... used the spray in the pictures.
Total time spent:
Remove old - almost an hour
Treat gaskets and clean slide top, etc - about 30 minutes
Install new - Almost an hour
Total: 2.5-3.0 hours....
Not bad... remember... this is a 29 foot slide out!
I think I could do it again in less than an hour.
Difficulty of task.... maybe a 5 out of 10.
Total money spent: $320 on parts, zero on labor...
Probably would have cost 700-800 to have that done at a shop!
-
I have an update....
so.... I cleaned off where the clamp was and left it overnight....
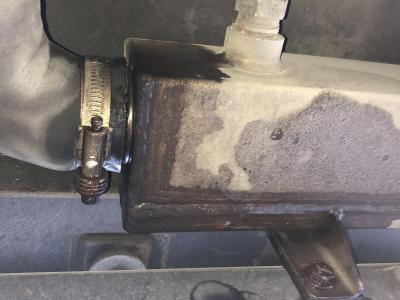
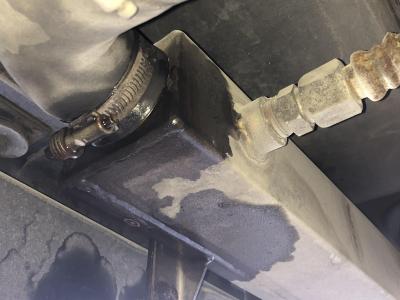
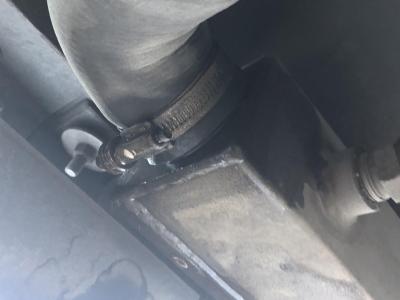
The next day it had a drip or two at the clamp on the bottom of the hose and also at the top... it's a very short 90 degree hose....
Gave each side a couple turns to tighten....
We did need to move the coach that day to dump.... ran for about 20 minutes.... no leak.
parked overnight..... checked today.... no leak at all.
"Easy day".
-
1 hour ago, manholt said:Eric, in the engine compartment you should have a line with a male plug, most times it just hangs there and you'll have a female plug. That's for your block heater, if not already plugged in, do so about 2+ hours before starting engine.
I've got two switches on my main control panel inside.
One is labeled "engine heater", when I turn it on it pulls about 7 amps. Another is part of my aquahot switches labeled "engine preheat".
I assume if I have these, I won't have the male plug hanging in the back / engine compartment. ???? (2014 Itasca Ellipse Cummins 450hp)
-
47 minutes ago, five said:As an aside, you don't need to turn the engine heat on unless you are going to start it. If you are going to start it, Cummins says to turn the pre heat on if the temp will be 40 degrees are lower. They are all different, my DD says to turn the eng heat on if 50 or lower.
That is what I figured but.... just had the oil changed and was working under the "better safe than sorry" theory to keep the engine happy. Wasn't sure exactly what the heater was "heating".
-
I climbed under and got these pictures.... unless the drip is coming from above and dropping right on top of this hose connection I think you are right... just needs a little tightening. It has stopped leaking... I put some card board under it to verify.... 3 drops over a 3 hour period earlier... and nothing more since. Wednesday afternoon it should be above freezing so we'll be doing our weekly driving up the hill to dump... I'll be sure that is the location before we do that.
-
2 hours ago, richard5933 said:Most any NAPA store will also have dip strips you can use to check the coolant protection level as well as various additives for some coolant types.
From what it sounds like, you've got some drips from your coolant lines. For us up here in the great frozen north, this can be somewhat normal - especially for older rigs. Not sure how old your coach is (you might want to add this to your signature) so I can't say for certain if this is what's happening.
As the rubber in the coolant lines gets older, it gets harder and it also tends to get compressed between the clamps and the metal flange it's mounted to. As the metal flange shrinks from the cold, the rubber doesn't have enough elasticity to fill the newly formed gap when the flange got ever-so-slightly smaller.
On my 46-year-old coach I go through this every winter. As temps drop to below freezing I'll start to get a few drips from my older coolant lines. It usually takes only a quarter turn or so on the hose clamps to take care of the problem. Sometimes a bit more. The hoses that take more than a quarter turn are put on the list to be replaced during the coming spring.
It can also help if you install constant-tension clamps on your coolant lines. These are a particular type of hose clamp which has a spring tensioner in the clamping device, and as things shrink up in the cold the clamp tries to continue tightening to prevent these little annoyance leaks.
All that said, if your coolant is not protecting your system at the current temps it's always possible that something more serious has happened. Get our your strongest flashlight and try and find where the leak is coming from. If it's from your engine block you will need to investigate further before restarting. If it's from any of the lines, chase it back to find the leaking clamp and give it a turn. Sometimes these little leaks can be quite devious and difficult to find, as the little drops will wind their way around multiple parts before making themselves visible. Just remember, if the engine is not being run drips always go downhill, not up.
Sounds like a plan.....
I did edit the original post with coach info which is 2014 Itasca Ellipse Cummins 450hp.
-
21 minutes ago, dickandlois said:Eric. The first thing that come to mind, Is you'r antifreeze low freeze point is not set low enough.
Not nominal temps in your part of the world. Do you have a Coolant Hydrometer ? Think I would see what the coolant low point is reading first.
Outsets like auto Zone sell them - If they are not sold out at the time!
Up north we set the low point at -35 degrees F.
Let us know the reading. That is the best starting point for now.
Rich.
ok.... not going anywhere today... but will do once I can get out...... too icy out there today and probably tomorrow.
-
Equipment: 2014 Itasca Ellipse / Cummins 450hp
I know it's cold everywhere.... but, we aren't used to it here in south central Texas.
It's been below freezing for a couple days, and got down to about 3 above zero last night.
We do live in the RV, and have had engine heater on since it got really cold.
I just noticed the snow under the radiator has some pink drops which means I have some sort of coolant leak. The top tank (surge tank?) shows fluid at it's prior level.
I haven't gotten under there to really look yet....
Wondering if I should start the engine up to see if I have issues..... or wait until I can check for the leak location?
As mentioned, level appears fine.
-
On 2/3/2021 at 10:03 AM, manholt said:eric, IMHO you have a Allison 3000.
Bill is correct on most of the rest.

Hill Country, Mobil RV Service by Robert and Richard, I believe Robert just retired, so Richard would be the rep now for our area and Houston! Sorry. I do not have his phone #! Only other one I know is Midnight Diesel Express in Kerrville, don't know if they service your area. Why not let Texas Custom coach do it?
Is that this guy? Great service!
-
1 hour ago, wildebill308 said:You are good to go. From the Allison web site,
"We recommend you use fluid analysis as the primary method for determining fluid change intervals."
Using my transmission serial number I found a duty cycle of 300,000 -400,000 miles using TS-296 transmission fluid.
https://www.allisontransmission.com/my-allison/customer
I would go enter your serial number as you can find lots of good information.
I would run a good full synthetic gear oil like Valvoline or Mobile 1 in the appropriate weight. I ran royal purple in my last coach.
Bill
^^Great info.
Thank you!
-
My equipment: 2014 Itasca Ellipse 42qd Cummins 450 / Allison 6sp (I think an Allison 4000)
Miles: 54,000
I was thinking it was time to change my transmission fluid and filter so I checked the manual.... It gave me instructions on how to have the system tell me what % of life for the fluid is remaining.....
It says 87% remaining. How is that possible? I bought the coach in 2017 with 17,000 miles on it so I'm pretty sure it's the original fluid.
So..... should I have it changed or believe the 87% number?
Also.... thinking of changing differential fluid also.... thoughts?
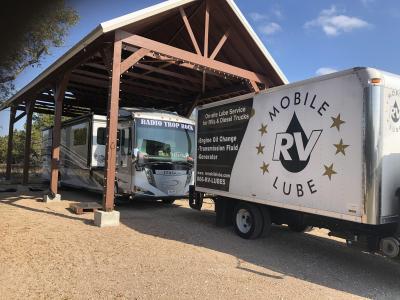
Lastly.... if you know a good mobile RV Mobile Lube service in the Texas Hill Country, just NE of San Antonio I'd love to hear about it.


REPLACING 50 AMP MALE PLUG
in Electrical
Posted · Report reply
Yes.... I always turn the breaker off prior to plugging in or out.
Yes..... same here.