-
Content Count
4234 -
Joined
-
Last visited
-
Days Won
12
Content Type
Profiles
Forums
Blogs
Gallery
Everything posted by dickandlois
-
There are many thoughts on this issue. I have picked up extended service on my coaches, because they have all been used. I try real hard to look them over and try to check and make sure things work. After a year or two I often drop the plans if there are no recalls, coach or chassis issues. I prefer to have control over who repairs or replaces items that I can not do myself. And if I have been real good about putting some money into my "if it breaks" account. I kind of go it alone. The need to have all the paperwork and records for the claims can be overwhelming. You have to be comfortable with the decision you make. R.M.
-
Brett, is right on top of the issue and you also. Mixing of the fluids is just not good in itself. Many of the seals used in hydraulic systems do not like some of fluids used.The fact that you followed up after finding what took place will save you in many ways down the road. Safe and happy trails. R.M.
-
From the album: Alternator problems
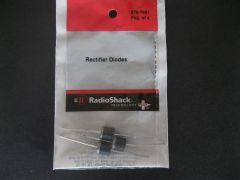
This is a picture of a package of four diodes, one is missing because its now in my alternator excitation circuit and the engine shuts down as soon as the key is turned off. Not a defective ignition switch is this case.© R.M.
-
From the album: Alternator problems
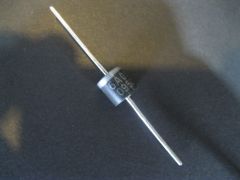
The banded end is connected to the Alternator exciter or (I) ignition terminal, the other end goes to the ignition / key switch side of the circuit.© R.M.
-
From the album: Alternator problems
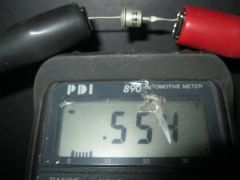
This picture shows the meter connected with the diode rotated 180deg. Negative lead to the left side ,but connected to the bar or banded end of the diode and the positive lead connected to the arrow end of the diode. In this setup the meter reads .554 volts. This is the standard reading of a good diode, they have a 1/2 volt drop across the junction when conducting.© R.M.
-
From the album: Alternator problems
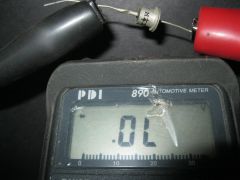
This picture shows a meter with a diode testing mode using a voltage to check for a defective diode. Negative lead left side-arrow end, positive lead right-the bar or band end. Reading O.L.= open lead / open circuit. The diode is a one way valve, the positive supply is now on the banded end and no current flows back to the ignition circuit.© R.M.
-
From the album: Alternator problems
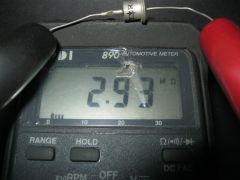
This picture is the connection for reading the forward resistance of the diode. In this case 2.93 Meg ohms. It may seam to be wrong and counter-intuitive, but remember where the supply voltage is coming from. The battery or source voltage is always connected to the arrow end, not the bar or band end. The band end goes to the item needing power. whatever it might be. A light,solenoid alternator or relay.© R.M.
-
From the album: Alternator problems
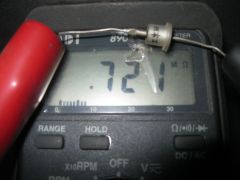
Pictured is the connection for reading the reverse resistance of the diode. In this case .721 Meg ohms.© R.M.
-
From the album: Alternator problems
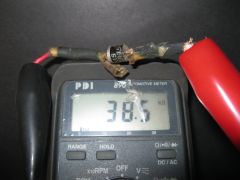
Forward Resistance test of a bad diode. When a diode reads this low in ether direction, IE, any reading in the low K Ohm range. It is defective. Below 400k ohm's ??? maybe is a state we call leaky. Change it. They need to read near, or in the mega ohm range to be good. IE, .700 meg ohms forward resistance to 1.5 and up meg. ohms reverse resistance. Should the diode read open with a voltage test in both directions it is defective. If the diode is open this will cause what looks like a dead alternator, when the only problem maybe the lack of excitation voltage at the alternator when the key is in the start position. Note ! there is voltage on this wire in only the start position not in the run position. No excitation voltage =s no output, so always check to make sure that there is power on this wire when starting the Engine! There is or should be no or a very low voltage present with the key in the run position.© R.M.
-

Ingnition wire to the Alternator exciter connection.
dickandlois posted a gallery image in Members Gallery
From the album: Alternator problems
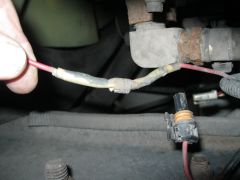
Pictures the harness connection,lower right,the exciter connection for the alternator is above and to the right of the harness connector. The item center picture is the blocking diode in the exciter circuit. All in the same general area in this case,sometimes its a little harder to find the diode;be-leave me its some where in the harness. When this diode fails the coach engine may not stop when one turns off the Key. The engine will eventually stop, but in the case of a diesel engine if there is enough voltage back feeding through this diode it may take some time for the fuel supply to drop low enough to starve the engine of fuel. One can remove and replace a new diode, just seal it up like the OEM connection with shrink tubing and tape. This keeps the connection clean and away from contaminants that will degrade the connections over a relative short time. Should is diode become open,the Alternator will not put out any voltage / Not charging batteries.© R.M.
-
From the album: Alternator problems
This is a picture of the exciter connection and blocking diode. A failed diode can also cause problems. It can fail over time or be damaged when an Alternator fails.© R.M.
-
From the album: Alternator problems
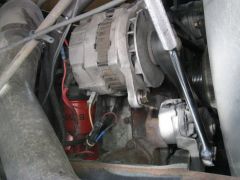
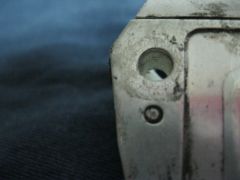
This picture shows the area around one of the mounting holes. If you look closely you can see pit marks where there was arching between the module and the alternator frame. This problem causes the regulator to fail. The noise caused by this problem can show up as faulty codes on VSMpc system readings and errors with the instrument readings. Also,This same problem can also be caused by loose or bad ground connections at the alternator or any number of grounding points in,on or under the coach. So always check for bad grounds first before changing out the alternator.© R.M.
-
From the album: Alternator problems
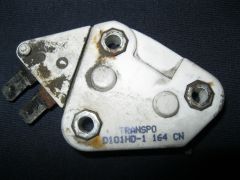
Picture of the module unit. This module also failed! in this case. When they fail you can get both an under voltage or over voltage issue. One should check with the help from a Service Tech. or someone with an understanding of alternators to see how to disable the exciter circuit of the alternator. The reason, You can run many coaches with a generator and a battery charger system on board to keep traveling even if your Alternator fails in regards to its output voltage. This is a good back up plan, just in case there is not a source for a replacement alternator. If the alternator bearings are still good it will act as a pulley to keep the water pump and other items working just like they should. This will allow you to keep going down the road. I have driven well over 2000 miles this way,to a location where a new replacement can be found!!© Taken by R.M.
-

Check Engine Light, 2008 Buick Enclave
dickandlois replied to mfinksr's topic in Toads-Towed Behind Motorhome
Mfink, Pulling the ECM power fuse should keep the check engine code from setting. The one thing you have to remember, that by doing this and you live in a state the has rigid inspection requirements, you will need to drive a number of miles before it will pass. I would think that the garage could give you the code number and if your check engine light comes on an you have someone read the code fault, you will know if its the same old problem. Have the parts store reset it. a copy of the repair orders from your service center should re leave any concerns they might have. Many Parts outlets have code readers now days and will read them for free,hoping you will by some parts. I travel with a code reader, because I have a truck that sets the check engine light from time to time. The problem is the temperature the O2 sender runs at. If I make a number of short trips sometimes it sends a code. Then again it my not come on for a year. always the same code. Hope this helps. R.M. -
William, I have been looking around for some additional information. With the transmission selector blinking, then nothing, wonder if there is an inhibit present. Some of the coaches have the slide outs and other items connected to the transmission control circuits so the coach can not move before all the safety requirements are met. The other thoughts have been covered. Hope you where able to get some LP loaded while going through this issue. R.M.
-
Thurmond, From your response it sound like you have a handle on the problem. Thing is if you never need to use the repaired module it might make a good ebay item or item to list for sale at a Rally. R.M.
-
RM1953, pulling the fan motor may not lead to a solution. Have you looked over the technical information I sent you? IF there is air in the hydraulic lines, the Cooling Fan motor way well be at the top of the system ( High point). That is where the air will get trapped. Air in the system will cause what is referred as cavitation, where the air in the system displaces the fluid. The control valve must be opened fully to try and get the air displaced by opening the output side at the connector enough to let the air out. This must be done with the engine running so the hydraulic pump can pump fluid. I would not try to do this if you are not used to working on a running engine. The other item is when the fluid starts to flow, you will get a spray of fluid at the same time the motor starts to spin, This can cause some very serious injuries. The torque on the motor is quite high. Should have some one working with you to turn off the engine, so you or the other person can quickly tighten the output connection Then restart and run for like 5 min. Remover the temporary jumper powering the control valve. Do connect the wire from the ECM. This is a pulsed circuit that sets the fan speed and should signal the motor to start as soon as the set temperature is reached. The speed of the fan will then change as the engine temperature changes. Temp up speed up / Temp. down speed down. if everything is working. R.M.
-
A follow up to my response to Leo, With a defective ground on the generator this can cause a number of problems with anything in, on; or connected to the coach when running on the Generator. The generator Turbine section is damaged by Eddy currents that build up, burning out the Turbine assembly or any AC motors and devices. This current increases directly with the load on the generator. The greater the load, the greater the eddy current. Causing more and more heat to be generated until it fails. R.M.
-
Leo ! OK, Now you need to check or tell me if there is an AC voltage present across the batteries when the generator is running. If you have some AC ripple present only when the generator is running, There will be a junction box near the generator where the wires from the generator splice into the cable feeding the Main AC power panel. With the generator off, remove the cover, generally a 4in. by 4in. box, check all the connections,splices and screw terminals for a good connection. There could be a ground wire running from this box to the chassis frame. Any loose connections could be causing your problem. I'm thinking a ground loop problem caused by an open ground at / or in the generator; or in the ground between them. This will cause a hum bar because the two 110 volt AC circuits in the generator are, for lack of a better term, talking to each other= ground loop!!!! Also, check all the connections at the transfer Relays !!!! Hope this leads you in the right direction. This problem can be caused by the smallest and seemingly unrelated item. R.M. Thanks for the Question, This is a area that can go unnoticed.
-
All I have to say is Location, Location, Location. If one lives in the Northeast with all the rain and dirt with a few other things thrown in, it’s real hard to keep them clean and if you do not keep them clean they start to pit and sooner or later they start to leak air. Thinking not on my dime. Makes me cheap to, R.M.
-
Hi Leo! Welcome. How to make it easy? It is a good question; The Coach is a world of its own when you are on Generator Power. Ground is the chassis or the ground plain. It floats on the tires. When you are on shore power, the ground from the coach is then connected to the power grid ground and becomes part of the bigger world. It's always good the check the shore power connections for proper ground, neutral and hot orientation, along with the voltage level. Think your coach will have a 50 amp shore power connection. This is a four pin connector wired with 2-120 volt circuits, common neutral and ground. Hope that answers your question. R.M.
-
RM, I placed two links on the page, Under-- Hydraulic Cooling Motors, the first link is for technical info. and the second link is for service information on your unit. I did send you the information via. the messenger section, that is the one with the envelope icon upper right corner of the screen. R.M.
-
Helene and Roch: That is a good point. The dates for the Indy rally got shuffled around and that caused a late summer date. Was the possibility of the date and the start of school considered? Not sure, but I think it will be in the future! I do know that there are states that start school the later part of August. This could have an effect on other members also. Thanks for taking the time to post your thoughts. R.M.
-
Thurmond, Send me a PM with your contact information and I will send you what info. I have. R.M.
-
I have compiled a list of different locations that repair Fogged Windows,and other window related issues. Always call and check with the locations and get feedback form others. Not all locations use the same method to repair the windows. There is no real order to the list, just put them in a file as they popped up. List of window repair and hardware items 1-Foggy Window Repair 2-Window and Door Parts 3-Window replacement shop locator 4- Seals for pod doors plus other applications Sun Coast Designers 15050 Labor Place Hudson, FL 34667 727-868-2773 www.suncoastdesigners.com I understand that Dave Root now has a shop in the Southern Ca. and or Az. area. Redwood Glass 1886 Demaray Drive Grants Pass, Oregon, 97527 541-476-8101 ]http--,,--//www.daveroot[/url] rvglassrepair. com/ RV Fog Dr. 2110 Dodge Ave. Searcy, AR. 72143 501-278-3015 www.rvfogdr.com RV Window info. Foggy Side Windows and Creepy Seal Fixed Here http://www.rvglassexperts.com The RV Glass Experts can now repair or replace your side windows. Are your RV windows fogged up? Is there an ugly, black seal hanging between the glass panes? Not only are these unsightly, but they can be visibility hazards. With decades of expertise and two fully-equipped warehouse / service locations in Phoenix, Arizona and Eugene, Oregon, RV Glass Solutions is your one-stop resource for replacement and repair of defective side windows. Though we can source replacement windows from virtually any manufacturer, purchasing a new window may not always be your best option! In many cases, repair of your existing windows will provide you a faster, more durable, and significantly less-expensive solution, than an OEM or aftermarket replacement. We guaranty all window repairs against future leaks and creepy seal for two full years. And, in most cases, we can have your coach back on the road within 24 hours. RV Glass Solutions offers side window repair and replacement in the following locations. 880 S. 67th Ave. Phoenix, AZ 85043 90 N. Polk St. Eugene, OR 97402 *Mobile service available in many surrounding areas. To receive a free quote, set an appointment or get more information, please call us at (888) 777-6778 1--Fog free window info. Continued. Some listings are duplicated. http://www.suncoastdesigners.com/ http://www.fogfree.ca/asp/AboutUs.asp?LID=38 http://www.rvglassexperts.com Dave Root www.daverootrvglass repair.com 2--Window and door Parts. These sights are more for the replacement hardware. Seals,hinges and latch parts. Some of the locations have a greater inventory then others, hope you can find what you may be looking for. There are other locations with parts and some of these links supply the harder to find items. http://www.parkin-acc.com/page2.html http://www.pellanden...x?CategoryID=71 http://www.pellanden...CFciA5QodWCrdDw http://www.interstat...at_windows2.htm http://www.pplmotorh...indow-frame.htm Kinro torque kits or torque tubes for Kinro windows http://www.dcmco.com/kinro.htm 3-- Glass Replacement Shop Finder This list is geared more to windshield replacement. 4-- Find Seals you may need / Cargo / Pod doors and similar applications. http://www.cleanseal.com/ They have a downloadable catalog. It may take some time to match up what you need. It is an extensive list with a number of stiles and sizes http://www.trimlok.com/ They supply door edge trim and moldings http://www.pacificrvparts.com/prodselect.asp?SID=8&DID=158&CID=552 They supply Exterior entry door screw Rubber and Vinyl cover moldings http://www.all-rite.com/insert-moldings-c-54.html They supply insert moldings and parts Rich. Edited 7-4-2013


