

andyshane
-
Content Count
257 -
Joined
-
Last visited
-
Days Won
4
Everything posted by andyshane
-
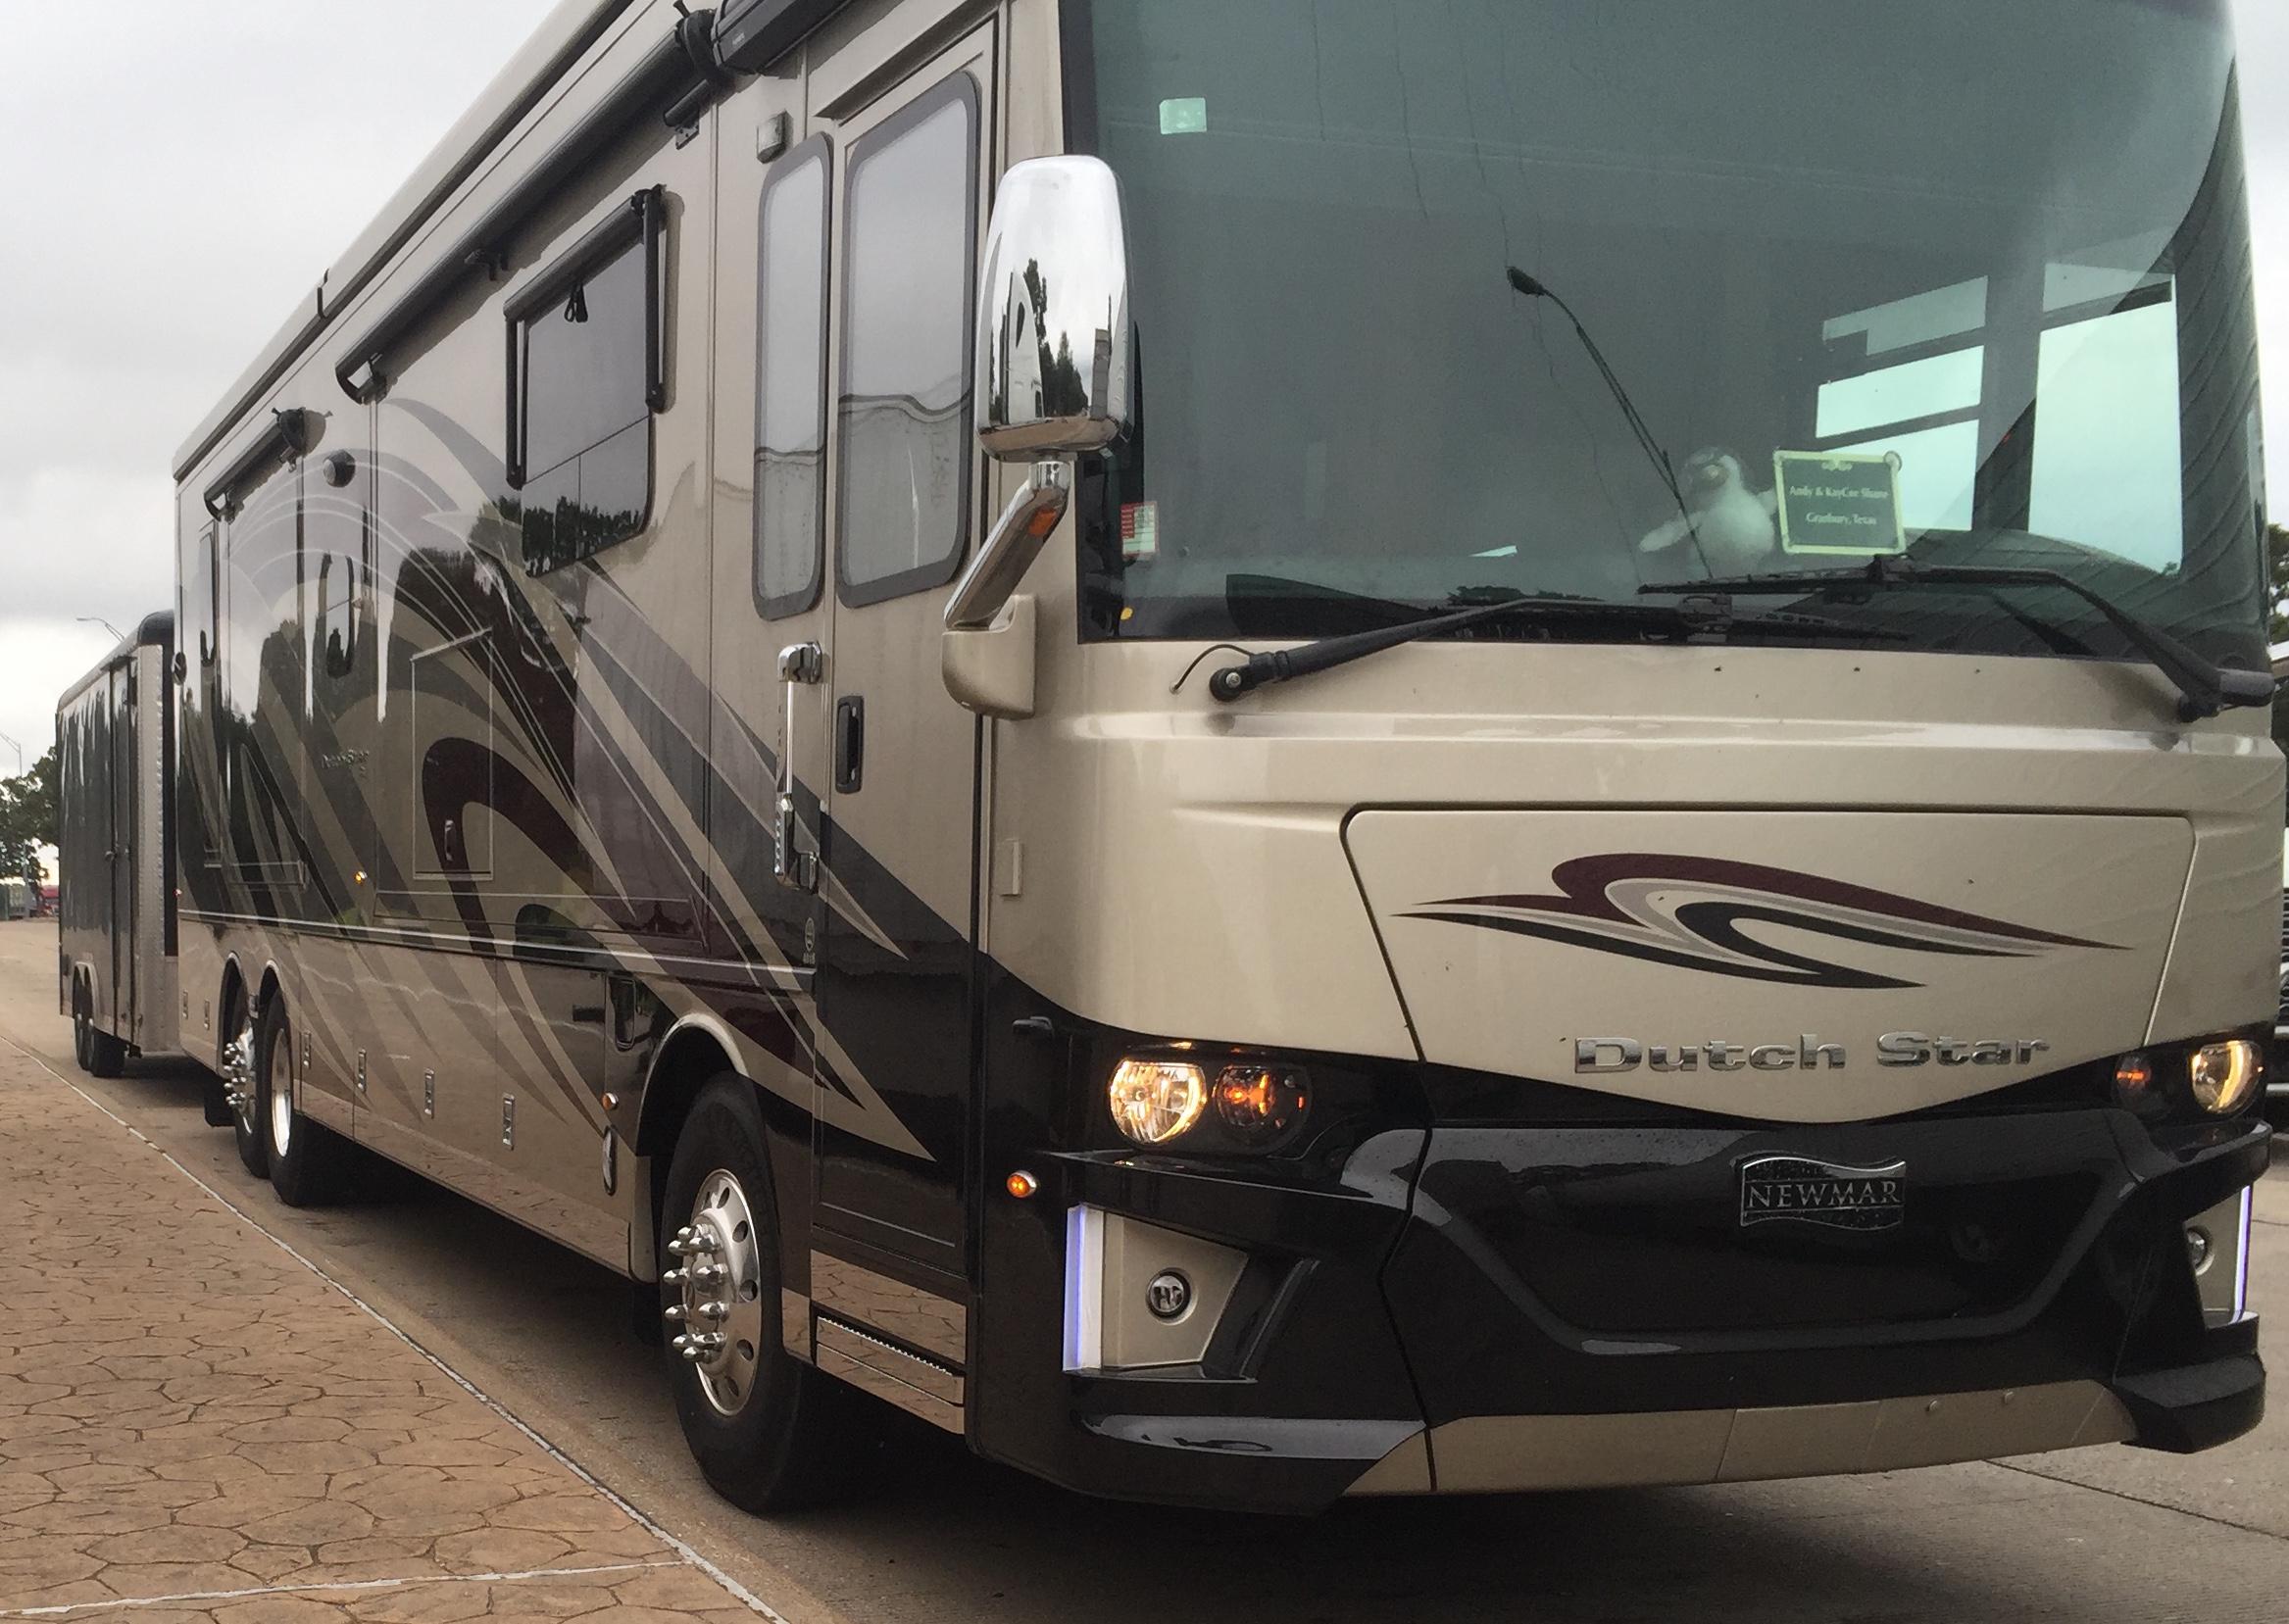
 We finally did it, and said goodbye to the Beaver Patriot Thunder my wife found and bought seven years ago. In its place is a DSDP 4018 on a Freightliner chassis. While a friend found the pigtail to connect a trailer brakes control on his 2018 Freightliner, I can't seem to locate mine. I can't call Freightliner or Newmar until Tuesday, and this is way too specific for Newgle's burgeoning database. Anyone deal with this, in their new rig? PS Newmar, if you're listening, a Class A with an MSRP of $460K should not have an array of loose modules dangling behind the dash, banging around and into one another. I'm not impressed.
 -
Power Steering/Hydraulic Systems Analysis
andyshane replied to andyshane's topic in Systems and Appliances
Well, that young man's tig welding repair lasted two years. Lately, I noticed a faint but ominous fogged area on the hydraulic cooler, made a mental note to check connections. They turned out to be dry, and meticulous cleaning followed by examining the repaired core/tank seam after driving confirmed wetness: the leak had returned. It was tiny, a mist from somewhere in the vicinity of his weld. Out of caution, I pulled the cooler and took it to Kirby Radiator in Fort Worth. Owner Van Smith actually answered a Sunday night email message sent to the company, invited me to bring it up for immediate repair. When I got there, he and son Riley were waiting, amidst a beehive of activity, with maybe a half-dozen workers busily working on units. The two seemed out of place, like we should be in Operations together signing in for the Japan trip, or out playing golf. Riley lept on the cooler issue, had it cleaned and pressure-tested. He lamented that their repair team wouldn't be able to clean up the weld, since my leakage was internal as opposed the where tank and core meet. I mentioned that a beach trip with our neighborhood RV club was in the cards, he said if I stabilized the area with epoxy, chances were it'd last until he could re-core it. It's a good time to mention that REV group cited replacement at $15,000. Riley took $60 for the cleaning and diagnostics, sent me happily on my way. That night, I used legacy JB Weld in the area, taping off a section and tilting the cooler on an incline in my shop. We all know that the "slow" original JBWeld thins as it cures; my hope was that it would wick into all of the nooks and crannies, arrest the seepage of hydraulic fluid temporarily. While the unit was curing, I noticed something alarming: The hydraulic cooler is conveniently outboard, an inch in front of the side-mounted radiator. Having graduated from a clog-prone rear radiator rig, I was anything but complacent with the side unit, using a pressurized bottle sprayer to shoot it with degreaser from outboard and from inside the engine compartment, each trip, followed by low-pressure spray. Well, "clogged" doesn't begin describing the mess that was packed between the two coolers. Fully a half-inch of black mud, mixed with grass clippings, coated the lower radiator. I'd patted myself on the back for maintaining a 190-194F window of coolant temperature no matter the slope or season; looking at the mess made me wonder how that could have been possible. I misted the surface in Zep degreaser, waited ten minutes, and then delicately shop-vac'd it off. Three vac full batches of muck later, it was looking like a radiator again. That left the condensate tray below, inside which cleaning revealed a rusty lower tank section that had been buried in a shipwreck atmosphere of wet mud and grass. After rinsing the trough, I treated it with rust converter. Since removing the outer hydraul cooler only takes five minutes, I'm setting up a 2-year maintenance task to repeat this critical "between the cores" cleaning, from now on. Sidemount owners might do the same: it looks spotless from outside, but is a clogged mess and corrosion time bomb, between the coolers! From the outside, this area appeared to be spotlessly clean! Rather than push the sludge deeper, gentle vacuuming followed by six or seven cycles of degreasing, did the trick. I let it sit for 48 hours and then put the cooler back into place. It looked leak-free, so we finished our pre-trip prep and joined the convoy Saturday afternoon, planning two, 200-mile legs. The first safety check an hour later showed some leakage; it was nothing serious. The second stop showed a little more. Still, minor. At our overnight stop, I dripped all the way into parking. Rather than continue, we said farewell to the group and returned home in the morning, monitoring fluid quantity and keeping to the truck-services-lined Interstate. An hour after parking, I had stabilized to a foot-round mark of hydraulic oil, beneath the cooler. The next morning, I dropped off the cooler with Kirby. They will send it to the big rig master of remanufacturing in Alabama; in a week, I'll have a new cooler. The cost: $700. As opposed to REV's $15K quote. Wow. To my surprise, servicing this unit is a Beginner Level task, for those of us who DYI our own maintenance. The hose from our hydraulic filter can be drained into a small pail -- it amounts to less than a quart -- and then a drip plan easily catches two cups that comes out when unhooking both ends of the cooler. Only four bolts hold the cooler in place. Loosen those, and you're carrying a thirty-pound unit with two quarts of oil remaining inside. It can be leaned against a tree and gently washed, and I've already described the cleaning done around the area revealed by the removal. Installation is just as easy. Oh. We cruise now at 10F cooler than before! -
In older Aqua-Hot systems, DO NOT attempt to "tighten" the boiler bulkhead fittings in response to an antifreeze leak. It is a real temptation, since a 7/8" crescent wrench can be laid against the stainless shroud and move what appears to be compression fittings. These are solder-on joints; the cause of dripping might be failure of the solder joint to begin with. Further movement can twist the boiler coil and restrict water passage while at the same time increasing the leak. The price of a boiler overhaul on the older models is about $8,000! I've put about ten manhours into removing our AHE-100-4S after noticing a persistent antifreeze leak. Rather than returning it to service with the obsolete bulkhead fittings, I upgraded to compression fittings at the bulkhead, re-soldered the original end fittings. Removed from the cabinet, the boiler can then be descaled, leak-tested. I also pressurized the hot water coil to ensure there was no leakage. Having the boiler out is a good opportunity to replace hoses, install a new insulation blanket, put stainless hardware on the feet instead of the rust-prone steel pop rivets used at the factory. Following Aqua-Hot Service Manual instructions, I also soaked the mix valve in diluted CLR. While applications differ, my coach needs about 10 gallons of antifreeze in addition to the 16 gallons held by the boiler. In our case, this whole overhaul process was innocently begun with replacement of the electrical heater element. The element is just like your home version, down to the wrench size. To replace the element, the boiler must first be drained. I dumped the non-toxic antifreeze, bought 22 bottles of Camco concentrate on line for about $8 each. It is important to use distilled water; a supersize IV rig fashioned from a plastic jug and hung on a ladder is a good way to execute the refill. Tracing leaks on the boiler bulkhead is made difficult by the snug cowling/shroud that encloses these units. Q-tips are handy for determining which fitting is the culprit. If either of the water In/Out fittings are allowing antifreeze to escape, the sole remedy is boiler removal. Did I mention that the cost of this is $8,000 plus shipping and taxes, if Aqua-Hot does the work?😏
-
A national dealer whose name I'll refrain from sharing at this point recently proposed something I'd never heard before. Until I pull it from the market later this month, my 2007 Patriot Thunder is for sale.* On the way back from a trip to the east coast, we stopped at several dealerships and looked at replacement candidates. Largely, we're looking to downsize due to a persistent inability to agree that a low-slung 45' coach pulling a 20' enclosed car hauler can't be safely dragged into just any parking lot on the spur of the moment; or, that some parks are simply not in the cards for a big rig like ours. Our quest first settled in on the new Horizons, built in the former Country Coach facility; lately, we've segued to the shorter Newmar offerings. We either visited or spoken with nearly two dozen dealers. One of these has been corresponding with us and recently mentioned a $3500 "Trade Inspection" fee. It doesn't take a cynic to view something like this as profit-margin fluffing like we've seen from car dealers over the years, eg protective coating, transportation and area adjustment additions to invoices. I'd like to hear if anyone else has run into something like this. Meanwhile, I'm prepping the Beaver for an exciting 2019 season hopefully void of mechanical woes, other drama. I like the bus, and they certainly don't make them that rugged anymore. *At the request of my wife, I lowered the asking price until the Trade-plus-tax-advantage and selling price lines intersected; I don't see any sense continuing below that amount, will instead do updating until she no longer suffers from "new bus fever."
-
I just reserved a spot for more than two weeks from now, since my mother-in-law wanted to see New Orleans. I was concerned about getting in and out of the park with a 45' coach pulling a 20' car hauler, but was told such rigs are common in the park. I swallowed and signed up for the $340 two-night stay, our most pricey in eight years of RV'ing. Four hours later, my guest's schedule changed, and I called the park well within the advertised 10-day cancellation period. The park told me that there is a $50 cancellation fee regardless of when it is required. Use caution, when making reservations here.
-
It began as a common problem: cruise control would not latch. Lots of owners have commented about having to cycle their Smartwheel Cruise Control ON/OFF switches before latching can occur. Then, another oddity: turning the dash lights rheostat on would unlatch/disengage the cruise control. Later, the system stopped working entirely. I could, on occasion, get it to engage for brief periods. No single event ever defined the inevitable unlatching, the longest it went without disengaging was a half-hour, during Interstate driving on a recent trip. When I contacted our chassis tech support representative, he said such issues are usually a Caterpillar ECM problem. Since, technically, the failure was an intermittent issue, I suspected the old culprits of corrosion, broken wires or looseness that plague all older chassis. The ECM is connected by two complex multi-pin plugs, in an area prone to spray, dirt. On the 2006 C13, it is located just forward of the fuel filter. The aft of these two plugs, taking in yellow braided wires, handles engine sensors. The smaller attends to other functions, like cruise control. I crawled underneath, used a 1/8" allen key to loosen the smaller of these, sprayed it with electronics cleaner, carefully snugged the plug into place and tightened the hold down screw. Still, no cruise. "It's the chassis ECM, not ours," insisted the Caterpillar shop foreman, when I raised the white flag and called for an appointment. He added that, for no charge, he'd plug in the ECM and prove his point. I hastily agreed, hung up and started driving to Holt Caterpiller of Fort Worth. They are the same folks who replaced all of my intake solenoids, accessing the engine by dismantling the bedroom closet -- they reassembled the doorframe and rehung the doors without leaving a trace -- for less than $1800. To shorten the story, let it suffice to say the computer revealed the "Inactive" status of the cruise control, and the technician could get it latch, but only in the high-idle mode. We agreed to a road trip with me driving and him using the laptop. He threw the switches for Retarder modes, Adaptive Cruise enabling, experimented with some other ideas on the screen while I drove. Eventually, I had cruise control with unlatching anytime the engine brake power was ON or the dash lights were illuminated. For the life of me, I cannot understand the latter, unless it is an inhibit to prevent night use of VORAD, the primative adaptive cruise control with which the original RV was equipped, later decommissioned. Finally, the technician mentioned that my brakes were showing engaged on an intermittent basis. We opened the generator bay and examined the backside of the pedal assembly. Two simple pressure switches are there: the inboard attends to cruise control, the outboard activates the brake lights. I instantly found a wobbly spade connector on the former, and when I crushed the interior slightly and slid it back into place, that line on his screen obediently said "OFF" and remained that way. All the way home -- a trip of forty miles -- the cruise remained engaged. Now, with a long trip to Florida looming, I have the simple luxury of driving with my fingertips!
-
I specifically requested Goodyear tires on a car-hauler trailer custom-built for me last year. It arrived with Goodyear Wrangler II LT tires, late 2014 manufacture dates. I shrugged off the age of the tires, and accepted the unit. My practice is to inflate to sidewall placard pressure, as we've discussed extensively at FMCA and iRV2. Additionally, I scan both tire and bearing temps during safety stops on a progressive schedule underway: first, third, sixth hour. With a year of use, and about 5,000 miles -- there was no visible tread wear -- my trailer tires began failing internally during a recent trip. Thankfully, the first two were caught during slow deflation by the TPMS; the third exploded and did some fender damage. To help users, I'll include a photo of the second tire failure, caught in progress. That way, you can spot what to look for. This particular tire was checked an hour prior to the incident and was running at 116F on a warm summer day in Georgia, inflated to 80PSI at 70F. There was no bearing or brake drag to increase wear/temperature. The combined weight of the car, trailer and misc contents divided by four barely exceeded 50% of the tire's load rating. In the case of this tire, I initally thought it was a false alarm from the TPMS: I entered a nearby rest area and parked on the end with the alarmed tires curbside for safety, soap-tested the still-inflated tire. No leakage was noted, so I tightened the TPMS transmitter, reinflated the tire and noted the pressure, fixed myself lunch. A half-hour later, I noted the pressure. The tire had lost something like 40PSI, so I removed it from the trailer and found these fissures between the treads. Research showed a pattern of failure in earlier Wrangler II LTs, some 200 injuries and 15 deaths have been associated with the model. However, Goodyear has paid claims and not recalled the tires. Three of these tires failed internally in three successive days of driving; so, I was at the Goodyear store in Marion, Mississippi, when it opened the morning after my third loss. The helpful salesman confirmed that Goodyear had not recalled that series, and explained that he'd have to order replacements. Since a Toyo dealer was nearly next door to our RV park, I went to them, next. Imagine my delight, discovering that the owner is a fellow Class A owner! He had indeed gotten the proverbial memo about Goodyear's quality/safety problems, and steered me to Toyo. We rummaged through his inventory, and he had me grab various sidewalls to assess their strength, an important characteristic of trailer tires. I noted that the light truck tires actually seemed to have beefier sidewalls than those designated for trailer use. His crew immediately swapped out all four of my tires. Counting the generic Chinese spare I'd bought in the wake of the first tire failure, I'd spent about $1,000. I reported the failures to the trailer manufacturer, the National Highway Traffic Safety Administration, and to Goodyear. Goodyear contacted me quickly, their representative stated that I'd been assigned a claim number. I submitted a debrief and receipts to them upon request and was just notified yesterday that they intend to give me a $267 rebate on a future Goodyear purchase. Given my experience with their product, I'm not sure if that option will be exercised, frankly. Consumers beware.
-
I just got done "flipping" the right slideout toppers whose threads had rotted due to time and UV exposure. It should be noted that this rig has been garaged since 2013. This is a wonderful benefit of having symmetrical toppers: Let one third of the fabric do open-air duty, and then retire it to the roller side, doubling the life of your toppers! On a 4-slide rig, this technique can save up to $4K during a period of ownership. A standard 7/32" RV/patio awning spline will suffice. Lessons learned: Marine 303 UV blocker should be sprayed onto fabric at least biennially. Thanks to Ingrid at StoneVos for this suggestion. Much effort can be waved by removing the plastic end caps first, releasing spring tension, and then simply sliding the roller-end spline and the outer extrusion with the spline remaining inside the extrusion. The outer spline is easiest to remove on the floor/bench. Sew worn toppers, wash the fabric, and treat with UV shield. Allow to dry on flat surface. Splines can be fed into their respective channels, on the floor/bench. The best way to install spline is to line up two work tables end-to-end against a wall, have someone "feed" the fabric and spline at the far end, and pull the splined fabric in the groove, towards the wall. When tightening the topper spring, start counting to 14 half-turns after taking up slack with the aluminum cover raised. A standard Phillips screwdriver pointed straight up inserted between the endplate and roller allows for speedy tensioning. After three half-turns, "pin" the assembly with the Phillips thru the endplate and run to the other end. Make sure fabric is centered on the roller, and not binding against the over magnet. The endplates are prone to corrode, even in dry climates. Bathe them with a corrosion preventer before installing plastic endcaps. I use Boeshield T-9.
-
Dallas Area RV Park Recommendation
andyshane replied to rsparrow's question in Destinations/Attractions
I use the Treetops RV Resort near The Parks Mall in Arlington, every time I go to training at the flight academy. While I love The Vineyards, passing planes grate on me: I'm reminded of work every moment of the day. Treetops is a decent park that is a quiet oasis among trees in the heart of a busy suburb. You could Uber four miles to the north to the Bell Station of the Trinity Railway Express, use the train to go straight to downtown Dallas. -
Sources talk about how easy it is to change, that the "regulator" as thermostats are sometimes called in Caterpillar-speak should be changed every few years.I loosened my thermostat housing, and all associated connections except for one: it comes affixed to a 1.25" metal tube presumably leading to the water pump. Thinking the tube (it is hard to see) was a hose, I was inching the housing upward, having detached the hose end below. Two things surprised me: the hose end below was unrelated, and the metal tube inched out of the housing, suggesting a slip joint. 'Problem is, it stopped coming out after two inches of upward travel.In all of the photos of the housing, there is simply an open hole where the tube is stuck, on mine. Can anyone help? This is not supposed to be a difficult job, but I'm stalled.
-
I have some info to add to this great thread. After scuffing the front end a few times on my 50K miles 2007 Patriot, I talked to Source Engineering about their tuned Bilsteins. As a test, I installed four up front. The six in the rear can wait, since they seem okay. Ride dampening is improved. Some thoughts: Torque values are 220 ft lbs for the larger upper bolt, 150 for the lower bolts. Socket sizes are 1 1/8" for the uppers, 7/8" for the lower nut and 13/16" for the lower bolt head. A mild ream of 11/16" needs to be done on the upper bushings for fit. The saddle accommodating the lower bushing is 1/16" wider, and a washer shim is required. Source Engineering says to disconnect the ride-selection wire at the top of each older shock, secure it. Disconnect the red warning light in the cockpit. Job difficulty is moderate, due to the wrestling part. A bottle jack can raise and lower the frame corner when removing the shock, gently raised until the bottom bolt spins freely, during removal. A slight change is required to align the bolt hole of the incoming new shock. Source instructed me to keep the old, wired shocks. Some of you are apparently hardcore and rebuild them. I have them in stock, if anyone wants to buy them. Two have intact plugs.
-
Not at all. I'm sure it works well for some folks. Funny, that they steadfastly refuse to make refunds if buyers discover it doesn't work for them. This was in my Inbox today. Thank you for contacting CoPilot. We're sorry to hear you are disappointed with our CoPilot RV app. Some of the topics you mention in your App Store review we believe we can clarify for you, and for some of the other issues you've described we'd like to see if we can put them right. POIs only showing nearby. When searching for POIs the app by default searches those nearby. You can switch by tapping on " Search nearby" to "In Different City" if you have not yet entered a stop. If you already have a stop entered you'll have "On My Route" and "At My Destination" as your options. Missing POIs If you could provide us with some additional information on which ones there are, we can double check with our POI data provider. Routing Issues This may be caused by a missing size restriction within the map data. If you could provide us with the details of the sample routes you tried, and where the trouble points are we'll certainly investigate what the issue is and try to correct. Maximum Dimensions Your use case for the RV app with a 45ft RV and 20ft car hauler is something we'd like to look at in more detail with our product management team so we'll keep you posted on that item. If you have further questions; please do not hesitate to let us know. Regards, CoPilot Consumer Support
-
-
Howdy from down the street, in Pecan Plantation! I too was censored on iRV2 for reporting violations to their own rules regarding illegal political discussions. Worse, if you even discuss administrative actions themselves, that is considered a violation. Whenever I'm tempted to participate more vigorously at iRV2, I only need look at my Profile section, where record of those partisan snipes are archived.
-
I'll never get over iRV2 sanctioning me for asking them to simply enforce their own rules. Worse, if you look at my account five years later, the nasty reminder of that episode is preserved. Worse, even mentioning iRV2 moderator rulings is, in itself, an infraction. FMCA is a vastly superior group, albeit smaller. I'll share a screenshot. Note that I am a Senior Member, with 928 postings. My lone blog entry: a link to FMCA
-
Here we are again... Time flies when we're all having fun, eh? I'm sitting here on a Tokyo layover, getting my ducks in a row for a second repack. After posting this original thread, I took the rig to a Weatherford, Texas truck repair shop and basically paid two hours of shop time for them to get up to speed. Accurate records of what they did weren't kept; so, now I intend to do the homework ahead of time and possibly farm out the work to a local family-owned RV repair shop that is trying to get started in the business. In the interim, we've put nearly 20,000 miles on the RV. Two years have now passed, and I'm sensing the need for a repack albeit one to be done at my leisure. One caveat: other lubrication requirements for the Roadmaster chassis have not been overly conservative. Just the other day, I laid underneath and pumped endlessly to fill the drive shaft slip joint (I jammed a right-angle pick with a conspicuous yellow handle into the vent hole, a huge convenience) before fresh grease finally blossomed from the front seal. Similarly, the kingpin lube points seemed in need of grease; sobering, since I greased it six months and 5,000 miles before that. I did a friend's Essex and found that his slip joint was dry and caked to the point that we never got grease to push out of it, even after dumping an entire cartridge into the void. Word to the wise. Speaking of wisdom, at sixty, I'm convinced that I now have a choice between a battery-powered grease gun -- my Campbell Hausfield air gun has never worked -- and rotator cuff surgery! Lever-guns are for kids and maybe trophy wives with their own coveralls. Beaver owners might better describe themselves as orphans. Yes, our parents sadly persished in the proverbial shipwreck, and now our well-intentioned stepmother at REV Group is trying to get their affairs in order. Try as she may, it is not the same as having a rig whose original support network remains intact. When I called them about my bearing specs, they referred me to Dana Spicer, the axle manufacturer. At Dana, one knowledgeable tech guy revealed that the model, part and serial numbers of my axle identifies it as a beam sold to Beaver for installation on its Patriot line. One of three companies had then sold wheel-ends to Beaver for use on the beam, he added. Several hours of detective work later, I'd found Mr. Dallas Garrison at Webb, manufacturer of such hubs. Using pictures I supplied, he identified the hub as a 2574 model, and gave me numbers for the cups, cones and seals. Just so this precious information is safeguarded, and in case a fellow Patriot owner finds him or herself in a similar bind, here they are. Inner Cup HM212011 Inner Cone HM212049 Outer Cup 3720 Outer Cone 3782 Seal # Stemco 383-0136 I have the 500 lb torque wrench and dial indicator needed to do this in my own garage; am wondering if anyone else has done the task at home. Ideally, we have some heavy truck mechanics here that can weigh in on change interval, shop procedures, etc. All the earlier responses to this query are deeply appreciated. Without you all, I'd be lost and probably more than a little dangerous. Photo: If you're not wearing, tasting the grease, you're probably not doing it right. Right?
-
Power Steering/Hydraulic Systems Analysis
andyshane replied to andyshane's topic in Systems and Appliances
Hey, Brett Sorry it took so long. When I posted this, I turned to the mother-in-law and said you would definitely have the answer; and, that I wouldn't be surprised if the answer came within minutes. A technical glitch kept me from signing in, earlier. This bus came to us with zero manuals, so I downloaded a Dynasty manual for the next year, same chassis. It calls for ISO 46 hydraulic fluid. The filter specified for my mount/engine is the MS Filtri CSG100P10A with a 10 micron rating. The NAPA 1759 and WIX 51759 that cross-reference are also 10 micron filters; but, I notice that "None" is the listed "By-Pass Valve Setting-PSI: None." Additionally, if you trace the MS Filtri model to Fram, it cross-references back to a different NAPA number. Of course, I've used the NAPA and Wix variants in the past, with no ill effects. Still, considering what is at stake, I'll first order an MS Filtri replacement, plug it in, and see if the bypass pin extends. Meanwhile, I'll poll other Patriot Thunder Owners and see if they're directed to use Dex III or ISO 46. And, keep degreasing my repaired radiator. The oozing of hydraulic fluid that persists means nothing, for the first month, after I painted the entire engine and compartment with the stuff!! -
A question for our engineering types: after a night with temperatures in the teens two weeks ago, I started dripping hydraulic fluid. The culprit was identified by mechanics in Maryland as a cracked radiator core, the leak minor enough to continue home to Texas. In Tennessee, the rate of leakage had accelerated. As I poured the coals to the rig coming out of a KOA in Newport, a sudden brown geyser appeared in my mirror, the steering hardened. I eased onto the shoulder, continued another quarter-mile to a truck repair shop. Sure enough, the core had a inch-long crack along an aluminum weld. That evening, I put on a new filter, installed the repaired core, leak-checked it, pushed in the distended bypass indicator. We had normal ops for the next three hundred miles, day of driving. Then, in Arkansas, the unthinkable: an hour into our day, the steering hardened! I parked and dashed to the engine compartment. Oddly, the repaired radiator was dry as a bone. Rather, fluid was gushing from around the filter. Now, this isn't my first rodeo. I've replaced that filter several times, did it in accordance with instructions. It is one of those with a large gasket that has to be tucked up, inside the housing. But, I'd carefully traced my finger around the entire circumference, assured that it was postioned correctly, tightened to specs. Now, a quarter-inch loop of gasket protruded, alongside the filter. Damned. I wiped everything down, drove the toad to a nearby store and bought yet another batch of hydraulic fluid. Having reinserted the gasket, I snugged the filter extra tight, refilled the system, ran it and retightened. My installation had not been any different than many times before, but the gasket -- they tend to be a bit oversized -- popped out nonetheless. But, I'm concerned because the bypass indicator on the filter housing is extended, will not reset. Right now, we're ops-normal, but I'm not comfortable with this. Any thoughts?
-
Reposted from iRV2 I thought I'd float this, in case it helps anyone. A few maintenance and operational items from this Texas - Maryland - South Carolina - Texas trip in freezing weather. Power Steering I've done two roadside repairs,* one to remove and replace a cracked hydraulic cooler core, the other to correct a filter "gasket hernia." At issue: higher pressures associated with cold weather ops. In both cases, the rig was warmed up for ten minutes before driving. Water Hose We forgot to retract the water hose after filling one night, and entire day in a heated compartment was not enough to thaw it. Worse, to save space (we were hauling freight), I'd hung the spare drinking water hose (to use for manually filling) in an unheated trailer, so it was a solid coil of ice. The solution was to completely extend the coach hose from its reel, coil it inside a bucket of hot water. Remember, those shutoff valves might not function, in extreme cold. I see lots of frozen lakes around various rigs. Batteries We've been involved with two different rigs whose owners inadvertantly ran down house batteries using a space heater driving down the highway. Running the generator enroute like we all do in the summer for air conditioning is the solution. Aqua Hot Remember that AH doesn't heat the coach unless the AH block heater is on, driving. Else, you have to run the diesel burner, too. At the campground, diesel and 110VAC functions can be run together. The added advantage of this technique: you don't have to remember to turn on the AH block heater for the overnight. Generator It might not start, due to cold. I'm going to invest in a block heater for the generator. Chassis Batteries A diesel mechanic buddy turned me on to Cabela's Pro Series battery tenders. I mounted one on the outside wall of my chassis battery bay, plugged it into the aft block heater receptacle. It optimizes those batteries nightly for that critical morning start under arctic conditions. Sewer Of course, leaving a sewer hose outside can be just as lethal as leaving a potable water hose out. Inchworm the hose to rid it of gray water, and stow before bed. To prevent slide-valve freezing, I pack a wet towel around the port through which the power line extends, eliminating the cold draft that enters my utilities compartment downstairs. Tires Removing a TPMS transmitter from a frozen valve stem for manual measurement will earn you a surprise: it will free flow. Tires should be inflated to manufacturer's load inflation table value -- don't use the placard by the driver's seat -- minus 1 PSI for each ten degrees under 65F. *If you dump power steering fluid, about ten seconds of normal steering is available, after which it gets progressively harder. In my rig, manually steering into a parking space (I was lucky enough to blow my core 1/4 mile from a truck repair shop) required more than 100 lbs of force on the wheel.
-
I had an interesting experience yesterday, in Lipan, Texas.It is a town of 430 people, along FM 4 north of Granbury. I was traveling northbound in support of a veterans' event at Sweetwater.Approaching the town, I backed off at the 30 mph sign shown below, but not fast enough. As a result, an officer identifying himself as a police lieutenant for the town pulled me over and issued a $171 citation.So, if bridging the confluence of state highways that lead up from Hill Country into Granbury, and Interstate 20 to the north, either avoid FM 4 or use great caution traversing this route.Any other such places out there, lying in wait for unsuspecting motorists?
-
Looking For Replacement Tile For Monaco, Beaver, Safari
andyshane replied to andyshane's topic in Type A motorhomes
Thanks! I'll drop 'em a msg. -
I'm in search of the 18" Aspen Lodge "Morning Breeze" tile found in mid-2000 Monacos, Beavers and Safari coaches. Does anyone have unwanted spares -- maybe you now have an upgraded floor -- or a source for the tile? It is made by Daltile, AL-60 18181P. There are online sources, but each shows that the item is no longer in stock.
-
I've driven about a dozen gassers and DPs, from Class C to Prevost. The wife, too. We agree that a sweet spot in value, utility, site access, ease of driving, fuel economy, depreciation, maintenance seems to happen at 40' in a basic diesel pusher with 350-400 hp.
-
I've been wrestling with a full-wall slideout topper since I bought this 2007 Beaver Patriot Thunder. As with most things, the problems trace back to incorrect maintenance. Early in its history, the long mast (these systems are engineered for much shorter lengths) cradle became loose, and the fabric-wrapped roller tube fell onto the top of the slideout. Someone replaced it with their own hardware, long boltsets which tore at the fabric and chewed holes in the aluminum extrusion (pn 1110089-30 Slide Lead Rail) in which the spline is retained. To compound their incompetence, they lined the cradle with duct tape, which broke down over the years and formed a sticky length of rope, impeding the roller action and shattering the mounting plates on either end. All that stress loosened the mounting brackets. In attempting to clean up their mess, I'm faced with grinding out the damaged backside of the second articulating rail. It is only a $60 item, but shipping for a single 30' length is a whopping $700. By comparison, an entire new topper system is $3,800 plus about $1,000 in shipping. The $1 million question for me: did the dealer from whom I bought the rig know this cascading maintenance failure was in play? If they did a decent inspection of the rig -- they had it long enough to install a Silverleaf system and day-night shades, front to back -- it would've been apparent. I noticed small tears in the topper fabric, some chipped paint on the outer portion of the rail. Of course, there was no way to see the massive damage inside until I cut the old fabric off, today. Recommended Action: Inspect topper fabric for tears, and observe extension and retraction for smooth operation. Lift the cover on longer toppers and check for security of the cradle mounting hardware, and check to see that nothing is binding during movement. Remove end covers and carefully inspect pn 1511100-00R Side Plate Assembly with Gudgeon Support to determine that the corners of the support adjacent countersunk holes have not cracked or broken (symptoms of binding). Following Girard procedures, remove tension from the topper, detach the topper fabric, and tighten the Allen screws that hold the entire assembly on the RV. I found 20% of mine either loose or missing. Time in service: 7 years Mileage: 30,000 miles Failure to accomplish these checks can lead to the assembly coming off the RV at highway speeds, which can cause injury or death to others. [My plan is to use aircraft building/repair techniques to rivet the cradle to the extrusion. Allen bolts will be dipped in thread locker, and then have torque seal applied after installation. The rail is unusable, I'll have Girard cut three ten-foot sections for shipping. This plan passes muster with my expert on all things Girard, Kevin Waite. He can be contacted at 541 953-6162 or by email at kvn.wt.7629@gmail.com.] Followup: Girard mentioned that the articulating extrusions are stacked, i.e. the fabric can be mounted to either. I used a bungee to hold them upright and closed the slide. To my absolute horror, the extrusion did not clear the mounting brackets, bending it backwards the same way your air conditioning unit did, that time you drove under the 12' overpass with a 12'2" rig Really. This is a manufacturing error by Beaver. The poor stupid technicians who rebuilt the cradle and saw the worn fabric simply didn't see that, upon closure, the fabric was sandwiched between crushed sections, and then mauled as the rig moved down the highway. Still, check your toppers. That tube for one weighs some fifty pounds and will leave a mark if it hits anyone, catapulted off your rig at seventy feet per second. Chances are, the strip didn't bind against the roller assembly when the bus rolled off the line. At 30 feet, a small amount of sag took place, and soon the parts started binding. Inept technicians failed to see what was happening, and inadvertantly made the situation worse. You humble correspondent is simply the boy with the shovel that follows their ugly parade...
-
I'll have to look that up for mine. Thanks for the tip, Brett.