

andyshane
-
Content Count
257 -
Joined
-
Last visited
-
Days Won
4
Everything posted by andyshane
-
From the album: Beaver Maintenance
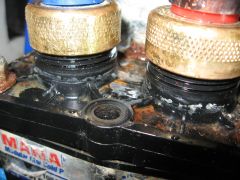
Either a dealer or the former owner neglected to drain and winterize the plumbing during cold weather; the entire plumbing bay shows signs of long-term leakage. Here is the source of it all: the hot water supply coupling of the Manabloc MXBD1B-14C2 manifold. -
 I'd noticed that the plumbing manifold had some rusty hardware, and was dripping. Actually, the first impression was that the Aqua Hot on the opposite side of the coach was dripping; but, good detective work and a drop light led me back to the true source: the Manabloc manifold. I'll spare you all the trials of rebuilding the manifold, replacing connectors, etc. and skip to the end: someone had not properly winterized the rig, and there are tiny cracks from freezing in the top of the stack. To the rescue came Louise Stout at Viega, who now owns the Manabloc name. She can be reached at 800-976-9819 Ext 220 and is one of those rare treasures we in the RV community love to have working on our side. Foremost, she told me that creativity on my part to undo the damage done by RV technicians' cross-threading the cold water supply line would parallel their own level of poor methods: it turns out that the threads atop Manabloc manifolds are NOT the standard plumbing variety, that they are a proprietary pitch. She referred me to Pex Supply equpping me with a part number (46414) for the correct 1" female connector that joins up to 3/4" Pex. Then, she looked up my manifold model number in their computer, pronounced it a rarity no longer in production -- heck, my RV is only a 2007 model -- and put in a work order for their shop to custom-build me its replacement. For $140, I get a new manifold and all outlet connections. Maintenance Recommendation Checking the plumbing manifold should be part of your monthly inspection routine. Open up the plumbing bay and inspect the floor for water. If power has been off the rig, rusty hardware might be the sole indication of leakage. Check under the rig for signs of long term leakage. Painted garage floors will have a telltale halo that indicates a leak/evaporation cycle. Touch the top of the manifold to ensure the recessed aren't harboring water. Check outlet fittings for security and leakage. Inspect manifold hardware for signs of moisture, eg rust.
 -
Newmar Motorhomes: Feedback Wanted Before Buying
andyshane replied to RafeCovington's topic in Buying an RV
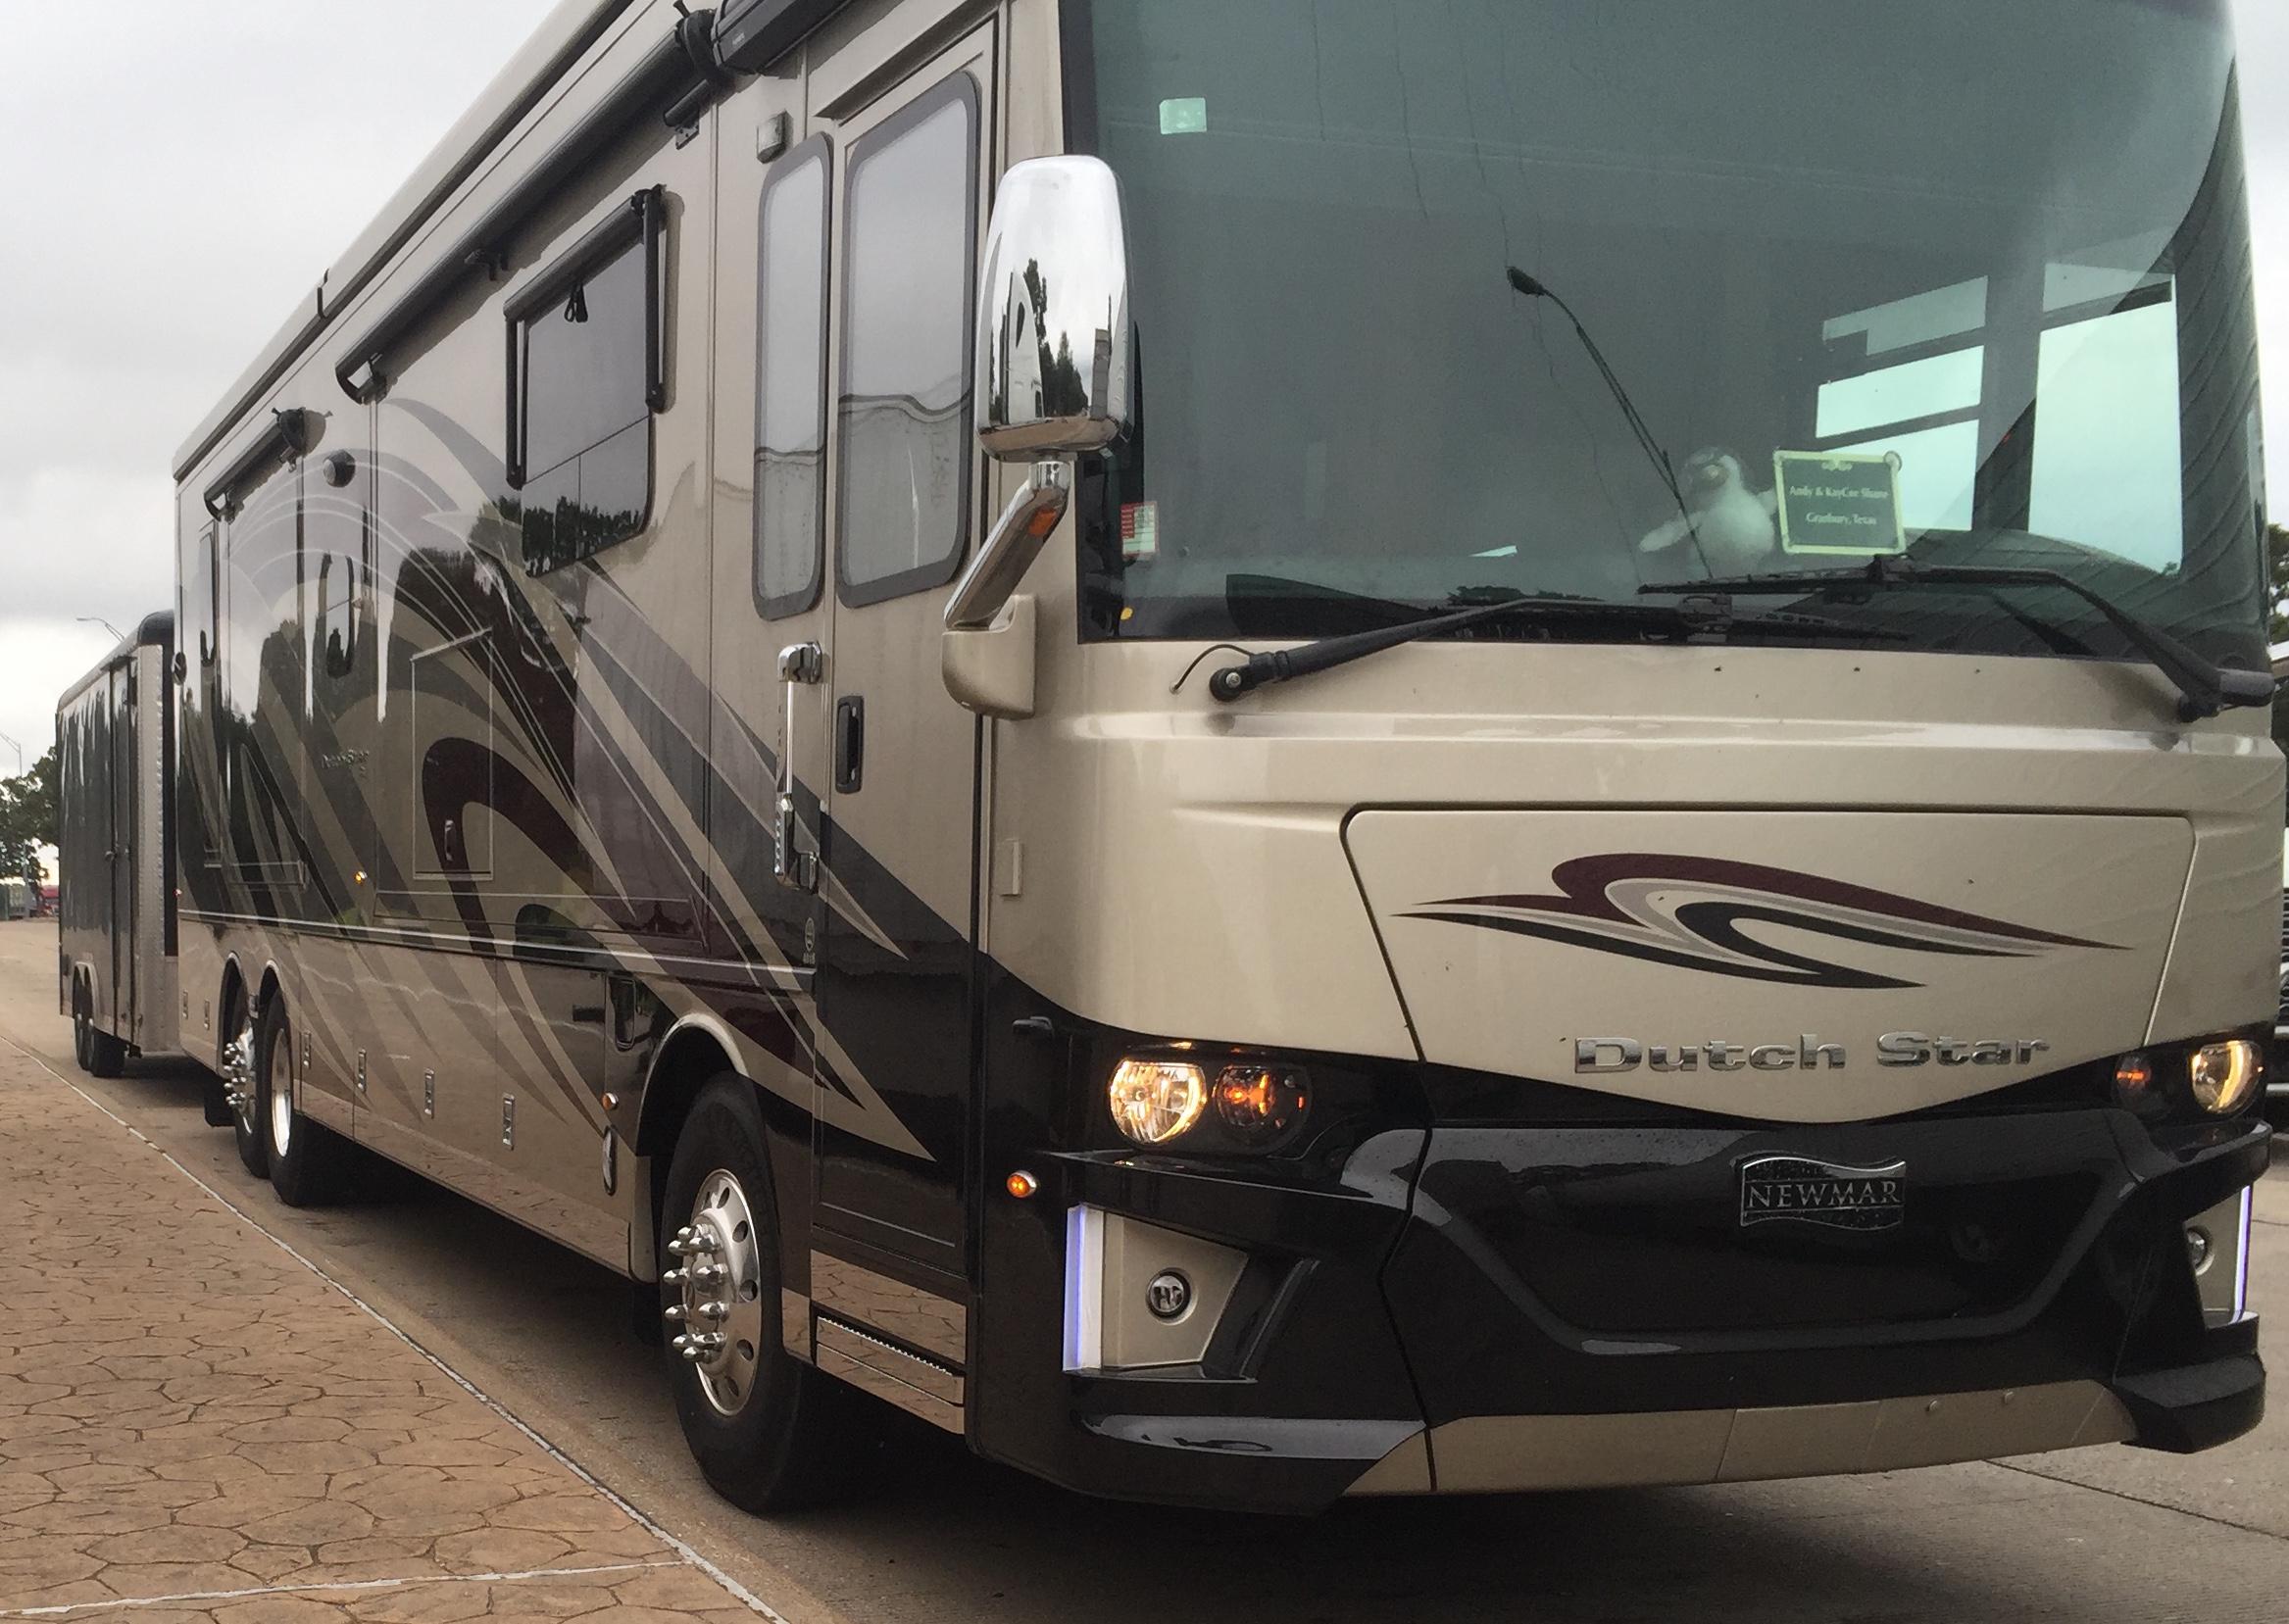
I've heard from no less than 200 people who own Newmar products, rave about them. One of my closest friends grew up in a motorhome family, his father's final "dream coach" was a loaded LondonAire. My buddy is now in his second year of owning his own retirement dream machine, an '05 Essex, he loves the coach. I've helped work on it, have ridden in it with him, an rank it up there with my own 2007 Beaver Patriot Thunder. -
Good Honest Dealer To Purchase A Used Diesel Pusher
andyshane replied to vtdave's topic in Buying an RV
One of my closest friends is a close friend of Paul's. Howard says Paul is the best for finding a good rig. -
I was pulling out my hair, suffering sporatic blown flasher fuses, on a recent trip. Then, the flasher unit itself failed. It was a maiden voyage with our new-to-us Patriot Thunder, our guests rolled their eyes every time I slid open the window to signal with my arm, got honked at, pulled into a truck stop to change yet another set of fuses. Finally, I unplugged the dolly lights and didn't blow another fuse. Today, after three hours of diagnostics and disassembling the dolly electrical system, I finally spotted the culprit: two tiny bites on a pair of wires going through a brand-new finder to the light assembly bolted to the outside. Yes, after catastrophic blowouts on BOTH sides of the dolly due to inferior OEM tires, I had to install new fenders. They arrive prewired, are simply mounted and plugged in. Turns out, at the factory the person who installed the lights put so much pressure on the wiring where it passes through the 1/4" hole that the insulation was severed inside of 2,000 miles of use. Of course, none of the pass-throughs are engineered with a 20 cent rubber grommet to protect the wiring; so, this kind of failure was bound to be repeated, had I not wrapped the wires in thick rubber tape. It seems dollies are designed to sell, rather than to last.
-
Our Aqua Hot was a little smokey. Replacing the nozzle and filter, along with checking the output pressure, didn't do the trick. The exhaust can be tested, easily: hold a paper towel over the end for 10 seconds, note the pattern. What finally reduced the smoke was adjusting the air intake bypass, a slot cut in the intake pipes that overlap, has a set screw. I went from a solid black circle to light gray, on the towels. Visit www.aquahot.com for owners and service manuals. Below is the combustion chamber before and after a vigorous wire brushing:
-
After our first trip in our 2007 Beaver, I noticed a foul odor coming from the toilet area. The floor around the toilet was dry and clean, there was no sign of leakage in the basement below. I cleaned the bowl and it still got stinky in the lavatory whenever the bus sat overnight with windows and doors closed. These toilets are easy to loosen, move: just remove the four hold down bolts, and it is a free-moving fixture tethered by hoses and wires. I looked in the wall space behind the unit, and everything looked fine. It smelled, but not terribly. Donning latex gloves, I spritzed the wires and hoses with 409 brand disinfectant spray and did some exploratory wiping with a damp paper towel. Well, when it touched the underside of the large black discharge hose-to-black-pipe coupling, it came back seriously soiled. Additionally, there was dried fecal matter caked up against the wall, under the bundled tubes and wires. My guess: the discharge tube clamps had slipped, and raw sewage had been pumped into the space. The shop had done a decent job of cleaning, but didn't take the time to break apart the bundle, jam rags underneath, really work to get the nooks and crannies spotless. So, I did all of that and then left two air fresheners inside the cavities: one for the toilet base and one for the wall. Addtionally, all clamps and nuts got tightening, a clean folded paper towel left behind, and wires neatly tied into bundles before returning the toilet to its original place and bolting it to the floor with fresh hardware, including a rubber washer overlaid with a stainless washer. I was extremely carefully tightening the bolts. Just snugging the floor bolts is sufficient. I've now added a behind-toilet check and tightening to my annual maintenance checklist; hopefully, there will be no more problems in this area.
-
Thanks, you two. There have been several cases like this where a little mill might come in handy. Also, there is a burgeoning 3D printing industry that might help with such things. For now, I've got it secured. 'Hoping someone will come up with a supplier, eventually.
-
As a new Beaver owner, I'm stomping out gremlins as fast as I can, developing a maintenance and inspection program for the bus. Really, I cannot stress enough the importance of reviewing all manuals for the RV itself, the chassis, and its components; and then compiling all applicable checks into one simple list. In addition to that, I've created an airline-style maintenance tracking book, so that broken items are tracked and their repairs documented. Since our January 12th purchase, I'd logged 71 maintenance writeups. And, I think this is on the plus side of average, in terms of failures in motorhomes that are six years old. Recently, while running my monthly checklist, I was shampooing the carpet and got warm from the afternoon sun pouring in the driver's side windows. Lowering the eight-foot Brustor awning, I heard a loud clunk and the interior brightened as the forward end of the rolled fabric fell onto the unfolded awning arm! Turns out, these awnings have a weakness: the retainer for the non-motorized end is made of nylon, and cracks due to vibration. The retainer can be broken and the awning remains marginally secure, propped inside the clamshell cover, held in place by a tiny stainless sheetmetal screw. That one screw then becomes all the sole difference between a safe operation, and catastrophic damage to the coach followed by sending an aluminum fixture that might weigh thirty pounds hurtling into oncoming traffic at seventy feet per second. The failure seems confined to my longest awning: the shorter versions all seem fine and work perfectly. But, there is even more bad news: Brustor is a Belgian company that makes a wide array of products and might be on its way out of business. All attempts to locate a dealer for parts have been unsuccessful. Check your awnings regularly, folks. And, if you find a parts dealer for these otherwise nice fixtures, let me know. Followup June 21, 2013 I had another small problem with this longest awning: at the beach, when it extended, there was a loud <clunk!> and the awning fabric was suddenly hanging over the window supporting the endcap. The arms dangled into open space, not attached. Thank goodness no paint was harmed during this failure. Unlike before, when technicians had marred the side of the coach attempting to reinstall the arms after a similar failure. Sure enough, I had not included the 4mm stainless screws that attach the arm-end to the sliding shoe of the extruded endcap in my checklist. They'd apparently backed out, leaving the endcap held against the coach enroute by the fabric and nothing more. Almost more critically, the sheetmetal screws that attach the arm to its base (the base that slides up and down the track mounted to the side of the coach) was bent, its endplug nearly pulled upward through the gap in the extruded arm. That screw holds massive spring tension and could cause a mess when it breaks. I removed the endcap and arms from the side of the rig, bagging all the hardware and plugs; the wife retracted the fabric into the shell for transport. This is a shop repair, not one easily performed in the field. So, in addition to the checks outlined in the first part of this post, be sure to check the endplug with its stainless screw for security and tightness, at the base of the arms. And, the screw securing the top of the arm to the long endcap (onto which the fabric is mounted) needs to be checked for security.
-
From the album: Beaver Maintenance
Here is the damaged awning with repaired retainer bracket in place. It really changes the interior of the coach, being able to lower awnings over the windows! -

From the album: Beaver Maintenance
The nylon retainer which holds up the non-motorized end of a Brustor awning is a weak point in the design. Worse, the company has no support network. I fashioned epoxy putty around the failed piece and later shaped the dried compound, drilled the safety pin hole. The fix is twice or three times the strength of the original part. Not a big problem with short awning assemblies, this part is simply too lightweight to handle the stresses of larger, ie longer, awnings. Monthly inspection can be made by peeking under the clamshell cover -- you need to check its security anyway -- to ensure operating safety. -
From the album: Beaver Maintenance
This is what a retainer failure with a Brustor awning looks like, from inside. Thank goodness this occurred during maintenance and not rolling down the highway, or a hundred miles from home at a campsite! -

From the album: Beaver Maintenance
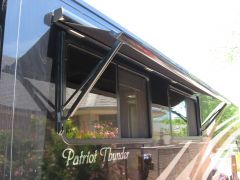
The Brustor window awning has two Achilles heel issues: the roller rotates inside a fragile nylon retainer on the non-motorized end. That fixture requires periodic inspection. The clamshell cover that must be lifted to inspect the awning for security is held in place by two tiny countersunk stainless screws which are prone to falling out (the second weakness). Once that cover extends to 30 degrees or so, it is designed to exit the scene. Were it to remain momentarily thanks to the remaining tiny screw, it could mar extensively the side of the coach before fluttering off into the windshield of a passing motorist... A curious and weak design, indeed. -
From the album: Beaver Maintenance
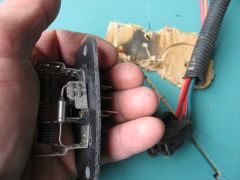
The blower resistor is comprised of several coils and a thermal fuse. Nothing is soldered: the items are clamped in place. Rather than ruining a replacement fuse, gently pry the clamped mount with a dental pick, and then ream the opening with a small bit. The fuse can be replaced for less than $5 and instantly restores a dash fan previously deemed inoperative on all but the highest setting to factory-new operation. -
From the album: Beaver Maintenance
The detachment-prone Brustor window awning needs to be checked for security as part of a monthly maintenance inspection. -
From the album: Beaver Maintenance
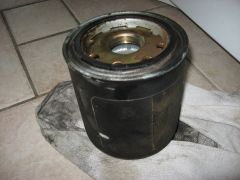
The dealer professed to have changed all fluids and filters; but, when I purged the forward air system and slimey orange fluid poured onto the driveway, I had my doubts. Sure enough, the air drier seemed to have never been serviced, in the 6-year life of the coach. Interesting note for maintainers: the Wabco-Meritor drier assembly is mounted so the spin-on filter literally touches the underside of the cabin floor. Initially, I cussed the ******** for playing such a terrible prank on owners/maintainers; then, I marveled at their forethought: in mounting the filter against the solid floor, it is prevented from coming loose. Indeed, lowering the entire drier assembly is not difficult, and a lone bolt can "pin" the assembly to the chassis frame for easy removal of the cannister element with an elongated strap wrench. I've now added the drier cartridge to my recurring maintenance checklist, and the pumpkin-colored discharge from my forward tank has been reduced to a brief puff of orange dust. -
From the album: Beaver Maintenance
Taking delivery of a new-to-us coach, I noticed a faint haze of diesel in the bedroom under way. Back home in the shop, I removed the engine hatches and cleaned them thoroughly, applied fresh stainless steel tape around the edges, lubbricated the seals, adjusted the latches and reinstalled the hatches. -

From the album: Beaver Maintenance
The symptom: the dashboard fan switch only seems to function on HIGH. All other switch positions have no effect. The cause: fried heat fuse in the blower resistor assembly. The cure: either order a new $40 assembly or spend $3-5 on a new fuse. In Monaco products, the resistor is carefully concealed at the top of the dash AC plenum, accessed by opening the nose of the coach. In my case, I had to cut through the underside of the dash (very carefully, to avoid slicing wires) to provide enough space to remove the two mounting screws and remove the resistor assembly. -
The Belgium-made Brustor awnings have an Achilles Heel in the form of a retainer on the front fitting, designed to hold the awning roller in place. That piece is made of plastic. Remember, that on RVs, all rubber and plastic fails within the first decade, as a rule of thumb. This fitting let loose at six years and 16,000 miles; in our driveway during routine inspection, thank goodness.
-
-
Failed fitting pieced back together with epoxy putty
andyshane posted a gallery image in Members Gallery

From the album: Brustor Awning Failure
The plastic retainer on which the forward end of the awning roller rests is a weak design. After ours fractured, I built up epoxy putty around it, forming the mass around a AA sized battery. After hardening, the putty can be shaped and then drilled for the safety pin that bridges the top of the U-shaped retainer but is worthless when the retainer itself comes apart. -

From the album: Brustor Awning Failure
After the roller retainer was repaired with epoxy putty, leaving it stronger than the rather frail original, putty was used to rebuild the damaged plastic endcap and the aluminum cover was reattached (use a dab of silicone on the screw first). -
From the album: Brustor Awning Failure
Thank goodness the Beaver was not injured. Better yet, it is good that this failure happened during a routine maintenance inspection at home, rather than at a destination or <shudder> moving down the highway in traffic. -
You all have put the Fear of God in me... I've already put XZEs on the front, scheduling the rears as soon as she gets in off the road. I just parked next to a 2007 Scepter owner -- he hates the bus* -- here in Galveston, and he opted to put XZEs on the steering axle and installed a full set of Wanli tires on the rear axles. His argument: that casino bus operators have deemed the Chinese Wanli as a favorite, "...they cruise 80 mph loaded with people..." Your thoughts? BTW, my tire guy re-torqued the steering wheels after 100 miles of driving, said that one lugnut was indeed loose. Remember to do a second torque!! * His is plagued with electrical woes, I was saying that I've signed off my 60th writeup prior to the end of my first trip, and that some stem from improper rigging or hardware on the assemblyline.
-
We're using a dolly, and I'm not certain to what extent I can recommend the practice. In the past, I've been a strong advocate of dollies, but now think they fill a specialized niche in the RV community. Yeh, you can haul different vehicles (guests arrive Wednesday with a rented* minivan that'll go on it for our upcoming trip). And, storing it at campsites or event venues has never been a problem. But, the dolly requires special considerations absent in 4-down towing. The engineering of our Roadmaster is anything but optimum: its Load Range C tires are marginal, and the OEM Carlisle tires -- I dare you to Google "Carlisle" along with "failure" or "dangerous" or "blowout" -- are notoriously dangerous. Two have exploded on ours, destroying the fender each time. I'm using Karrier Loadstars at present, but plan to upgrade both tires to Load Range D models. However, even if the dolly came with good tires that possessed a large weight range margin, the it must be maintained at regular intervals. The suspension as designed is ridiculously sloppy, making precise alignment impossible. After experiencing uneven wear of my new Loadstars, I've modified the steering arm, and have dialed in the alignment to perfection. It requires a complete re-torque, alignment and lube every 3,000 miles. Not a challenge for even a modest home shop, but daunting to many RV'ers. Most people gripe about the effort it takes to hook up and unhook the vehicle, but I don't regard that as a problem. Most of the time, I'm loaded or unloaded faster than a 4-down unit. My wife easily mounts the car onto the dolly, has made several solo trips towing her car. And, dolly use doesn't leave its mark on a car: no excessive mileage, holes in the bumper, wear from the braking unit, etc. In all, I'd say that dollies are a bad deal unless you meet all three of the following conditions: you wish to tow a variety of vehicles, bending and crouching aren't problems, and you have a shop. If any of those are missing, spend the extra money and give up a little flexibility; tow 4 down. * All applicable legal and safety precautions have been addressed
-
Considering a Dolly, Would Like Opinions/Experiences
andyshane replied to dewat's topic in Toads-Towed Behind Motorhome
We opted for the Roadmaster dolly, I've got mixed feelings. After the first year of use, I've come to some conclusions. Foremost, I feel that the OEM tires are dangerous, not appropriate to the dolly. Carlisle has settled with me after two catastrophic failures that have destroyed fenders each time; the blowouts join thousands of others in online reports, I've debriefed the NHTSA. To their credit, Carlisle paid me for the lost tires and damage to the dolly. Honestly, I think the solution might lie in opting for a higher load range tire -- that is what the tire professionals seem to believe -- since the Load Range C is asked to support a considerable portion of its allowable load. The tires are rated to carry 3,520 lbs and the dolly itself weighs 620 lbs, and you can haul a 4,380 lb vehicle on the dolly. If 2/3 of the weight is focused on the front axle, as if the norm for front wheel drive, my math shows you've arrived within 10 lbs of the tires' load limit. Legal, but not smart. So far, my new Karrier Loadstars have stood up to the challenge, but it is my plan to put beefier tires on the dolly, for peace of mind. Roadmaster said they were looking into the tire problem. But, I believe they are still distributing dollies with the Carlisle tires, which reportedly (and by my experience) blow out before reaching 3,000 miles. Google the topic for yourselves. You'll be horrified. There is too much play in the steering of the dolly as designed, making it impossible to precisely align. After noting abnormal wear in my new Loadstars' tread, I added washers beneath the balljoint to stabilize the steering, allowing me to align to factory specs. Otherwise, it is an impressive and strong dolly. I certainly prefer the flexibility of dolly use, and it is ultimately cheaper.